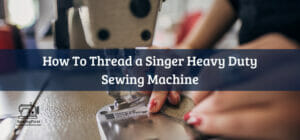
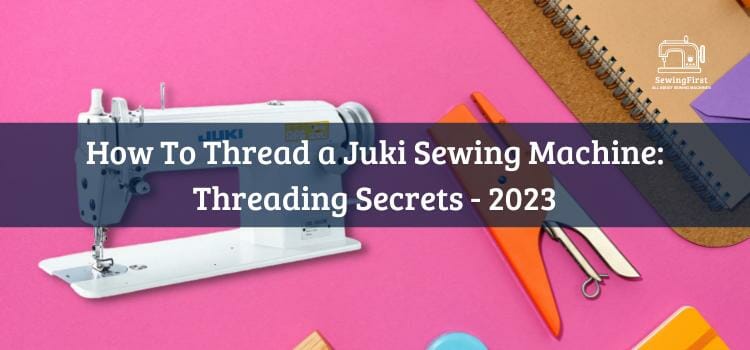
Are you looking to learn how to thread a Juki sewing machine? It’s easier than it looks and can be incredibly rewarding! Take the case of Sarah, an ambitious beginner seamstress who wanted to start creating her own garments. She quickly found success by learning how to use her Juki machine. With the help of this guide, you too can get started on your creative journey with confidence.
Threading a Juki sewing machine may seem daunting for first-timers but don’t worry – we’ll walk you through it step-by-step so you’ll have no trouble getting up and running in no time. From winding the bobbin correctly to setting up the top tension control knob and more, I’m here to show you just how easy it is to master this essential skill.
At the end of this article, you’ll know exactly what tools are necessary and which techniques really matter when using a Juki sewing machine. You’ll also gain confidence in knowing that all those knobs, dials, and buttons actually do something useful! So let’s get started – read on to find out everything there is to know about threading a Juki sewing machine.
Related Topic: How to Thread a Singer 248: Effortless, Step-by-Step Guide
Table of Contents
ToggleEssential Tools And Supplies
Setting up your Juki sewing machine doesn’t have to be complicated. All you need are the right tools and supplies, and I’m here to show you what those are! First, let’s talk about essential items that come with most machines.
Many models include an automatic thread trimmer for snipping off excess threads at the end of a stitch. You’ll also get a presser foot for holding fabrics in place while stitching, as well as a zipper foot for attaching zippers to garments or other projects.
Plus, there’s usually a bobbin winding spool pin so you can quickly wind new bobbins when needed. Finally, some machines even come with a foot controller. This makes it easy to adjust speeds without having to take your hands off the fabric while you’re working.
Now that we’ve gone over all the necessary components of setting up your Juki sewing machine, let’s move on to preparing our fabric – which is just as important!
Preparing The Fabric
“The devil is in the details,” they say, and this certainly applies to sewing. Before you begin stitching with your Juki sewing machine it’s important to prepare your fabric correctly. To ensure a strong seam that looks professional, start by threading your Serger for use with heavier fabrics or if working with wovens.
Threading Your Serger:
- Metal Thread Guide: First locate the metal thread guide located on the top of the needle plate cover. This will be used to feed both threads through to create loopers for an even stitch pattern.
- Nylon Thread: Next pull out some nylon thread from the spool and place it under the metal thread guide before feeding it down around both loopers underneath the looper covers.
- Feed Dogs: Finally, make sure your feed dogs are engaged so they can help produce reliable stitches as you sew.
Now that you have prepared your fabric and threaded your serger, it’s time to move on to ‘threading the bobbin’ – another essential step when using a Juki sewing machine.
Threading The Bobbin
I’m going to show you how to thread your Juki Sewing Machine. It’s important that the bobbin case is threaded correctly, so let’s start there. First, take off the small cover plate on the side of your machine and insert the bobbin in its case with the thread coming off it anti-clockwise.
Then clip the case back into place on top of the bobbin winder spindle just beside where you inserted it. Now you can begin winding your bobbin by turning your Bobbin Thread Winder towards you until it catches onto the thread from around your bobbin.
Keep turning until tight then cut off any excess thread before pushing down on your Thread Arm which will disengage the Bobbin Thread Winder.
Now move over to your needle Thread Hook above and follow this path: pull out a length of thread, and pass it through all four thread guides (Thread Tension Knob included) before bringing it around and looping it through itself twice.
Pull tight up against your thumb as you hold both loops securely then release them allowing tension across each loop to build gradually until they are taut without being too loose or too tight; adjust if needed using either one finger or two depending upon what feels most comfortable for you personally.
Once complete, gently tug on both ends of the upper thread to make sure everything has been pulled tightly into position and feel confident that when sewing again soon, these steps have ensured a smoother experience!
Adjusting The Tension
Let’s get down to the nitty-gritty. Adjusting the tension on a Juki sewing machine is essential for creating beautiful and professional-looking stitches. It all starts with getting familiar with your machine’s adjustable stitch length, metal hook, thread tension scale, rotation thread tension dials, and auto-set thread lock.
To reduce the amount of bobbin thread showing through on top, you’ll need to adjust the upper thread tension. Start by turning the upper threaded tension dial slightly clockwise until it clicks into place.
Then slowly rotate the lower rotary thread tension knob counterclockwise until you hear another slight click sound. This will let you know that everything is set in its optimal position. You should now see minimal or no visible threads from underneath when zigzagging!
Now that you’ve adjusted your Juki’s tension settings properly, it’s time to move on to threading the top spool.
Threading The Top Spool
Threading the top spool of a Juki sewing machine is not difficult once you know how to do it. First, make sure your upper thread spool has been placed in the Thread Converter properly. It should be resting smoothly on the shaft and secure with no loose threads or awkward sideways movements.
Then, take the color-coded Automatic Thread Guide that came with your Juki and loop it around the Cone Thread Guide on top of the machine. The guide will help keep everything organized as you wind up the spool correctly.
Now comes the time for winding up! Take your cone thread and place it over the pin located at the back of the upper thread holder.
Once your thread is securely positioned, turn both hand wheels clockwise until you can see some tension build up on either side of where you started winding. This lets you know that there are now two separate layers of wound thread ready to go!
Finally, use one arm to gently hold down the presser foot while using another arm to pull out all excess ends of thread from underneath and cut off any extra length if needed. You want all sides neat and tidy before moving on to inserting the needle – this way when you start stitching, nothing gets tangled or caught in between!
Inserting The Needle
Now that your top thread is properly in place, it’s time to get the needle ready for sewing. This may seem intimidating but with a few easy steps and some practice, you’ll be set up for success!
Here are some tips on how to insert the needle into the Juki Sewing Machine correctly:
- First, make sure the presser foot is in its raised position.
- Then, attach the multi-purpose foot to the machine by pushing down on the shank until it clicks into place.
- Next, use your fingers or an appropriate tool to loosen and remove the needle clamp screws.
- After removing them, carefully slide out any remaining needles from their holder before inserting a new one.
- Finally, tighten the screw back in place after making sure that there are no loose threads caught around or near the needle.
To ensure proper tension when stitching with thicker fabrics like denim or canvas, turn your thread tension knob counterclockwise while using thinner fabrics like cotton or silk requires turning clockwise.
Make sure that both upper and lower tensions are balanced correctly so that all of your stitches look smooth and even throughout your project. Once everything is secure -you’re ready to start sewing!
Securing The Threads
Now that your Juki sewing machine is threaded, it’s time to secure the threads. This step is essential for producing consistent thread tension and quality stitches.
To make sure everything is ship-shaped first cut off any excess thread from the spool with a built-in thread trimmer or portable thread cutter. Then, look at the back of the presser foot and ensure the auto-threader has properly secured both upper and lower threads in order to keep them separate, creating optimal stitch formation.
Once you have verified this step, engage the needle position lever so that it’s parallel to the feed dogs. Finally, adjust your bobbin winder stop motion knob if necessary depending on how much thread you’re using; this will help ensure an even distribution of pressure along each side of your seam line. Now you can move on to setting the stitch length!
Setting The Stitch Length
Ah, setting the stitch length on a Juki sewing machine. It sounds so simple and yet it can prove quite daunting for those of us who have never threaded one before! But fear not – with the right tools, the process is actually rather straightforward.
First off, you’ll need to set your thread tension correctly. There is an adjustment wheel located at the top-right side of the lockstitch machine that controls this feature. Make sure it’s in line with what type of fabric you’re working with as well as how thick or thin you want your stitches to be. This will help ensure even stitching throughout your project.
Next up is free hand embroidery; if you are using a walking foot sewing machine then no worries here! Simply attach the hemming presser foot and adjust its height accordingly by turning the knob until it’s at just the right level. This allows for easy maneuverability while keeping all fabrics firmly in place during operation.
Now you’re ready to make some magic happen! Adjusting your stitch length couldn’t be simpler – simply turn the dials on either side of your Juki sewing machine to select from a variety of lengths depending on what kind of effect you wish to achieve when completing a particular task. And voila! You’re now ready to begin selecting your desired stitch type and start creating something beautiful.
Selecting A Stitch Type
Now that you’ve threaded your Juki sewing machine, it’s time to choose which stitch type will work best for your project.
You can select from straight stitches and zigzag patterns or even decorative stitches depending on what kind of fabric you’re working with. All you have to do is turn the dial on the side of the machine until you find the setting that works best for you.
Once you’ve chosen a stitch type, make sure that your blue thread is properly tensioned. This helps ensure that there are no loose loops in the fabric when stitching. If needed, adjust the tension knob so that it matches up with the number indicated next to each pattern on the control panel.
For more complex projects like installing a zipper, consider using a walking foot or a zipper presser foot attachment. These attachments provide extra stability while stitching delicate fabrics or when putting together difficult seams such as curved edges and corners.
They also help reduce puckering and fraying along seam lines by making sure that all layers stay firmly in place during stitching. With these tools at hand, you’ll be able to confidently tackle any challenging project!
The last step before beginning any new project is changing out your needle. Different needles are designed for different types of fabric, so make sure to consult your manual before picking one out!
Changing The Needle
Changing the needle on your Juki sewing machine is a relatively simple task, but it’s one that you should take seriously. I always recommend cleaning out any lint or dust around and under the presser foot before changing needles.
To start, make sure to use the correct size needle for your project. A good rule of thumb is to match the weight of your fabric with the corresponding needle size. And don’t forget your cleaning brush! Now let’s get started.
To change the needle on a Juki machine, open up the hinged foot by pushing down on its lever, then slide off the old needle. Insert the new one so that its flat side faces left (toward you). Once it’s in place, secure it firmly by tightening the screw below with an appropriate sized screwdriver—but not too tight! This will help ensure consistent thread tension while you sew.
Next, be sure to attach the glide foot to your Juki machine; this helps keep everything running smoothly during stitching. When attaching it, align it correctly above and behind the needle bar so that when switched on and lowered into position, it creates just enough pressure over the top of your fabric without bunching or pulling as you stitch.
Finally, if necessary activate the automatic thread button to give yourself more control over where a thread is placed in each seam line. There you have it – now you’re ready to start stitching!
Winding A Bobbin In Machine
Who would have thought that winding a bobbin in your Juki sewing machine could be so fun? With its bright LED light and quilting foot, it’s easy to get beautiful seams. Plus the applique presser foot and binder presser foot make stitching even easier.
It’s like having a personal assistant doing all the hard work for you! So let’s get started with winding the bobbin. First, find the spool pin on your machine – usually located near the top right corner of your machine. Place a standard-size spool onto it, then thread your bobbin as instructed by your manual (make sure to refer to this!).
Pull out some extra 10-15 inches of thread before placing it into the tension disc – don’t forget that! Now pull the Bobbin Thread Guide over the end of the thread, then place your empty bobbin onto the winder shaft at its side.
When ready, push down on both pedals and switch to begin winding – it should take about 20-30 seconds for one full cycle depending on the type of yarn used. To finish off, simply cut off excess threads from the spool pin and close the lid back up when done.
Now that we’re finished winding our bobbin, you can feel confident knowing that you are safe while using this amazing machine!
And with all these special features – like those mentioned above – you’ll be able to create beautiful projects quickly and easily. Let’s move on now to sewing with specialty threads – another great way to add interest and dimension to any project!
Sewing With Specialty Threads
Sewing with specialty threads can be a challenge, but with the right cording presser foot for your Juki sewing machine, you’ll have success. Standard accessories that come with an industrial machine are usually compatible with most types of fabric and thread.
When researching the list of features offered by the authorized Juki dealer you’ve chosen to purchase from, make sure it includes this type of accessory specifically designed for use on their machines.
Once you’ve found or purchased the correct presser foot and familiarized yourself with its uses, then it’s time to begin specialty stitching! You might find it helpful to practice scrap fabrics first before trying anything too difficult or intricate. Be sure to read all instructions carefully as not all techniques may work with every type of fabric.
It’s important to keep in mind that while some specialty stitches may require more skill than others, they don’t need any specialized parts or attachments and only require a bit of patience and precision.
With these tips in hand and your trusty cording presser foot at the ready, go ahead and start exploring new ways to embellish your projects! Moving into maintaining and cleaning your machine is essential in keeping it running smoothly…
Maintaining And Cleaning the Machine
Cleaning and maintaining your machine is essential for it to work properly. After each use, I recommend wiping down the area around and underneath the needle with a damp cloth or rag. This prevents rusting of the parts and build-up of lint that can cause jamming. It’s also important to clean the bobbin area regularly since lint and dust can accumulate here over time as well.
It’s also wise to oil your machine every few months or after about 10 hours of sewing – or more often if you’re using it frequently. Oiling lubricates all moving parts on the machine, so they are able to run smoothly without any issues.
You’ll need a good quality lightweight machine oil; usually, a 1/2-ounce bottle will cost around $5 USD – check online for pricing information. Most machines come with an instruction manual that outlines how much oil should be used, where it should go, and when it needs replacing.
Finally, regularly inspecting your machine ensures everything is running properly before starting projects. Look carefully at all areas including under the needle plate, thread guides, tension discs, feed dog teeth, bobbin case, and hook race for signs of wear such as broken threads or bent needles.
If anything looks suspicious have it checked by a qualified technician before continuing to sew with your Juki Sewing Machine? With regular maintenance and cleaning, you’ll keep your sewing machine in great shape for years to come! Ready to move on to troubleshooting common issues?
Troubleshooting Common Issues
Did you know that more than 80% of sewing machine issues can be solved with basic troubleshooting? Solving common problems on your own is not only satisfying, but it also saves time and money. Here are four useful tips to help troubleshoot some common issues with a Juki Sewing Machine:
- Ensure the bobbin thread is properly wound
- Check the needle size and type for the appropriate fabric weight
- Make sure there are no knots or tangles in the upper thread
- Inspect all connections between parts such as the presser foot and feed dogs In addition to these basics, consider using a seam ripper if needed to fix any errors while stitching.
If none of these solutions work, then refer to your user manual for specific instructions about troubleshooting based on your model number.
It’s best practice to keep up-to-date maintenance records for quick reference when working through a problem. Taking care of your Juki Sewing Machine will ensure its longevity so you can have years of quality sewing!
Taking Care Of Your Juki
Taking care of your Juki sewing machine is important to ensure it lasts a long time. The first step in doing this is making sure the machine is clean and free from dust and lint build-up.
This can be done by using compressed air or a soft brush when removing any debris that could accumulate near the bobbin area, needle plate, foot presser, tension discs, and feed dogs.
Additionally, regularly lubricating the moving parts on your machine will help keep it running smoothly for years to come.
This includes oiling all metal components such as the needle bar, thread take-up lever, shuttle race, and walking foot arms. Also, make sure you use an approved thread stand spindle oil as some oils may react with plastic surfaces causing them to become brittle over time.
It’s also necessary to adjust settings like stitch length, pressure control, and thread tension every few months so they remain accurate. If these are not kept up on a regular basis then fabric puckering or skipped stitches can occur which will result in subpar stitching quality.
Keeping your Juki serviced each year is also recommended to prevent any major issues down the road while ensuring optimal performance at all times.
Conclusion
In conclusion, mastering the basics of threading a Juki sewing machine can be an intimidating task. However, with patience and practice, you will soon master this essential skill needed to create beautiful projects!
Once you have mastered the basics, don’t forget that your Juki is capable of so much more—from specialty threads to intricate details — the possibilities are endless.
So go ahead and explore all that your Juki has to offer by experimenting with different types of thread and fabric combinations. As they say: “The only way to get better at something is through practice.” So grab some thread and fabric, and sit down in front of your trusty Juki – it’s time for some fun!