
The Singer 248 is a reliable, dependable sewing machine with a great reputation. It contains special features designed to make sewing easier, which can be particularly helpful for beginners.
If you just got a Singer 248 or are considering buying one and want to learn how to use it, we’ve got you covered. This article will guide you through threading the machine, so you can get your 248 up and running.
How to thread a Singer 248 isn’t as complicated as it seems if you know the basics. The key is to properly thread the needles, upper tension discs, and bobbins in order for the sewing machine to work as it was made.
Once these components are threaded correctly on the Singer 248, you’re ready to begin your next project!
Related Topic: What Sewing Machines have Automatic Thread Cutters? Discover the Secret Machines!
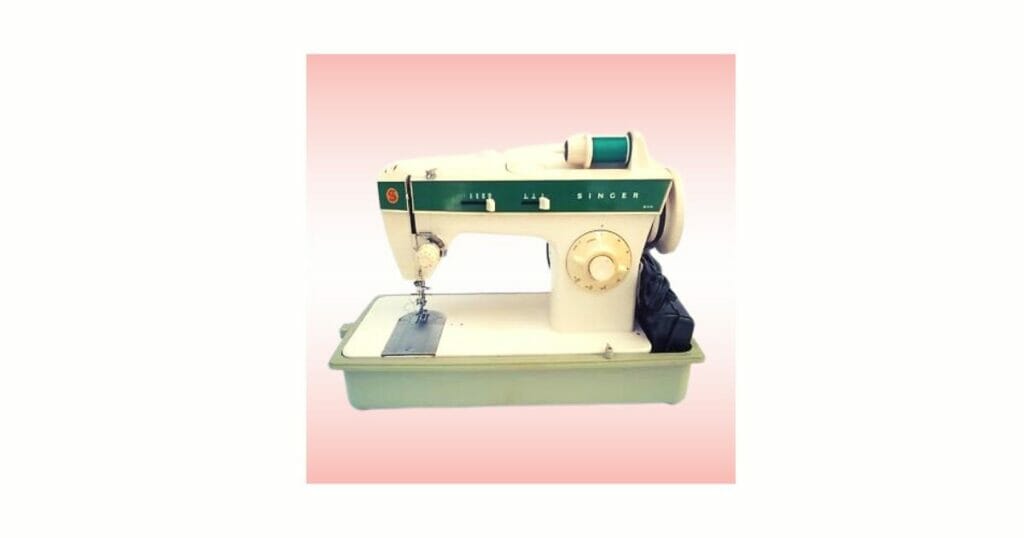
Singer 248 Sewing Machine
The Singer 248 Sewing Machine is a great choice for any beginner. It has all the features you need to get started in sewing and offers ease of use.
This machine comes with a variety of convenient features, such as automatic needle threading, a drop-in bobbin winder, and adjustable stitch length and width selection.
Plus, it also offers up to 31 built-in utility and decorative stitch options to choose from. It’s perfect for tackling those more intricate projects.
It also has an extra high-presser foot lift, so you can easily work on multiple layers of fabrics without any trouble! With this machine, you’ll be able to take your sewing skills to the next level!
Preparing the Singer 248 Sewing Machine for Threading
Before you begin threading the Singer 248 Sewing Machine, it is important to make sure that all of the components are in their proper positions. Start by raising the presser foot lever and then turning the hand wheel towards you until the needle is at its highest position.
Next, make sure that the bobbin winder is disengaged and that the stitch length and width settings are set to their default positions.
Finally, check that the upper tension discs are properly aligned with each other and that there are no loose threads or knots in either of them. Once everything is in place, you can start threading your machine.
Threading the Needles
Threading the needles on the Singer 248 is a relatively simple process. Start by inserting the thread from the spool into the needle threader and then pulling it through until it comes out of the eye of the needle. Make sure that you pull enough thread so that it can be easily grasped when sewing.
Step 1: Raise the Presser Foot
Raising the presser foot lever is an important step in threading the Singer 248 sewing machine. This will ensure that the needle is at its highest position and that all of the components are in their proper positions.
It also allows for easier access to the bobbin winder, stitch length and width settings, and upper tension discs. Raising the presser foot lever is a crucial step in preparing your Singer 248 sewing machine for threading.
Step 2: Insert the Thread into the Needle
Once the presser foot lever is raised, the next step is to insert the thread into the needle. To do this, take the end of the thread from the spool and insert it into the needle threader.
Step 3: Pull the Thread Through the Needle’s Eye
Once the thread has been inserted into the needle, it is important to pull it through the eye of the needle. This will ensure that the thread is properly secured and ready for use.
To do this, hold onto both ends of the thread and gently pull them until they come out of the eye of the needle. Make sure that you don’t pull too hard or else you may damage your machine.
Step 4: Secure the Thread in Place with a Knot
Once the thread has been pulled through the eye of the needle, it is important to secure it in place with a knot. To do this, tie a small knot at the end of the thread and then pull it tight.
This will ensure that the thread does not come loose while you are sewing and that your stitches remain secure. Additionally, it is also important to trim any excess thread from the needle so that it does not get tangled or caught on anything while you are working.
Threading the Upper Tension Discs
When threading the Singer 248 Sewing Machine, the next step is to thread the upper tension discs. This allows for balanced tension between the top and bottom threads resulting in perfect stitches.
Step 1: Locate and Open the Upper Tension Discs
The disc should be easy to find; it’s usually located on the upper arm of the sewing machine near the needle operation area. Depending on your model, opening it up is quick and simple, just by pressing a button or unscrewing a locking mechanism.
Once opened, you’re ready to proceed with threading your Singer 248 Sewing Machine’s upper tension discs.
Step 2: Insert and Pull Through the Thread from Right to Left
Once you’ve opened the upper tension discs of your Singer 248 Sewing Machine, it’s time to insert and thread the machine. To do this, start by inserting the end of the spool of thread through the opening from right to left.
Make sure to leave some extra thread at this point so that it is easier to pull it through the other side. Once you have it through pull it all the way until there is no more slack in your thread. You can then cut any excess off for neatness. And that’s how you thread a Singer 248 Sewing Machine!
Step 3: Close and Lock the Upper Tension Discs
To do this, simply take the two tension discs in your machine and rotate them so that they are locked into place. The bottom disc should be pulled up towards the upper disc until it makes a secure connection.
Make sure to check that the threads are held firmly before proceeding to your next step. Doing this will keep your threads secure, ensuring that you get accurate stitches every time with your sewing machine.
Threading the Bobbins
The Singer 248 sewing machine requires you to thread the bobbin in order to proceed with your sewing project. Thankfully, it’s really simple to thread the bobbins on this machine!
Make sure that you have a bobbin and the correct color and type of thread for your project before you start.
Step 1: Place a Bobbin on its Spindle
To begin, find the small knob at the top of the case and gently pull it out until it’s fully extended. Once done, you will be able to see the starting point for threading your bobbin.
Step 2: Wrap Thread Around Bobbin Clockwise
The second step in threading your Singer 248 Sewing Machine is wrapping the thread around the bobbin clockwise. To begin, you must place the bobbin on its spindle.
Find the small knob at the top of the case, and lightly pull it out until it’s fully extended to get to the starting point of wrapping your thread around the bobbin.
Make sure to wrap your thread around the bobbin in a clockwise direction and avoid crossing any threads as this can cause tension problems later on when you start sewing.
Step 3: Pull the End of the Thread Through the Slot in Bobbin Case
Find the slot located at the top of the bobbin case. To make sure you don’t cross any threads while doing this, gently pass the end of your thread through this slot and make sure that it is facing up so that you can take a hold of it with ease.
Pull this end carefully and tighten it around one side of the spool pin. Once secured, place back your bobbin case onto its spindle before starting to thread your machine.
Threading Different Singer Sewing Machines
Threading different Singer sewing machines can be a bit tricky, but with the right instructions, you can easily thread your machine and get started on your project. The most important parts to remember when threading any Singer machine are the bobbin thread, upper thread, needle bar, needle plate, and horizontal spool pin.
To begin, start by placing the bobbin onto its spindle. Make sure that it is facing up so that you can take a hold of it with ease. Then wrap the thread around the bobbin in a clockwise direction and avoid crossing any threads as this can cause tension problems later on when you start sewing.
Once done, pull the end of the thread through the slot in the bobbin case and make sure that it is facing up so that you can take a hold of it with ease. Pull this end carefully and tighten it around one side of the spool pin.
Next, move on to threading your upper thread. Start by passing your upper thread through the needle bar from left to right until it reaches its destination at the top of your machine’s needle plate. Then pass your upper thread through one of two slots located at either side of your needle plate before finally looping
Threading Computerized Sewing Machines
Threading computerized sewing machines is slightly different than threading a regular Singer machine. To begin, you must first locate the bobbin case and insert your bobbin into it.
Then, you will need to thread the upper thread through the needle bar from left to right until it reaches its destination at the top of your machine’s needle plate.
After that, you will need to pass your upper thread through one of two slots located at either side of your needle plate before finally looping it around the horizontal spool pin. Finally, you will need to press the start button on your machine and follow any instructions that appear on the LCD screen in order to complete the threading process.
Conclusion
Learning how to thread a Singer 248 Sewing Machine can take some time, but it’s well worth the effort. With patience and practice, you’ll have this machine set up in no time and be ready to start creating beautiful finished projects with ease.
With a thorough understanding of the various parts of your Singer 248 and how they work, you’re sure to be a crafting enthusiast in no time!
FAQs
How do you thread a Singer sewing machine for beginners?
For beginners, the best way to thread a Singer sewing machine is to start by placing the bobbin onto its spindle and wrapping the thread around it in a clockwise direction. Then, pull the end of the thread through the slot in the bobbin case and tighten it around one side of the spool pin.
Next, move on to threading your upper thread by passing it through the needle bar from left to right until it reaches its destination at the top of your machine’s needle plate. Finally, loop it around the horizontal spool pin and press the start button on your machine.
What is a bobbin case?
A bobbin case is a small plastic or metal piece that holds the bobbin in place while you are sewing. It is usually located near the needle plate and is used to help guide the thread as it is being sewn.
How to thread a Singer 252 sewing machine?
Threading a Singer 252 sewing machine is similar to threading a Singer 248. Start by placing the bobbin onto its spindle and wrapping the thread around it in a clockwise direction. Then, pull the end of the thread through the slot in the bobbin case and tighten it around one side of the spool pin.
Next, move on to threading your upper thread by passing it through the needle bar from left to right until it reaches its destination at the top of your machine’s needle plate. Finally, loop it around the horizontal spool pin and press the start button on your machine.
What is the right way to start threads?
The right way to start threads is to first make sure that the bobbin is properly inserted into the bobbin case. Then, thread the upper thread through the needle bar from left to right until it reaches its destination at the top of your machine’s needle plate.
After that, pass your upper thread through one of two slots located at either side of your needle plate before finally looping it around the horizontal spool pin.
How to thread a Singer sewing machine with automatic threader?
Threading a Singer sewing machine with an automatic threader is relatively simple. First, make sure that the bobbin is properly inserted into the bobbin case.
Then, place the threader over the needle and press down on the lever to activate it. The threader will then automatically pull the upper thread through the needle bar and loop it around the horizontal spool pin. Finally, press the start button on your machine and follow any instructions that appear on the LCD screen in order to complete the threading process.
