For any avid sewers out there, one of the most important steps in your creative ventures is threading your sewing machine. With something as complex as a Deluxe Zig Zag Sewing Machine, even an experienced sewer may find themselves feeling overwhelmed.
But fear not! Threading this type of machine – or any other machine for that matter – doesn’t have to be a daunting task if you take the right steps. By following step-by-step instructions and understanding how to use each feature correctly, you can get through it in no time at all.
In this article, I’ll show you exactly how to thread a Deluxe Zig Zag Sewing Machine so you can get back to creating amazing garments and home decor in no time!
Related Topic: How to Thread a Singer 248: Effortless, Step-by-Step Guide
Table of Contents
ToggleHow to Thread a Deluxe Zig Zag Sewing Machine
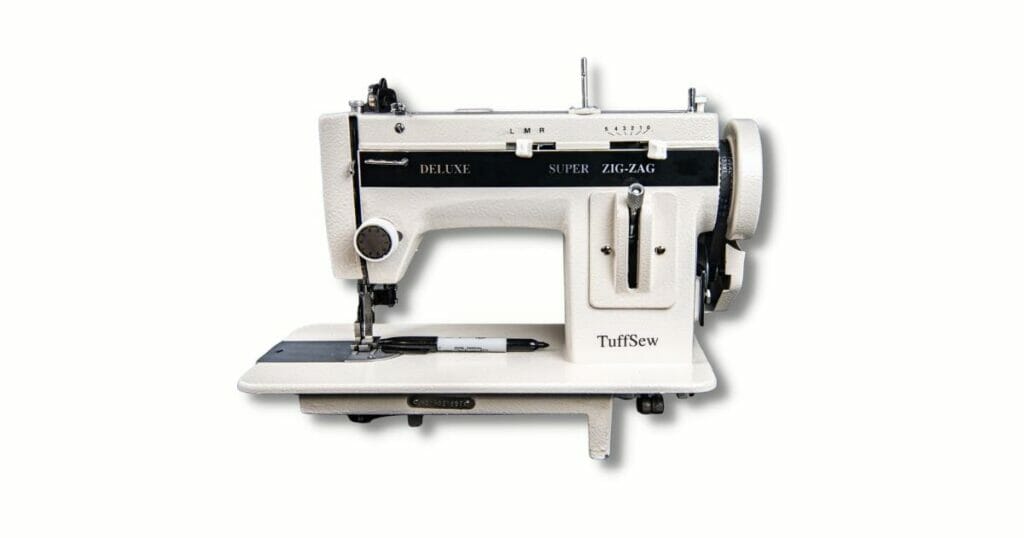
The Herald Deluxe Zig Zag Sewing Machine is a powerful and versatile machine that allows you to create intricate designs with ease. It features a foot pedal for easy control, a touch & sew sewing machine for precise stitching, and a comprehensive sewing machine manual to help you understand the various settings and functions.
With its zigzag sewing capabilities, this machine is perfect for creating beautiful garments and home decor items. Whether you’re an experienced sewer or just starting out, the Herald Deluxe Zig Zag Sewing Machine will help you take your projects to the next level!
Step 1:Preparing the Machine
Before you begin threading your Deluxe Zig Zag Sewing Machine, it’s important to make sure the machine is properly prepared. Start by winding a bobbin and inserting it into the bobbin case.
Then, raise the needle to its highest position and thread the upper thread through the take-up lever, tension discs, and needle eye.
Finally, make sure that all of the presser feet are in their correct positions before you start threading.
Raise the Presser Foot
Raising the presser foot will allow you to easily guide the thread through the machine. To do this, simply turn the hand wheel until the needle is at its highest position and then lift up on the presser foot lever.
Thread the Needle
Once the presser foot is raised, you can begin threading the needle. Start by pulling a length of thread from the spool and guiding it through the thread guide on top of the machine.
Then, pull the thread down towards the needle and insert it into the eye of the needle. Make sure to pull enough thread so that there is some slack in order to ensure that your stitches are even and consistent.
Insert Bobbin
To insert the bobbin, open the bobbin case and place the bobbin inside with the thread running in a counter-clockwise direction. Then, pull a length of thread from the bobbin and guide it through the slot on the side of the case. Finally, close the case and you’re ready to start sewing!
Step 2:Threading the Upper Part of the Machine
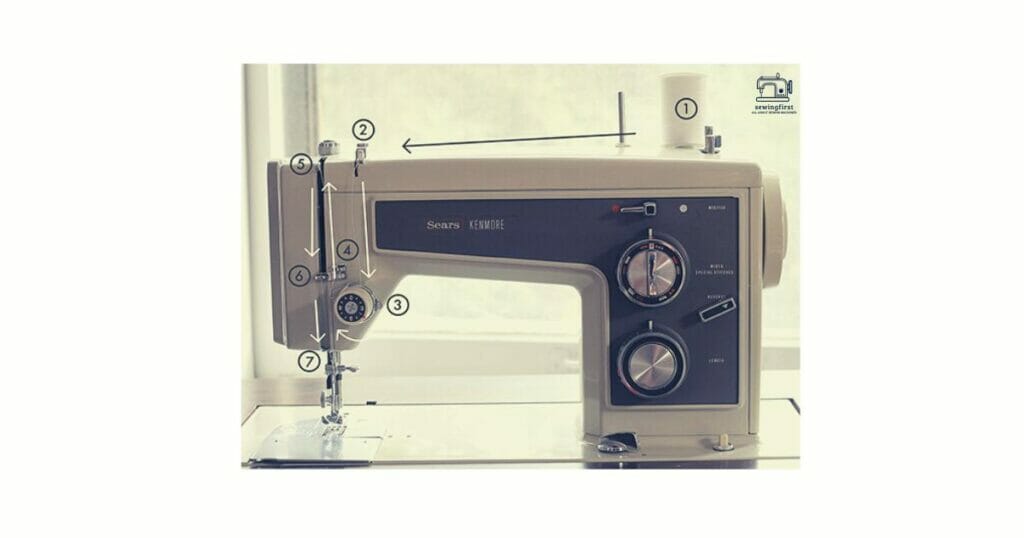
Once the bobbin is in place, you can begin threading the upper part of the machine. Start by pulling a length of thread from the spool and guiding it through the thread guide on top of the machine. Then, pull the thread down towards the take-up lever and insert it into one of the slots.
Attach Thread to Spool Pin
Once the upper thread is in place, you can attach it to the spool pin. To do this, simply take the end of the thread and wrap it around the spool pin several times. This will ensure that the thread stays in place while you are sewing. !
Pull Thread Through Tension Discs and Take-Up Lever
Now you can begin pulling it through the tension discs and take-up lever. Start by pulling the thread from the spool pin and guiding it through each of the tension discs.
Pull Thread Through Needle Plate Slot and Eye of Needle
Start by pulling a length of thread from the spool and guiding it through the needle plate slot. Then, pull the thread down towards the eye of the needle and insert it into the eye.
Make sure to pull enough thread so that there is some slack in order to ensure that your stitches are even and consistent.
Step 3:Threading the Lower Part of the Machine
Once the upper part of the machine is threaded, you can begin threading the lower part. Start by pulling a length of thread from the bobbin and guiding it through the slot on the side of the bobbin case. Then, pull the thread up towards the take-up lever and insert it into one of its slots. !
Place Bobbin in Shuttle Race and Wind Bobbin with Hand Wheel
Once the lower thread is in place, you can place the bobbin into the shuttle race and wind it with the hand wheel. To do this, insert the bobbin into the shuttle race and hold it in place with your finger.
Then, turn the hand wheel clockwise until you feel resistance. This will ensure that your bobbin is wound correctly and securely. Once you have finished bobbin winding, remove your finger from the bobbin.
Pull Thread Through Bobbin Case and Out Through Slot
To pull the thread through the bobbin case and out through the slot. Start by pulling a length of thread from the bobbin and guiding it through the slot on the side of the bobbin case.
Then, pull the thread up towards the take-up lever and insert it into one of its slots. Finally, pull the thread back down towards the needle plate slot and out through its opening. This will ensure that your stitches are even and consistent when you start sewing.
Step 4:Finishing Up the Upper Part of the Machine
Once the lower part of the Deluxe Zig Zag Sewing Machine is threaded, it’s time to finish up the upper part. Start by pulling a length of thread from the spool and guiding it through each of the tension discs. Then, pull the thread up towards the take-up lever and insert it into one of its slots.
To make sure that your machine is properly threaded, check for any loose threads or knots in both parts of the machine before starting to sew.
Pull Thread Back Through Tension Discs and Take-Up Lever
Once the thread is pulled through the tension discs and take-up lever, it’s important to make sure that the tension is set correctly. To do this, turn the tension knob until you feel resistance.
This will ensure that your stitches are even and consistent when you start sewing. Additionally, it’s a good idea to check for any knots or tangles in the thread before starting to sew.
Step 5:Finishing Up the Lower Part of the Machine
Start by pulling a length of thread from the bobbin and guiding it through the slot on the side of the bobbin case. Then, pull the thread up towards the take-up lever and insert it into one of its slots.
To make sure that your machine is properly threaded, check for any loose threads or knots in both parts of the machine before starting to sew.
Pull Bobbin Thread Up Through the Needle Plate Slot
Once the bobbin thread is pulled up through the needle plate slot, it’s important to make sure that the tension is set correctly. To do this, turn the tension knob until you feel resistance. Additionally, it’s a good idea to check for any knots or tangles in the thread before starting to sew.
Step 6:Testing Your Work
Once you have finished threading your Deluxe Zig Zag Sewing Machine, it is important to test your work. To do this, sew a few stitches on a scrap piece of fabric and check the tension and stitch quality.
If the tension is too tight or too loose, adjust the tension knob accordingly until you achieve the desired results. Additionally, make sure that there are no knots or tangles in the thread before starting to sew. Once you have achieved even and consistent stitches, you can begin sewing with confidence!
Things to Consider When Threading a Deluxe ZigZag Sewing Machine
When threading a Deluxe ZigZag Sewing Machine, it is important to consider the needle size and type. The needle should be appropriate for the fabric being sewn and should be changed regularly to ensure that stitches are even and consistent.
Additionally, the tension of the sewing machine should be adjusted correctly in order to achieve even stitches. The tension dials on the machine can be used to adjust the tension of both the upper and lower threads.
It is also important to consider bobbin tension when threading a Deluxe ZigZag Sewing Machine. The bobbin thread should have enough tension so that it does not become loose or tangled while sewing.
Additionally, it is important to make sure that the bobbin winding instructions are followed correctly in order to ensure that there is no slack in the thread.
Finally, if any problems arise with regard to sewing machine tension or threading, it is best to consult a professional for assistance.
It is also important to regularly clean and maintain your Deluxe ZigZag Sewing Machine in order to ensure that it runs smoothly.
This includes cleaning the bobbin case and needle plate, as well as oiling any moving parts. Additionally, make sure to check for any loose or broken parts before starting to sew. Following these steps will help you get the most out of your sewing machine and
How to Thread an Old Singer Sewing Machine
Threading an old and Vintage Singer sewing machine can be a bit tricky, but with the right instructions and a little patience, it can be done. Before starting, make sure to have all of the necessary supplies on hand such as thread, needle, bobbin, and scissors.
First, start by winding the bobbin. Place the bobbin onto the spindle located on the side of the machine and wind it until it is full. Once finished, remove it from the spindle and set it aside.
Next, thread the needle by passing the thread through both of its eyes. Make sure that there are no knots or tangles in the thread before continuing.
Once threaded, pull some of the thread up through the slot in front of the needle plate and then insert it into one of its slots. This will ensure that your machine is properly threaded before you begin sewing.
After this step is complete, place your bobbin into its case and slide it into its designated spot underneath your machine’s presser foot. Pull some of the bobbin thread up through one of its slots so that you can see both threads at once (the upper thread from your needle and the lower thread from your bobbin).
Conclusion
Threading a Deluxe Zig Zag Sewing Machine can seem like a daunting task, but with the right instructions and tools it can be done quickly and easily. It is important to consider the needle size and type, as well as the tension of both the upper and lower threads when threading your machine. Additionally, make sure to check for any knots or tangles in the thread before starting to sew.
FAQs
How do you thread a zig zag sewing machine?
To thread a zig-zag sewing machine, start by winding the bobbin and threading the needle. Then, pull some of the thread up through the slot in front of the needle plate and insert it into one of its slots. Next, place your bobbin into its case and slide it into its designated spot underneath your presser foot.
What is the correct order of upper threading the sewing machine?
The correct order of upper threading in a sewing machine is to first pass the thread through both of the needle’s eyes, then pull some of the thread up through the slot in front of the needle plate and insert it into one of its slots.
How do you thread a deluxe precision sewing machine?
To thread a deluxe precision sewing machine, start by winding the bobbin and threading the needle. Then, pull some of the thread up through the slot in front of the needle plate and insert it into one of its slots.
Next, place your bobbin into its case and slide it into its designated spot underneath your presser foot.
How do you sew a zigzag for beginners?
To sew a zigzag stitch for beginners, start by setting your machine to the zigzag stitch. Then, adjust the tension of both the upper and lower threads to ensure that your stitches are even and consistent. Once everything is in place, you can begin sewing!
