Have you ever been to a craft show and seen beautiful things made from burlap fabric? Do you want something similar for your home, but don’t know where to begin?
Sewing with a sewing machine is an art, and after you learn some basics, the possibilities are endless! Burlap is one of the most popular fabrics for making crafts, home decor items, clothing, quilts, and more.
In this article, I’ll teach you how to sew burlap with a sewing machine. I’ll also share helpful tips and tricks so that even beginner crafters can feel like seasoned veterans.
Related Topic: How to Make Scrunchies with a Sewing Machine (Easy Secrets)
What is Burlap?
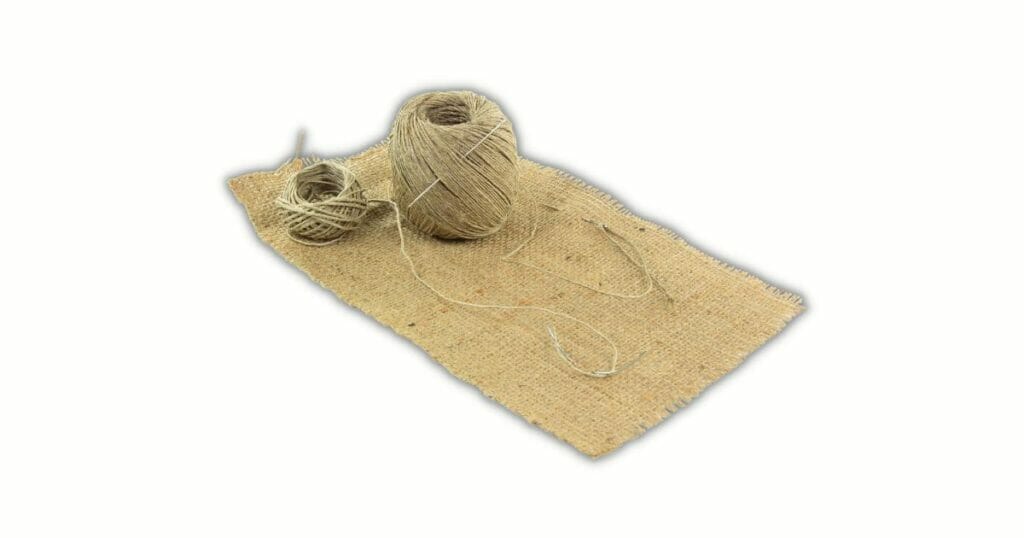
Burlap is a loosely woven fabric made from jute, hemp, or other natural fibers. It is characterized by its loose weave, which allows air to pass through the material easily. This makes it an ideal choice for projects that require breathability and durability.
Burlap is also known for its rustic look and feel, making it a popular choice for home decor and fashion accessories alike. Its versatility makes it a great choice for any project requiring a unique texture or look.
Materials Needed For Sewing Burlap
When sewing burlap with a sewing machine, one will need to have the right materials. This includes the burlap fabric, thread that matches or coordinates with the burlap color, scissors for cutting and trimming excess threads, pins for keeping seams in place before stitching them together, an iron for pressing seams flat if needed, and of course a sewing machine.
It’s also important to make sure you have extra bobbins on hand; when working with thicker fabrics like burlap, they can go through quite a bit of thread more quickly than normal.
Preparing The Burlap For Sewing
When preparing the burlap for sewing, there are a few steps to take. First, it’s essential to make sure that all loose threads have been trimmed and removed from the material. This will help ensure the fabric doesn’t get caught in the machine as you sew.
Additionally, if there is any excess dirt or dust on your burlap, use a lint roller or vacuum cleaner to remove it before beginning.
Next up is pre-shrinking the fabric. Burlap can shrink significantly when exposed to heat, so it’s best to do this step before you start sewing anything with it.
You can either soak the burlap in warm water and then hang it dry or put it through a hot cycle in your washing machine (tumble drying isn’t recommended). Once finished, iron out any wrinkles in order for everything to lay flat while stitching. With these two steps complete, you’re now ready to begin using your sewing machine!
Setting Up Your Sewing Machine For Burlap
Before you start sewing burlap with your machine, it’s important to make sure everything is set up properly. This involves ensuring that the correct needle and thread are used for the job.
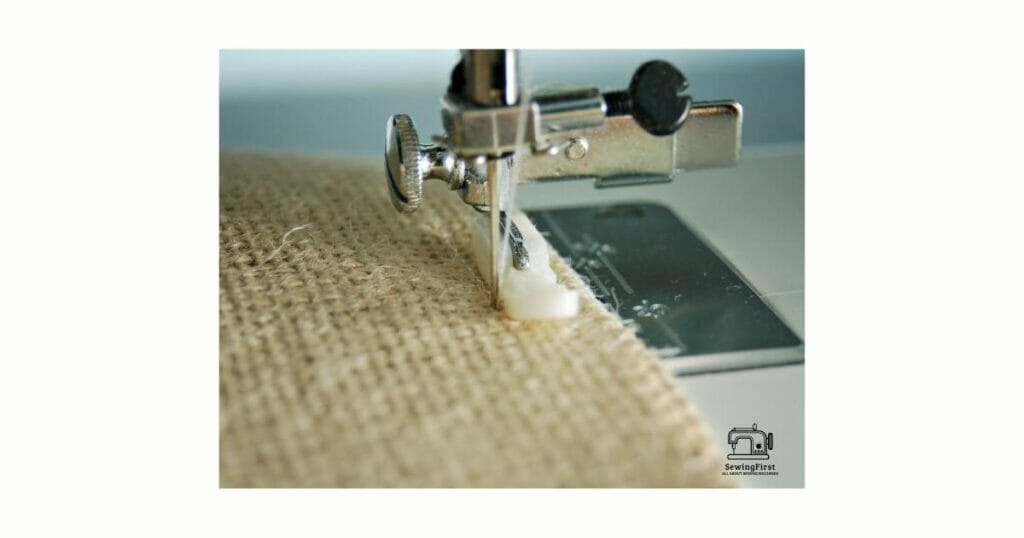
The first step in setting up your sewing machine for burlap is to select a heavy-duty needle. It should be at least 90/14 gauge or larger, as this will give you better control over how the fabric moves through your machine.
You’ll also need a strong thread to help hold together multiple layers of burlap; polyester thread works best for this purpose. Make sure you’re using good-quality thread so that it doesn’t break while you’re working on your project.
Once you’ve selected the right needle and thread, adjust the tension settings on your machine accordingly. Burlap can be quite thick and requires higher tension than other fabrics in order to keep its shape during the stitching process.
Additionally, if available use an adjustable presser foot which helps guide fabric more evenly when stitching thicker materials such as burlap. After adjusting these settings, it’s time to get started! With all of these elements in place, sewing burlap with a machine should now be much easier and less intimidating.
Different Types Of Stitches For Sewing Burlap
When it comes to sewing burlap, there are a few different types of stitches you can use such as straight stitches or zigzag stitches. The type of stitch you select will depend on the project you’re working on and what look you’re trying to achieve.
For instance, if you want a more decorative design with lots of texture, then using an applique stitch may be your best bet. On the other hand, if your goal is to create a strong seam that won’t easily fray or come undone, then straight stitching should do the trick.
No matter which stitches you choose for your burlap project, one thing remains consistent: You’ll need to adjust the tension settings on your sewing machine accordingly.
This is because burlap has thick fibers that require extra tightness in order to ensure maximum durability and strength. If your thread tensions are too loose, then chances are high that your seams will unravel over time. That’s why it’s important to take care when setting up your machine for this particular material.

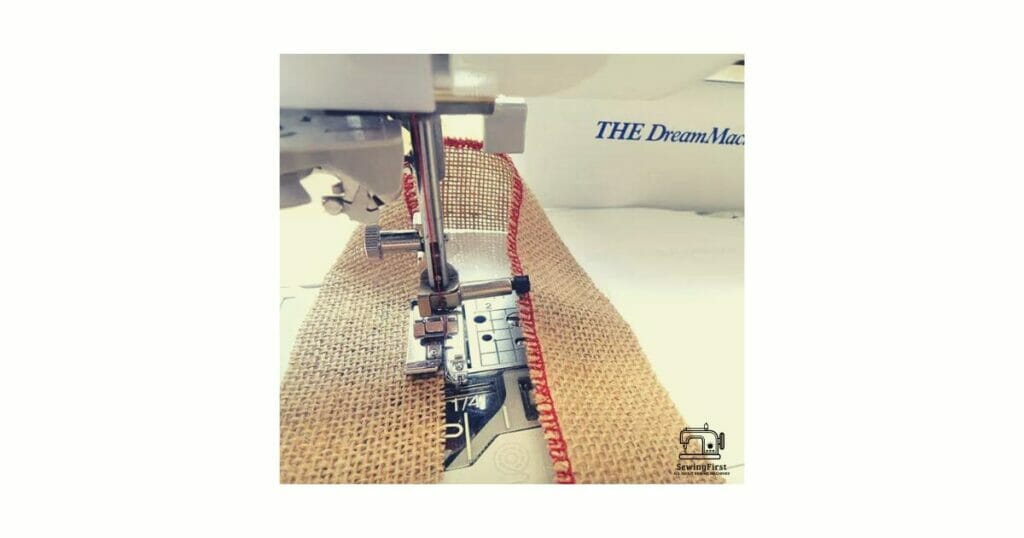
How To Thread a Sewing Machine For Burlap
Threading a sewing machine correctly is important to get the best results when sewing burlap. First, make sure you have the right needle size and type for the fabric; while many needles can be used with burlap, using one specifically designed for heavier fabrics will help avoid skipped stitches or other issues.
Start by winding the bobbin, making sure it moves in a clockwise direction as you wind it. Once finished, place it into its holder on the side of the machine and draw up some of the thread from below, so that both lines – upper and lower – are ready to start stitching.
As you guide them through their respective paths above and below the presser foot, set tension according to your owner’s manual specifications. Pull gently on each thread before starting to stitch so they move freely without resistance.
Once everything is properly threaded and tensioned, test run several stitches on a scrap piece of burlap similar to what you’ll be working with. This way you can adjust any settings needed until you get consistent-looking stitches across your fabric pieces.
With proper preparation, including selecting an appropriate needle and accurately threading your machine, sewing burlap should go smoothly!
Techniques For Sewing A Hem On Burlap
When it comes to sewing burlap, there are a few techniques you can use to get the job done. One of these is hemming the fabric. With this method, you can create a neat and tidy edge on your project and make sure that no fraying occurs.
To begin, gather all the materials that you will need for this process:
- thread
- needle
- scissors
- pins
- measuring tape
- burlap fabric
Once you have everything ready, start by folding over one side of the fabric until it meets with the other and pin it into place. Use a ruler or measuring tape to measure how much material needs to be folded in order for the two sides to meet evenly across the entire length of the burlap.
After that’s taken care of, take out a threaded needle and stitch along where both edges come together as closely as possible while still being able to remove the pins afterward. Make sure not to pull too hard when stitching so that your work looks nice after completion.
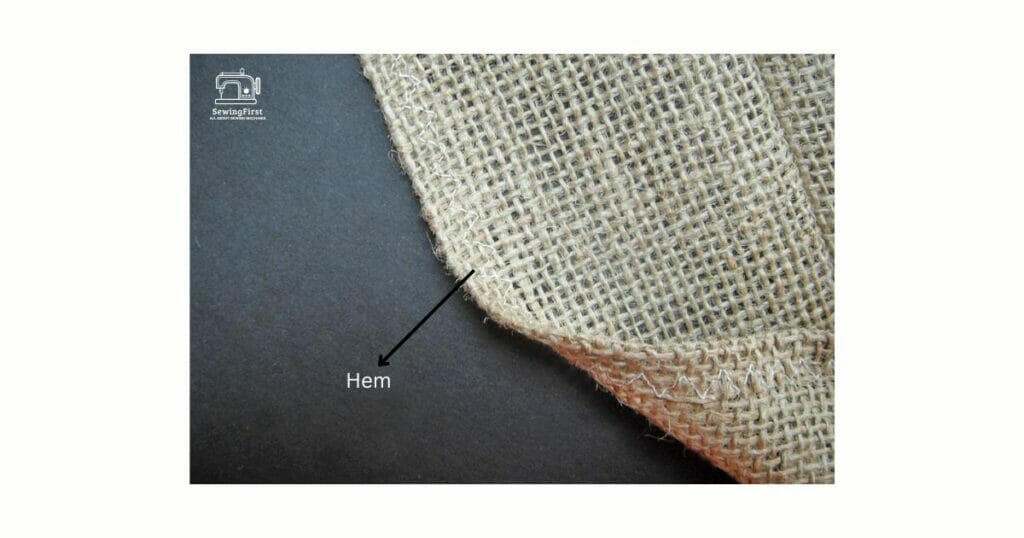
For an even cleaner look, try using a zig-zag stitch if available; otherwise, just continue stitching straight lines until you reach the end of your piece of burlap. Once done with stitching, cut off any extra threads around the area before removing all pins from the fabric surface — now you’ve got yourself a beautiful hemmed piece of burlap!
Sewing A Straight Line On Burlap
When it comes to sewing a straight line on burlap, there are several techniques that can be used. Firstly, you’ll want to make sure your presser foot is set correctly for the type of fabric you’re using and ensure your bobbin is wound with thread that matches the top of your fabric.
It’s also important to adjust the tension properly so that you don’t end up with uneven stitches.
Once these steps have been completed, pinning the material in place along the line where you intend to sew will help keep it from shifting while stitching. You can then begin sewing by setting the machine at a slow speed, as this will give you more control when guiding the fabric through.
As you stitch, remember to backstitch at the beginning and end of each seam for extra strength and stability. If possible, try to use an edge guide attachment which helps maintain an even distance between the needle and the raw edge of your fabric.
Sewing a straight line on burlap may seem like a daunting task but taking some time to practice beforehand can really pay off! With patience and care, anyone can achieve professional-looking results with their projects.
Sewing Curves And Circles On Burlap
Sewing curves and circles on burlap is a bit different than sewing straight lines, but it can be done. First of all, you need to make sure your thread tension isn’t too loose or too tight – the perfect balance will help keep your stitches even as you maneuver around curves and circles.
With the right settings in place, you’ll want to start by using a guide for stitching those awkward shapes; draw them with chalk or use masking tape along the edges so that you have something to follow while you sew.
Once everything’s set up properly, actually making those curved lines and circles is relatively easy. Make sure to go slowly at first; if your needle starts veering off-course, gently tug on either side of the fabric until it’s back where it should be. Don’t pull too hard though! Doing this repeatedly could cause puckers in the finished product.
Remember to take breaks every now and then when sewing complicated patterns like these – give yourself time to rest your hands and eyes before continuing with more detailed designs.
It may take some practice before you get used to following curves with a machine stitch, but once you do, creating intricate pieces out of burlap becomes much simpler.
Tips For Sewing With Burlap
Sewing with burlap can be a challenging task, but it doesn’t have to be. With the right tips and techniques, you can sew beautiful projects on this sturdy fabric.
- When sewing with burlap, one of the most important things is to use a larger stitch length than normal. This will help reduce puckering and allow for easier manipulation of the fabric while you’re stitching.
- if your machine has an adjustable presser foot height, raise it as high as possible when sewing through multiple layers of thick burlap fabric.
- It’s also beneficial to use a universal or denim needle – these needles are designed specifically for fabrics such as canvas and denim that provide more resistance than regular cotton materials.
- To prevent fraying, finish all exposed edges before beginning your project by using pinking shears or zigzag stitches around raw edges.
- use plenty of pins or clips when holding down seams in place for added stability during the sewing process; binder clips work especially well on thicker burlap fabrics.
- take your time when working with this material as its thickness may cause skipped stitches if you rush too much. By following these helpful tips, you should be able to confidently create stunning pieces with burlap!
Finishing Touches For Burlap Sewing Projects
When it comes to sewing projects, the finishing touches can make all the difference. Burlap is no exception! After you’ve finished stitching with your sewing machine, a few extra steps will ensure that your burlap project looks professional and polished.
One way to give your burlap item an elegant look is by adding decorative trims or appliques. You could also add fabric paint for color or embellishments like buttons, beads, or bows.
Another great way to finish off a burlap item is by topstitching around the edges of seams – this helps keep everything in place while giving it a neat appearance.
If you’re using a thicker type of burlap, consider taking time to fray-check each seam; this prevents fraying and keeps your work looking tidy.
No matter what kind of decorative elements you choose, always remembers that less is more when it comes to working with burlap fabrics. A little bit of flair goes a long way in enhancing any handmade project – so take care not to overdo it! With these tips in mind, you’ll be able to create beautiful pieces that are sure to impress.
Troubleshooting Common Sewing Problems With Burlap
Troubleshooting common sewing problems with burlap can be a challenge, but it’s still possible to do. There are some key things you should keep in mind while tackling the issue of how to sew burlap with a sewing machine.
- Watch your thread tension and make sure that it is neither too tight nor too loose; this will help avoid puckering or other problems when stitching through thick materials like burlap.
- Use a larger needle than usual; this will ensure that the fabric won’t get stuck on the tip of the needle as easily.
- Always remember to cut down on bulk whenever possible by using clips instead of pins. This helps prevent bunching up around the edges of your seams and makes them look neater overall. Also,
- Test new techniques before actually committing them to your project – just so you’re sure everything looks perfect! All these steps can help guarantee success when mastering how to sew burlap with a sewing machine.
Conclusion
In conclusion, sewing burlap with a sewing machine is not as difficult as it may seem. All that is required is the right materials and tools, along with patience and care when setting up the machine. With a few simple steps, anyone can learn how to sew burlap with a sewing machine and produce beautiful and unique pieces that stand out from the rest.
FAQs
What Type Of Needle Should I Use For Sewing Burlap?
The type of needle you choose depends on several factors. First, consider what type of thread you’ll be using; thicker threads require larger needles than thinner ones. Additionally, if you plan to sew through multiple layers of burlap (or other thick fabrics) then an even larger size may be necessary.
How Long Does It Usually Take To Sew A Burlap Project?
The answer will depend on several factors including the size and complexity of your project. For example, if you’re just making simple curtains or tablecloths then the task won’t take too long – perhaps only about half an hour.
If, however, you are creating something more intricate such as pillows or stuffed animals that involve multiple layers of fabric and stitching patterns then the time required could easily double or triple.
Can I Use Burlap To Make Clothing?
Making clothing out of burlap is a great way to add texture and color to your wardrobe. It’s also an incredibly versatile material, allowing you to create unique pieces that reflect your own personal style. So the answer to the question of whether or not it’s possible to use burlap for making clothing is a resounding yes!
Can you sew burlap with regular sewing machine?
Yes, you can sew burlap with a regular sewing machine. However, it is important to use the right type of needle and thread for the job. A larger needle will help prevent the fabric from getting stuck on the tip of the needle as easily, while thicker threads are better suited for sewing through multiple layers of burlap.
What size needle do you use to sew burlap?
The size of the needle you use to sew burlap will depend on several factors, such as the type of thread you’re using and how many layers of fabric you’ll be stitching through. Generally speaking, a larger needle (such as a size 16 or 18) is recommended for sewing through thick materials like burlap.
How do you sew burlap so it doesn’t fray?
To prevent burlap from fraying, you should use a zigzag stitch when sewing it. This type of stitch helps to secure the edges of the fabric and prevents them from unraveling. Additionally, you can also use a fray-check product or sealant to further protect the edges of your project.