
Do you remember the big Scrunchies craze of the 80s? We all wanted bright, colorful, fabric scraps crunched up to hold our hair in place! Who would have thought that almost 40 years later we’d be bringing back this trend with a bang?
If you’re looking for a creative sewing project, why not make your own scrunchies? Making scrunchies can be done with a basic sewing machine and they don’t take very long to make.
In this article, I’ll show you step-by-step how to make your own scrunchies using a sewing machine. Whether you want to do it for fun or for profit, this article will give you the miss knowledge and skills necessary to become an expert scrunchie maker.
Related Topic: How to Sew Burlap with a Sewing Machine: Techniques Simplified!
Background of the Scrunchies Trend
The scrunchie trend first began in the 1980s when women started wearing bright, colorful fabric scraps to hold their hair in place. The trend quickly caught on and soon everyone was wearing scrunchies. Scrunchies were a way for women to express themselves and their style without having to spend a lot of money.
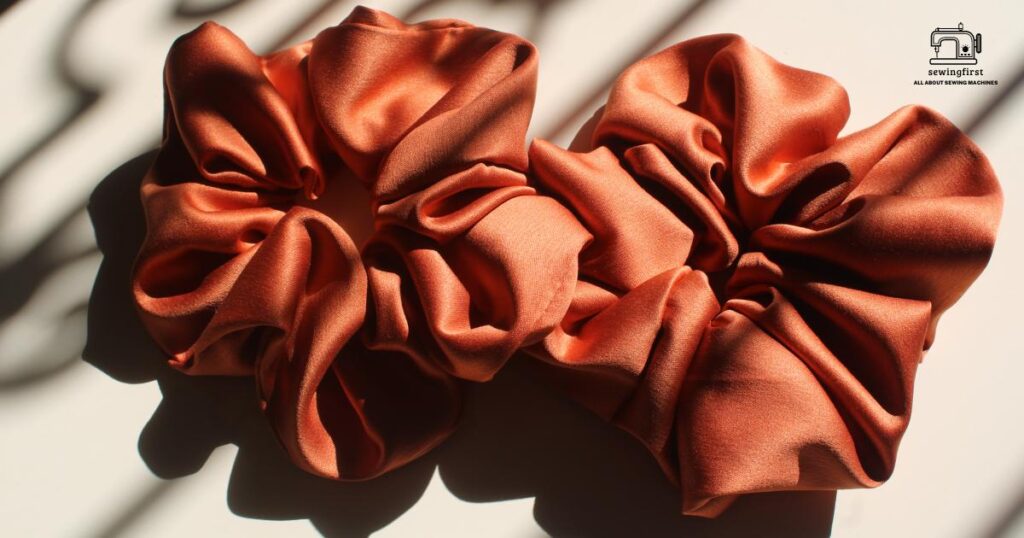
The scrunchie trend has had its ups and downs over the years, but it has recently made a comeback in a big way. Scrunchies are now seen as a fashion statement and can be found in all sorts of colors and patterns.
Benefits of Making Your Own Scrunchies
Making your own scrunchies has many benefits. For starters, you can make everyday scrunchies that are perfect for everyday wear.
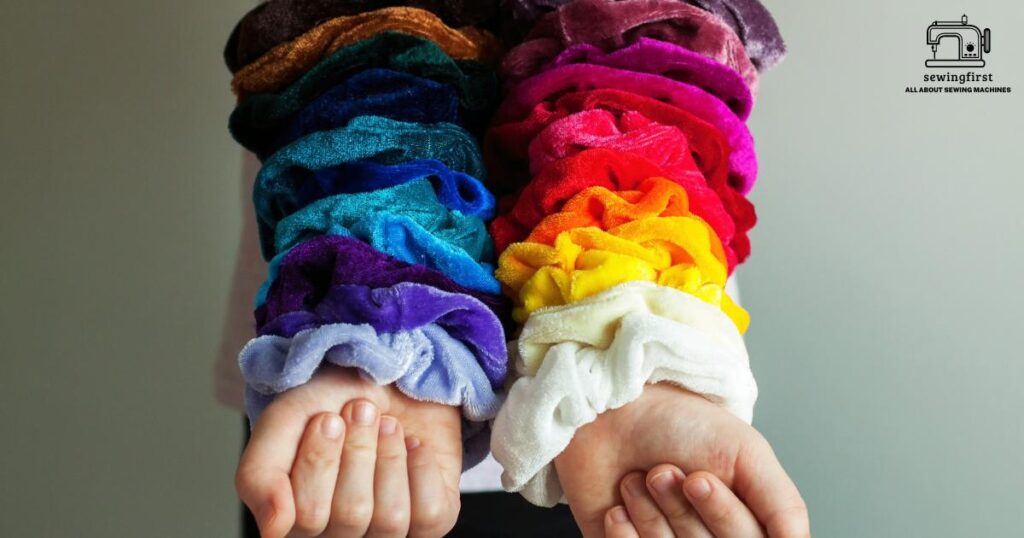
You can choose from a variety of fabrics and colors to create the perfect scrunchie for any occasion. Plus, you don’t have to worry about spending too much money on expensive scrunchies that may not last very long.
Another benefit of making your own scrunchies is that you can make them as unique as you want. You can choose from a variety of fabrics and colors to create the perfect scrunchie for any occasion.
Plus, handmade scrunchies are sure to be one-of-a-kind and will definitely stand out in a crowd. Finally, making your own scrunchies is a great way to express your creativity and show off your sewing skills.
Step-by-Step Instructions for Making Scrunchies
To make your own scrunchies, you will need the following materials:
- Fabric scraps (at least 6 inches in length)
- Elastic band (1/4 inch wide)
- Sewing machine
- Thread and Needle
- Scissors and pins
- Fabric scissor
Cut the Fabric
The first step in making a scrunchie is to cut your fabric into two pieces. You need one fabric piece that is 6 inches long and 4 inches wide, and another piece that is 8 inches long and 4 inches wide. Use a safety pin to mark the center of each piece of fabric.
Sew the Fabric Together
Next, you will need to sew the two pieces of fabric together. Place the two pieces of fabric right sides together and pin them in place. Sew a straight stitch along the pinned edges, leaving a 1/4-inch seam allowance.
Attach the Elastic Band
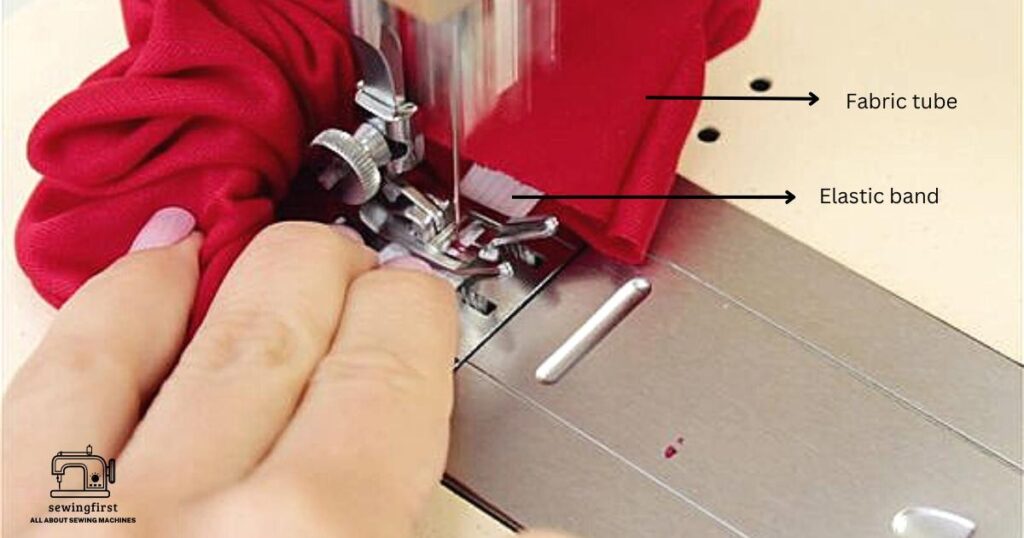
Once you have sewn the two pieces of fabric together, it’s time to attach the elastic band. Take your piece of elastic and fold it in half. Place the folded elastic band inside the fabric tube, with the raw edges of the elastic band aligned with the raw edges of the fabric tube. Pin in place.
Sew the Elastic Band in Place
Now it’s time to sew the elastic band in place. Sew a straight stitch along both sides of the elastic band, making sure to backstitch at each end for extra security.
Trim and Finish the Scrunchie
Once you have sewn the elastic band in place, it’s time to trim and finish the scrunchie. Trim any excess fabric from the edges of the scrunchie. Then, fold the piece of fabric in half lengthwise and sew a straight stitch along the raw edges to create a finished look.
How to Sew Scrunchies on a Sewing Machine
Sewing scrunchies on a sewing machine is a great way to make them quickly and easily. Follow this guide and you will get to know everything about sewing scrunchies
- Attach the presser foot to your sewing machine.
- Thread the sewing needle with thread that matches the fabric you are using.
- Cut a rectangle of fabric measuring 6 inches by 4 inches for small scrunchies and 8 inches by 4 inches for larger scrunchies.
- Place the two pieces of fabric right sides together and pin them in place.
- Sew a straight stitch along the pinned edges, leaving a 1/4-inch seam allowance.
- Take your piece of elastic and fold it in half. Place the folded elastic band inside the fabric tube, with the raw edges of the elastic band aligned with the raw edges of the fabric tube. Pin in place.
- Sew a straight stitch along both sides of the elastic band, making sure to backstitch at each end for extra security.
- Trim any excess fabric from the edges of the scrunchie.
- Fold the piece of fabric in half lengthwise and sew a straight stitch along the raw edges to create a finished edge.
- For an extra secure finish, use hot glue or fabric glue to attach the outer edge of the scrunchie to the elastic lengths.
Important Considerations When Making Scrunchies
- When making a scrunchie, make sure to cut two pieces of fabric – one 6 inches long and 4 inches wide, and another 8 inches long and 4 inches wide.
- Use a safety pin to mark the center of each piece of fabric before sewing them together.
- Leave a 1/4-inch seam allowance when sewing the two pieces of fabric together to create a tube of fabric.
- When attaching the elastic band, make sure to align the raw edges of the elastic with the raw edges of the fabric tube.
- When sewing the elastic band in place, make sure to backstitch at each end for extra security.
- Trim any excess fabric from the edges of the scrunchie before folding it in half and sewing a straight stitch along the raw edges to create a finished look.
Finally, when you’re finished making your scrunchie, you can embellish it with ribbons, buttons, or other decorations.
You can also make multiple scrunchies in different colors and patterns to create a unique look. Making your own scrunchies is a fun and creative way to add a personal touch to any outfit.
DIY Scrunchies Sewing Projects
Scrunchies are a great way to add a personal touch to any outfit. With just a few simple supplies and some basic sewing skills, you can make your own scrunchies in no time! To get started, you will need matching thread, a scrunchie pattern, a strip of fabric, and scissors.
First, cut out the scrunchie pattern from the fabric. Make sure to cut two pieces of fabric – one 6 inches long and 4 inches wide, and another 8 inches long and 4 inches wide. Once you have cut out the scrunchie pattern, use a safety pin to mark the center of each piece of fabric before sewing them together.
Next, sew the two pieces of fabric together. Place the two pieces of fabric right sides together and pin them in place. Sew a straight stitch along the edges, leaving a 1/4-inch seam allowance. Once you have sewn the two pieces of fabric together, it’s time to attach the elastic band.
Take your piece of elastic and fold it in half. Place the folded elastic band inside the fabric tube, with the raw edges of the elastic band aligned with the raw edges of the fabric tube. Sew a straight stitch along the edges of the elastic band, making sure to backstitch at each end for extra security.
Finally, once you have sewn the elastic band in place, it’s time to trim and finish the scrunchie. Trim any excess fabric from the edges of the scrunchie. Then, fold the piece of fabric in half lengthwise and sew a straight stitch along the raw edges to create a finished look.
You can also embellish your scrunchie with ribbons, buttons, or other decorations. With just a few simple steps, you can make your own scrunchies in different colors and patterns to create a unique look!
Types Of Fabrics used for Making Scrunchies
Scrap fabric is a great way to make scrunchies without having to buy new fabric. It’s also an eco-friendly option since you’re reusing fabric that would otherwise be thrown away. When using scrap fabric, make sure to choose a type of fabric that won’t fray easily, such as cotton or linen.
When making scrunchies with scrap fabric, you’ll need to cut out a pattern piece. The pattern piece should be 6 inches long and 4 inches wide for the main body of the scrunchie, and 8 inches long and 4 inches wide for the elastic band.
Cotton fabric is a great choice for making scrunchies since it’s lightweight and won’t fray easily. You can also use other types of fabric such as linen, silk, or even fleece. When using cotton fabric, make sure to pre-wash it before cutting out the pattern piece. This will help to prevent any shrinkage or color fading after the scrunchie is finished.
No matter what type of fabric you choose, make sure to use a coordinating thread for sewing the scrunchie together. This will help to ensure that your scrunchie looks neat and professional.
You can also add embellishments such as ribbons, buttons, or other decorations to give your scrunchie a unique look. With just a few simple supplies and some basic sewing skills, you can make your own scrunchies in no time!
Elastic Bands for Making Scrunchies
When making scrunchies, it’s important to choose the right type of elastic band. The most common type of elastic used for scrunchies is 1/4 inch wide and comes in a variety of lengths. You can purchase elastic in pre-cut lengths or buy it by the yard and cut it to the desired length.
When choosing an elastic band, make sure to measure your fabric tube before cutting the elastic to ensure that you have enough length.
When sewing the elastic band into the fabric tube, it’s important to leave some excess elastic at each end. This will help to create a snug fit and prevent the scrunchie from slipping off your wrist. Once you have sewn the elastic in place, you can trim off any excess elastic with scissors.
Finally, you’ll need to secure the elastic band in place with an elastic thread. This is a special type of thread that is designed to stretch and hold the elastic in place.
To use the elastic thread, simply wrap it around the fabric tube and sew it in place. Make sure to leave some slack in the thread so that it can stretch when needed. With just a few simple steps, you can make your own scrunchies with a sewing machine!
What is the difference between a hair band and a scrunchie
Type Of Stitches for Making Scrunchies
Ladder stitch
The ladder stitch is a great choice for making scrunchies since it’s easy to do and creates a neat, professional finish. To use the ladder stitch, simply thread your needle with a coordinating thread and knot the end.
Then, start at one end of the fabric tube and insert the needle in and out of the fabric in an alternating pattern. This will create a series of small loops that will hold the fabric together.
Invisible stitch
The invisible stitch is another great option for making scrunchies. This stitch is similar to the ladder stitch, but it’s designed to be nearly invisible when finished.
To use the invisible stitch, start at one end of the fabric tube and insert the needle in and out of the fabric in a straight line. This will create a series of small stitches that will hold the fabric together without being visible.
Whip stitch
The whip stitch is a great choice for adding embellishments to your scrunchie.
To use the whip stitch, start at one end of the fabric tube and insert the needle in and out of the fabric in a zig-zag pattern. This will create a series of small stitches that will securely hold any decorations in place.
Blind stitch
The blind stitch is a great choice for finishing the edges of your scrunchie.
To use the blind stitch, start at one end of the fabric tube and insert the needle in and out of the fabric in a straight line. This will create a series of small stitches that will hold the fabric together without being visible from the outside.
Edge stitch
The edge stitch is a great choice for adding decorative details to your scrunchie.
To use the edge stitch, start at one end of the fabric tube and insert the needle in and out of the fabric in a straight line. This will create a series of small stitches that will securely hold any decorations in place while adding an extra decorative touch.
Conclusion
In conclusion, making your own scrunchies with a sewing machine is a fun and creative way to add some personal flair to your wardrobe. It’s an accessible and relatively simple skill that anyone can learn.
Whether you prefer hand-sewing or using a sewing machine, use these tips and tutorials as a guide to help you create the perfect scrunchie! With the right materials and techniques, you’ll soon be able to master how to make scrunchies with a sewing machine like a pro.
FAQs
What are the measurements for making a scrunchie?
The measurements for making a scrunchie will depend on the size of the fabric tube you are using. Generally, you will need to cut a piece of fabric that is about 2-3 inches wide and 12-14 inches long. You can adjust these measurements as needed depending on how large or small you want your scrunchie to be.
What Stitch is best for scrunchies?
The best stitch for making scrunchies will depend on the look you are trying to achieve. For a more secure hold, the ladder stitch or invisible stitch are great options. If you want to add embellishments, the whip stitch or edge stitch are good choices.
What supplies do you need to make scrunchies?
To make scrunchies, you will need fabric, scissors, a sewing machine, thread, and any decorations or embellishments you want to add. You may also want to have pins and a measuring tape on hand to help with the cutting and stitching process.
What is the best elastic for scrunchies?
The best elastic for scrunchies is a thin, stretchy elastic. This type of elastic will provide the most comfortable fit and will ensure that your scrunchie stays in place. You can find this type of elastic at most fabric stores or online.
What is the difference between a hair band and a scrunchie?
The main difference between a hair band and a scrunchie is the material used. Hair bands are usually made of plastic or metal, while scrunchies are typically made of fabric. Scrunchies also have more decorative elements than hair bands, such as bows, beads, or other embellishments.
