
When was the last time you took care of your sewing machine? Do you even remember how to do it?
It doesn’t matter whether you sew clothing, quilt, make bags, or anything else with a sewing machine. If you’ve got a vintage sewing machine or a new one, then you should probably clean it once in a while.
But cleaning your sewing machine isn’t as simple as it sounds. There are many parts inside that require special attention. In fact, most sewing machines have over 100 parts inside. And each part has its own unique way of being cleaned.
In this article, I’ll teach you how to remove and replace the baseplates on your Singer sewing machine. This will help prevent future problems with your machine and make sure everything works properly again.
Related Topic: How To Store A Sewing Machine (Safe Solutions)
Antique Singer Sewing Machine Base: How to Restore
An antique sewing machine base is a special type of sewing machine base used by Singer sewing machines. The Singer sewing machine was invented in 1884 by Isaac Merritt Singer. He created his first sewing machine in 1851.
The Singer sewing machine has been one of the most popular home sewing machines ever since its invention. Today there are over 1 million Singer sewing machines sold every day worldwide.
There are many different types of sewing machine bases available today. Some are designed specifically for Singer sewing machines, while others are made for any brand of sewing machine.
This guide shows you how to restore an antique Singer sewing machine base. This guide assumes you already have a working Singer sewing machine.

- First, remove the cover plate from the back of the sewing machine base. Then carefully pry off the top panel. Remove the screws holding the top panel down. Next, gently lift out the bottom panel. Finally, remove the two side panels.
- Next, take apart the sewing machine motor. Carefully separate the motor from the frame. Be careful not to damage the wiring harnesses.
- Now, clean the inside of the sewing machine base with a damp cloth. Use a soft brush to scrub away dirt and grime. Make sure to wipe the entire interior of the sewing machine base including the underside of the footboard.
- After cleaning, reassemble the sewing machine base. First, put the top panel back on. Then replace the screws. Reattach the side panels. Lastly, attach the bottom panel.
- Finally, test the sewing machine base to ensure everything works properly. Now you’re ready to sew!
Restoring Antique Singer Treadle Sewing Machine
You may notice some rust or corrosion around the screw holes in the base plate. You should use a small drill bit to remove these areas. If you don’t, the threads holding the base plate to the frame could break when you try to reinstall the base plate. Use warm water and gentle soap to wash the base plate. Wipe it dry with a paper towel.
When you’ve finished cleaning the base plate, you can then install the new bobbin winding mechanism. To do so, first, place the base plate back into position. Then tighten all four screws that hold the base plate to the sewing machine frame.
Once the base plate is securely attached, you can then proceed with installing the bobbin winder. Start by placing the bobbin winder into position. Then thread the bobbin through the bobbin winder’s spool. Tighten the knob at the end of the bobbin winder until the bobbin thread stops spinning.
Singer Treadle Sewing Machine Base: How to Restore it
If you’re restoring a Singer sewing machine, you need to remove the treadle base before you begin. The treadle base holds the foot pedal down and keeps the needle moving forward. Without the treadle base, the sewing machine won’t work properly.
To remove the treadle base, you must first loosen the screws holding the treadle base to the frame. Then carefully pull out the treadle base. Be careful not to drop any parts inside the sewing machine.
After removing the treadle base, wash the entire area thoroughly with warm water and dishwashing liquid. Use a soft cloth to wipe away any excess dirt. Dry the area well with paper towels.
Next, apply a small amount of sewing machine oil to the threads of the sewing machine. This helps prevent rust and keep the threads lubricated. The needle bar area also needs to be cleaned. Soak a cotton ball in rubbing alcohol and rub it over the needle bar area.
Then, carefully reassemble the sewing machine’s base. First, place the treadle base back into position. Then, secure the treadle base using the screws. Once the treadle base is secured, replace the screws that held the treadle base to its frame.
Finally, replace the treadle base and tighten the screws. Now your sewing machine should work again.
Singer Foot Control Mechanism: How to Restore it
The Singer foot control mechanism is located at the front of the sewing machine. It controls the speed of the needle bar as well as the feed dog. To repair or replace the foot control mechanism, you must first remove the foot pedal assembly.
Remove the four screws that hold the foot pedal assembly together. Lift up the foot pedal assembly. You’ll see three metal plates underneath. These are the foot pedal assemblies. Take them out.
Remove the screw that holds the foot pedal assembly to the base plate. Lift off the foot pedal assembly. Remove the screws that hold the foot control mechanism to the base plate.
Replace the foot pedal assembly. Put the screws back into place. Replace the foot pedal assembly. Attach the foot pedal assembly to your sewing machine. Test the foot pedal assembly to make sure it’s working correctly.
Vintage Singer Sewing Machine: Cast Iron Base Restoration
Vintage Singer sewing machines were made between 1885 and 1960. They’re known for their quality workmanship and durability. These vintage sewing machines have a cast iron base, which makes them heavy and hard to move.
If you’ve got a vintage Singer sewing machine, chances are its base is rusted out. And if it’s rusty, there’s no telling how bad things may be underneath. So, you need to take care of this problem right away.
First, remove the bottom plate. Then, use a hammer and chisel to pry off the top plate. Next, carefully lift the base out of the machine. Finally, clean everything thoroughly.
Cast iron bases can easily be cleaned with gentle soap and warm water. Once you’ve cleaned everything, apply some rust-preventative oil to the base. This will help keep the metal from rusting again.
Now, you’re ready to restore the base. Simply replace the bottom plate, then the top plate. Finally, reinstall the base in the sewing machine.
Cast Iron Sewing Machines
Today, most Singer sewing machines are cast iron. Cast iron has many advantages over steel, including durability, strength, heat resistance, and ease of maintenance. However, there are disadvantages too. One disadvantage is that cast iron is heavy. Another disadvantage is that cast iron requires frequent oiling.
To avoid these problems, some manufacturers use stainless steel instead of cast iron. Stainless steel is lighter than cast iron, but it doesn’t last nearly as long. So, which type should you buy? The answer depends on your needs.
If you need a durable machine that won’t rust out after years of hard work, then go with cast iron. But if you just need something light enough to carry around, then go with stainless steel.
An Overview of How to Clean the Iron Bases of Sewing Machines
Singer sewing machines are great tools for home sewers who want to learn how to sew. They’re affordable, durable, and easy to operate. However, there are some things that can go wrong with them. One of those problems is the iron sewing machine base.
Step-By-Step Guide
Step 1: Remove the Bottom Plate
The first step in cleaning the iron sewing machine base is to remove the bottom plate before removing the needle plate. If you don’t have access to a table saw or other power tools, you can use a screwdriver to loosen the screws holding the bottom plate on.
Step 2: Pry Off the Top Plate
After loosening the screws, gently pry up the top plate. Be careful not to damage the top plate when lifting it.
Step 3: Carefully Lift Out the Iron Sewing Machine Base From the Sewing Machine
When you’ve lifted the iron sewing machine base out of the sewing machine, set it down on a flat surface. You should be able to see all of the parts inside the base.
Step 4: Use a Hammer and Chisel to Pry Off the Cast Iron Parts
Use a hammer and chisel (or another suitable tool) to pry off the cast iron parts. It might take several attempts to use different tools. Don’t worry about damaging the plastic parts. Just make sure you get every part out of the base.
Use gentle soap and warm water to clean the base first before applying anything to it.
Step 5: Apply Rust Preventive Oil to the Iron Sewing MachineBase
Use a rag or paper towel to apply a light coating of oil to the iron sewing machine base parts. Make sure you cover all of the exposed surfaces.
Step 6: Wipe Away Excess Oil With a Soft Cloth
Wipe away any excess oil with a soft and dry cloth. Remember, you only want to apply enough oil to prevent rusting, so don’t overdo it.
Step 7: Replace the Iron Sewing Machine’s Base
Replace the iron sewing machine base in its original position. Reattach the machine by following the instructions provided by the manufacturer.
Restoration Of Domestic Sewing Machine Base
Today, most domestic sewing machines are made from aluminum alloy. Aluminum alloy is much lighter than cast iron, and it’s also easier to maintain.
However, aluminum alloy isn’t as strong as cast iron. So, if you drop your sewing machine, it could break. Also, aluminum alloy tends to rust more easily than cast iron. That means you’ll have to clean it more often.
So, what do you do if you accidentally drop your sewing machine? Fortunately, it’s pretty easy to repair a broken sewing machine base. In fact, you can fix it yourself without having to pay someone else to do it.
How to Repair a Broken Sewing Machine Base
To repair a broken sewing machine, follow this simple guide.
Step 1: Locate the Needle Plate Screws
First, locate the two screws that hold the needle plate onto the sewing machine base. These screws are usually located near the front edge of the sewing machine base.
Step 2: Loosen the Needle Plate Screw
Lift up the needle plate and carefully lift it off of the sewing machine base using one hand. Then, slide the screwdriver under the head of each screw and turn them counterclockwise until they’re loose.
Step 3: Remove the Needle Plate
Next, remove the needle plate from the sewing machine base. When you lift the needle plate off of the sewing machine, you’ll notice that there are two small holes at the back of the needle plate. This is where the bobbin thread passes through the needle plate.
Step 4: Clean the Thread Passageways
Clean the threaded passageway in the needle plate with an old toothbrush. If you use too much pressure when cleaning the passageway, you may damage the threads.
Step 5: Attach New Needle Plate
Attach the new needle plate to the sewing machine base by sliding the screws back into place. Then, reassemble the sewing machine by following the instructions supplied by the manufacturer.
How to Make a Singer Sewing Machine Base at Home
If you own a vintage sewing machine, you probably know how hard it is to find replacement parts for these antique machines. But, now you can create your own sewing machine base at home!
Making a sewing machine base at home is very easy. All you need is some wood glue, a drill, a saw, and a few other basic tools. You can even build a sewing machine base on a budget.
Here’s How To Build A Sewing Machine Base At Home
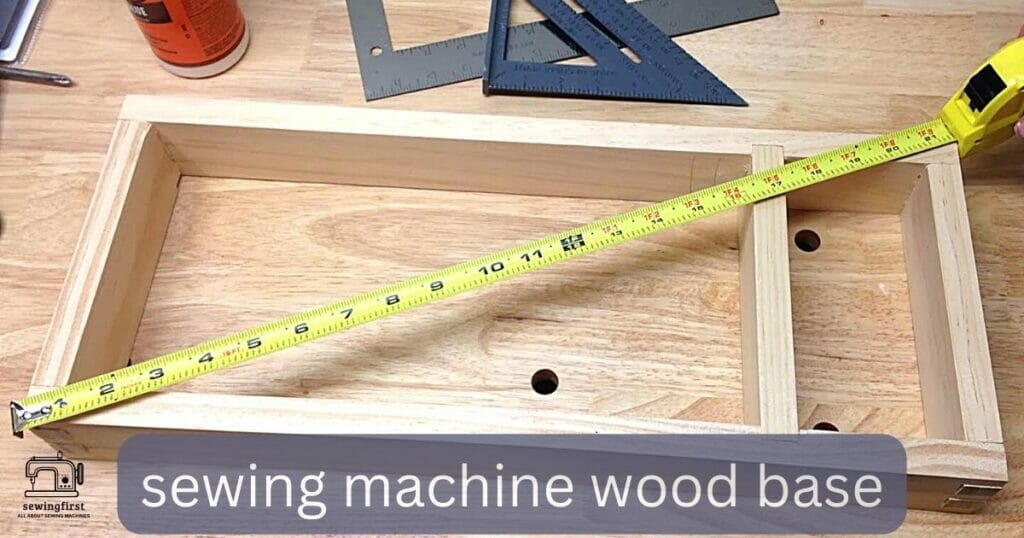
Step 1: Cut the Wood Pieces
Start by cutting the wood pieces to size. The first piece should be about 12 inches long and 8 inches wide. Next, cut another piece of wood that’s about 6 inches long and 6 inches wide. Finally, cut the third piece of wood that’s just slightly longer than the length of the first piece.
Step 2: Drill Holes
Drill three evenly spaced holes along the bottom of the first piece of wood. Use a drill bit that’s about ¼ inch larger than the diameter of the threaded rod.
Step 3: Glue the Wood Pieces Together
Apply wood glue to both sides of the second piece of wood. Place the glued side down on top of the first piece of wooden board. Let the glue dry completely before moving on to the next step.
Step 4: Insert the Rod Through the Holes
Insert the threaded rod through the three drilled holes. Slide the rod all the way through so that it protrudes out of the end of the wood.
Step 5: Sand the Wooden Board
Sand the wooden board until smooth.
Step 6: Finish the Project
Use finishing nails or finish nails to attach the last piece of wood to the first piece.
You’ve made a great sewing machine base at home. Now, you can enjoy hours of stitching without worrying about damaging your precious sewing machine.
Conclusion
Singer sewing machines are an excellent choice for those who need a machine that is reliable and durable. However, when you first buy a Singer sewing machine, you might notice that its base looks worn out.
This is because the base has been exposed to moisture and dirt for quite some time. To restore the base, simply clean it thoroughly using soap and water.
Once you’ve done that, apply a thin layer of oil to protect the base from further damage. After that, you can put the base back where it belongs.
FAQs
Can you buy sewing parts online for the sewing machine restoration?
Yes, you can purchase sewing machine parts online. There are many websites that sell sewing machine parts. Some of them offer free shipping while others charge a small fee like eBay, Amazon, etc.
Do antique sewing machine parts are still available today?
Yes, they are still available. If you want to get sewing machine parts, you can visit any local store or search online.
Do vintage sewing machine parts are still available today?
No, not really. Vintage sewing machine parts have become rare due to the fact that most people don’t use their old sewing machines anymore.
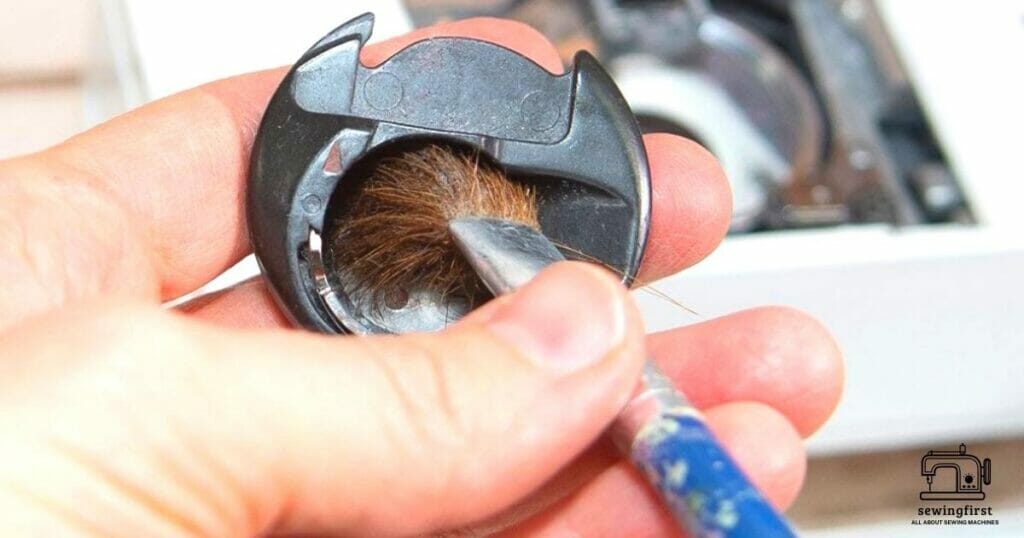
How to clean the bobbin during sewing machine base restoration?
Bobbins are used in sewing machines to hold the thread. When you’re restoring a sewing machine base, you’ll need to remove the bobbin case. This will allow you to access the bobbin easily.
To do this, you’ll need to unscrew the bobbin case. Once you’ve removed the bobbin case, you can then wipe the bobbin with a damp cloth.
