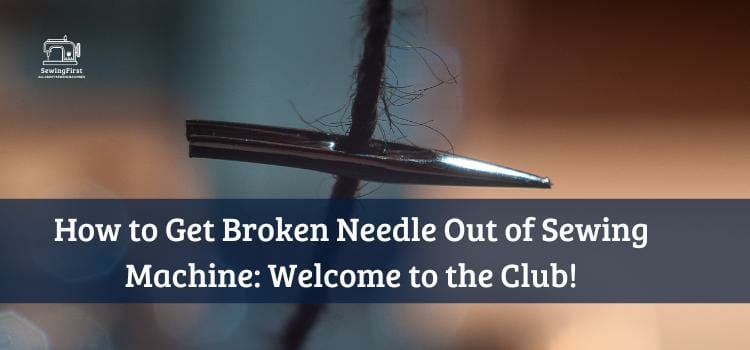
Have you ever been sewing and suddenly felt the needle break? It’s a common problem that many sewers experience. Take Rachel, for example. She was working on a dress she had vowed to finish in time for her friend’s wedding when it happened—the needle broke right in the middle of her project!
In this article, we will discuss how to get broken needles out of your sewing machine so you can continue with your projects without fear of further damage.
The good news is that retrieving a broken needle from your sewing machine isn’t as difficult as it seems. With some patience and knowledge about what tools are necessary, anyone can successfully remove a broken needle from their machine. We’ll explore exactly how to get broken needle out of sewing machine and what steps need to be taken and which tools should be used to guarantee success.
Related topic: How To Tell If Your Sewing Machine Needle is Dull? Check This Before You Sew!
Table of Contents
ToggleCommon Problems Causing A Needle Break
Believe it or not, a broken needle in your sewing machine is surprisingly common. It’s almost like the universe was conspiring against you when you started that project!
Even so, understanding why needles break and how to remove them can help save time and frustration when this happens again. So let’s dive into what causes needle breaks and some solutions for removing them from your sewing machine.
The first thing to understand about needle breaks is that there are several potential culprits – from improper thread tension to an incorrectly aligned needle plate or needle bar.
When any of these factors cause the needle to bend or snap off during use, it becomes lodged inside the machine and needs to be removed before further stitching can occur. If you suspect one of these issues is the cause of your broken needle, take a few moments to double-check everything before attempting removal.
In addition, bobbin thread may also be responsible if it gets tangled around the shaft of the needle while being wound onto the spool pin. This extra pull on the thread causes increased strain on the needle tip leading eventually to its breaking off inside of your sewing machine.
Inspecting and cleaning out the bobbin case regularly will help prevent this type of issue from occurring in future projects.
Knowing all possible causes for a broken needle helps us better prepare for their eventuality – but now comes actually getting rid of them! Read on for tips and tricks on how to safely get that pesky piece out without damaging your beloved sewing machine.
How To Get Broken Needle Out Of Sewing Machine?
If you’ve ever experienced a broken needle while sewing, you know the distress it can cause. It’s important to remove the piece of a needle from your machine as soon as possible; otherwise, it could lead to further damage. Fortunately, getting a broken needle out of a sewing machine is relatively easy if done correctly.
- The first step in removing a broken needle from your machine is to check the needle plate for any pieces that may have been left behind.
- If there are any visible fragments, use tweezers or pliers to grab them and pull them out carefully.
- Make sure not to push too hard on the needle plate or you could risk damaging other components of the machine.
- Also, inspect your current sewing machine needle – chances are that this was the wrong type of needle for your project and likely caused the breakage.
- Replace it with a special needle designed specifically for whatever material you’re working on so that future breaks don’t occur again. Once everything has been checked over, sew away!
It’s worth taking time when dealing with a broken needle issue since improper handling can lead to bigger problems down the line. Take these precautions and you’ll be back up and running in no time!
When To Change Your Needle
Changing a sewing machine needle might just be one of the most important things you can do to help keep your machine running smoothly. Without an up-to-date and correctly installed needle, your projects will suffer from skipped stitches, broken thread, and even total stitch failure!
When changing out needles, make sure that the type of needle matches what is recommended by the manufacturer of your particular sewing machine. It’s also very important to ensure that you’re inserting it into the correct position on the needle plate; if not, there’s no telling how much damage this incorrect installation could cause.
Once inserted properly, double-check that the needle hole lines up perfectly with the groove in the needle plate before giving it any tension.
Doing regular maintenance on your tools should always include making sure they have fresh and suitable parts. Keep track of when each part needs replacement so you never have to worry about being caught off guard again!
How To Replace A Sewing Machine Needle
Changing your sewing machine’s needle can be an intimidating task, but with a few simple steps, you’ll soon be able to do it like a pro. Before we get into the how-to, let’s look at what types of needles are available and which one is best for your project.
There are different types of needles made specifically for various fabrics and materials. If you choose wrong, there’s a good chance that it will break or not perform as expected. Understand the material you’re working with so that you can select the most suitable needle before beginning any project.
Once you’ve decided on the right needle,
- Start by loosening the needle plate screws with a screwdriver and taking off the plate cover to reveal the needle shaft and clamp.
- Make sure that when inserting your new needle, its flat side faces backward–inserting it in the wrong direction may cause damage to both your machine and fabric.
- Then insert it all the way down until it reaches the bottom and tightens firmly using your finger or pliers if needed. When done correctly, replacing your sewing machine’s needle is easy!
Now that you know how to change out a broken needle quickly and safely, check out our next section on tips for avoiding future breakage.
Needle Breakage Checklist in 9 Steps
Maintaining a sewing machine needle is an essential part of successful stitching. It’s important to take some steps to avoid the unfortunate event of a broken needle in your machine. With this 9-step checklist, you can be sure that you’ve taken all necessary precautions to make sure your project goes as smoothly as possible!
By following these simple steps each time you begin working on a new project, you’ll greatly reduce your chances of experiencing unexpected needle breakage while stitching. So take a few moments now and double-check everything so that your next piece will have perfect results!
1- You’re Using The Wrong Needle
It’s quite common for sewers to experience frustration when their needle breaks. But it doesn’t have to be an inevitable part of your sewing journey – understanding the type and size of the needle that you should use can help prevent those pesky needle breakages from occurring in the first place!
When selecting the right needle, there are a few things you need to take into consideration. Firstly, make sure that you know what type of sewing machine you’re using as this will determine which needles will fit your machine; some machines require special needles so check with the manufacturer or manual for more information on this.
Secondly, consider the weight and fabric type that you’re planning to work with – each needle has its own unique characteristics, such as having a sharp point or a ball-point tip. You also want to ensure that any chosen needle is compatible with your machine’s existing needle plate prior to starting your project.
Finally, don’t forget about the size of the needle: if it’s too large then it won’t fit through the fabric properly and could cause problems like skipped stitches or even damage to the material itself.
On the other hand, if it’s too small then there is an increased risk of breakage and jamming inside your machine. So always double-check before purchasing new needles to make sure they’re suitable for your particular type of stitching job.
We’ll cover how to get those broken needles out safely in our next section!
2- Your Needle isn’t Inserted Properly
It’s possible that your needle isn’t inserted properly into the sewing machine. Let’s investigate this theory to uncover if incorrect positioning of the needle is really the cause behind a broken needle issue.
To begin, locate and carefully remove the needle plate cover from the front of your machine. This will reveal the open area where you’ll be able to see if there are any signs that indicate an improper insertion of the needle.
Look for discrepancies between how far in or out, up or down, and left or right the bit of the needle has been positioned within its screw hole on top of the needle plate. If it looks like your needle wasn’t placed correctly prior to use – maybe too deep into its slot or not at all – then this could explain why it broke during the sewing operation.
A misaligned position can create added tension on certain areas of a thin metal shaft as stitches are formed with each pass, causing eventual breakage.
You may need to further assess other components such as bobbin case, thread tensions, etc., but correcting an incorrectly set needle should take precedence over everything else here as it likely plays a major role in preventing future issues.
3- Your Needle isn’t Positioned Correctly
When your needle isn’t positioned correctly, it can cause problems like a broken needle in the sewing machine. To fix this issue, you need to locate the needle plate and remove the needle holder.
The needle clamp screw will be visible once you’ve removed the holder, allowing you to loosen it so that you may take out the broken bit of the needle.
It’s important to carefully inspect the remaining parts – if any pieces of the old needle are left behind, they could cause similar issues or even damage other components of your machine. You’ll also want to make sure there is no loose thread stuck inside before inserting a new sharpened one into its place.
Once everything is clear, all that’s left to do is put back together what was taken apart and tighten up the screws securely!
This should ensure that when next time you use your sewing machine, you won’t have to worry about another unexpected breakage due to an incorrectly fitted needle. Moving forward with a properly prepared machine will help prevent future needles from breaking as well.
4- Your Needle is Damaged, Dull, Old, Or Bent
The needle is the essential part of any sewing machine, like a swordsman and his weapon. If your needle is damaged, dull, old, or bent, it’s unlikely you’ll be able to get the desired results with your project. Here are some tips on what to do when this occurs:
- Check if the needle isn’t sitting in its slot properly – take off the needle plate and make sure that it has been correctly inserted back into place.
- See whether there is a jammed needle stuck inside the bobbin case – if so carefully remove it using tweezers.
- Investigate if you have been using an overly-heavy duty thread or fabric, which may require lighter needles for smoother stitching progress.
If none of these solutions seem to work, then chances are you will need to replace either the entire needle or just its tip.
To check if this is needed, hold a loose needle next to yours and compare them side by side – look out for blunt edges or bends as they could cause problems while working with the material.
In worst cases scenarios where replacing doesn’t help either, consider taking your sewing machine in for repair services from professionals who can provide more precise advice tailored to your specific model and situation.
5- Your Sewing Machine isn’t Threaded Correctly
Pulling out all the stops, it is time to check whether your sewing machine isn’t threaded correctly. Just like a jigsaw puzzle, you need to make sure each piece of the threading process fits in together for efficient stitching.
Start by locating the needle plate, upper thread spool pin, presser foot holder, and built-in needle threader on your sewing machine. It could be that these pieces are not properly connected or that they were never put into place during assembly.
You may also want to consider switching up your heavier needle as this can cause misalignment with the threads if the size does not match up well with the other components of your sewing machine.
If so, change it back to what was originally provided when you bought the machine. Make sure everything is firmly attached and secured before testing out a few stitches!
If none of these steps seem to address the issue at hand, then perhaps something else is causing an improper alignment between parts; possibly even tension errors within the threads themselves.
Continue troubleshooting until you have pinpointed exactly where things are going wrong – then let’s get those needles moving again!
6- Your Thread Tension is Too Tight
The broken needle in your sewing machine could be caused by more than just an incorrectly threaded bobbin. Maybe the thread tension is too tight? It’s worth considering if you want to get that pesky needle out and back to stitching! Let’s explore this potential culprit further.
In order for a straight stitch to work correctly, the upper and lower tensions need to be balanced. If the bobbin tension is too tight, then heavier fabrics or thicker threads may cause it not to sew properly and even break needles. To solve this issue, loosen up the bobbin tension of your machine before attempting any other adjustments.
If loosening up the bobbin tension doesn’t work, try inspecting the needle shaft bushing inside your machine as well. This part holds the needle in place during operation and can become worn over time causing needles to break due to excessive shaking while sewing.
Replacing this piece would help ensure that your stitches are always secure and free from those dreaded broken needles!
Before assuming something else might be wrong with your machine, check first whether adjusting your bobbin tension and/or replacing the needle shaft bushing will alleviate this problem. With these two pieces taken care of, you’ll soon be able to put away your worries about broken needles once and for all!
7- You’re Using the Wrong Thread
It’s like a needle in a haystack: it can be hard to find the solution when you have a broken sewing machine needle. When lightweight fabrics are involved, this delicate problem needs to be addressed with care and attention to detail.
You can start by determining if you’re using the correct type of needle for the fabric weight. If not, switching out needles is an easy fix that might just solve your dilemma.
However, if you’ve already checked the needle type, then take a look at the horizontal spool pin where your thread is secured. Maybe it isn’t properly attached leading to breakage as you sew. Grab some screwdrivers and do some troubleshooting – make sure everything is in its proper place!
If all else fails, don’t fret; there may be other steps that need to be taken to get that pesky needle out of your sewing machine. Keep reading for more tips on removing broken needles from your beloved device so you can keep stitching up those lightweight fabrics without the worry!
8- The Spool Pin is Not Properly Securing Your Thread
Do you know what kind of trouble can arise when your thread isn’t properly secured on the spool pin? Sewing machines demand a lot from their users, and it’s important to make sure that any potential issues have been taken care of. In this case, let’s look at what happens when the thread isn’t properly secured on the spool pin.
When using a sewing machine, if you don’t secure the thread onto the spool pin correctly, it could cause some serious problems. The throat plate might get clogged up with a Bakelite brush or bits of a leather needle – leading to an aggravating jam-up in your machine!
Not only can it be extremely difficult to remove these items once they’re caught in there, but it may even require professional assistance to truly fix the problem.
The best way to avoid all of this is by making sure that everything is running smoothly before starting a project – particularly checking if your thread is securely attached to its spool pin.
This will ensure that no mishaps occur during your work session and save time trying to tackle any jams down the line. With proper maintenance and attention to detail for things like securing threads onto their respective pins, you’ll be better equipped for success with your sewing projects!
9- Your Sewing Machine Hasn’t Been Properly Maintained
Like a rusty machine that needs oiling, your sewing machine’s needle can become stuck and broken if it isn’t properly maintained. It may feel like you’re hitting a brick wall when trying to fix this issue, but there are steps you can take to get the needle out of its original position.
To rid yourself of this pesky problem, here are four items you should do:
- Check for any debris or dust inside the bobbin area.
- Make sure the presser foot is raised while pulling on the thread gently.
- If necessary use tweezers to remove the broken piece of needle carefully.
- Take extra caution not to damage other parts of the sewing machine in the process.
If done correctly, getting a broken needle out of a sewing machine does not need to be an arduous task after all! With patience and proper maintenance, fixing your beloved sewing buddy will soon have you back up and running with successful stitches once again – no more needles in sight!
Sewing Machine Needle Breakdown: What Do You Do?
When your sewing machine needle breaks, it can be a frustrating experience. It feels like you’ve suddenly hit a dead end in the middle of your project. But don’t despair – there are several ways to get that broken needle out of your machine and keep on stitching!
First off, turn off and unplug your machine before attempting any repairs. For safety reasons, it’s best to never work with an electrical device while it is connected to power.
Next, take out the bobbin case from inside the stitch plate and inspect for any parts or pieces of the broken needle. If any were left behind, carefully remove them using tweezers or pliers and then proceed to:
- Gently tap the outside of the stitch plate with a plastic hammer;
- Insert a piece of thin wire into the hole where the needle was located;
- Twist some thread around one end of a pair of curved long-nose pliers;
- Carefully pull up both sides of the broken needle until it comes loose.
These steps may require a bit of patience but they will help you retrieve that pesky broken needle quickly so you can get back to creating! Plus, taking time to perform regular maintenance on your sewing machine will reduce incidents like this happening in future projects.
Conclusion
To conclude, broken needles in sewing machines can be a tricky problem to solve. However, if you keep the nine-step checklist for avoiding needle breakage in mind and make sure that all parts of your machine are properly maintained and secured then this shouldn’t be an issue.
With knowledge, patience, and some creative thinking, even the most tangled thread knot or stuck needle can be untangled or removed from the system safely. So don’t give up – where there’s a will (and a few good tools) there’s a way!
FAQs
How do you remove a broken sewing machine needle?
1. Unplug the machine and turn it off.
2. Carefully use tweezers to remove the broken needle from the machine.
3. Clean the area where the needle was and remove any small pieces of the broken needle.
4. Re-thread the machine and replace the needle.
How do you get a stuck needle out of a sewing machine?
If a needle is stuck in a sewing machine, it is best to unplug the machine before attempting to remove the needle. With the machine unplugged, use a pair of needle-nose pliers to gently pull the needle out.
If the needle is very stuck, use a soft cloth to protect the needle and try to slowly twist the pliers until the needle comes out. Once the needle is removed, check the needle plate and bobbin area for any debris that may have caused the needle to get stuck.
What happens if you break the needle on a sewing machine?
If you break the needle on a sewing machine, it is best to immediately stop using the machine and inspect the needle for any fragments. If any fragments are found, they should be carefully removed from the machine before continuing to use them. If the needle cannot be removed, it should be replaced with a new one.
What to do if you break a needle?
If you break a needle, the best thing to do is to carefully remove it from the fabric and discard it. If possible, try to minimize the amount of thread that is left behind. Once the needle has been safely removed, replace it with a new needle before continuing with your project.
My Needle Broke And Fell Into The Machine – Singer XL550
A tip on how to get the broken needle out of your machine.