
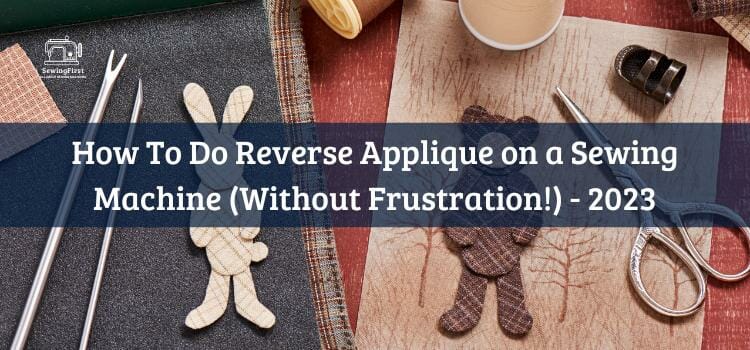
Do you have a subconscious desire for innovation when it comes to your sewing projects? If so, reverse applique might be the perfect technique for you. This method of stitching involves taking two layers of fabric and cutting away an inner layer to reveal the color underneath.
The result is an eye-catching design that looks as if it took hours to create! With just a few steps and some basic embroidery supplies, this project will take your garments from ordinary to extraordinary in no time.
In this article, I’ll walk you through the process of how to do reverse applique on a sewing machine. Keep reading and get ready to wow with one-of-a-kind pieces!
Related Topic: How to Make a Rope Basket Without a Sewing Machine: Easier Than You Think!
Overview
Reverse applique has been around for centuries but only recently gained popularity among sewers due to its unique look and fast results. It’s also incredibly simple: all you need are scissors, pins, thread, and two coordinating fabrics – plus your trusty sewing machine!
You can use any type or weight of fabric depending on what kind of garment you’re making. From lightweight cotton and knits to heavier wools and denim – whatever works best for your project should work fine here too. Plus, because there’s minimal hand stitching involved, even beginner sewers can achieve professional-looking results easily.
Once you’ve gathered all the necessary materials, it’s time to get started on creating fabulous fashion statements with reverse applique!
Whether you want something subtle yet stylish or bolder designs for special occasions like proms or weddings – there really isn’t anything holding you back from creating amazing masterpieces at home. Get set up at your machine and let’s dive into this fun way of embellishing handmade clothes!
What Is Reverse Applique?
Reverse applique is a creative and innovative technique of sewing that allows you to make beautiful, intricate designs on fabric. It involves cutting the top layer of fabric away to expose the background fabric underneath. To get started, all you need is your trusty old sewing machine, some sharp scissors, and two pieces of contrasting fabrics for the foreground and background layers.
The process begins by deciding what shape or design you would like to cut out from the top layer, then trace it onto the wrong side with a pencil or tailor’s chalk. Once this template has been created, place it between the two pieces of fabric so that they are right sides together and secure them in place using pins.
Finally, sew along the outline of your traced design with a zigzag stitch – taking extra care not to sew beyond its edges! This creates an anchor stitch which will keep both layers securely attached as you cut away sections of the upper layer. After trimming away any excess threads, you have successfully completed one reverse applique project!
Now that we understand what reverse applique entails let’s move on to creating our applique template…
Creating The Applique Template
Now that you know what reverse applique is, let’s talk about how to create an applique template. To get started, you’ll need a piece of sturdy paper or fabric for the pattern and some freezer paper or other templates to place over it.
You can use any type of paper pattern for this project – from simple shapes like circles and squares to more intricate designs. Once your pattern is ready, hoop your stabilizer with the wrong side facing up, and then trace the design onto the hooped stabilizer using a pen or pencil.
Once your pattern is traced, cut out each individual piece along the lines you drew on the stabilizer. Now layer these pieces one-by-one in order onto your chosen fabric with the right sides facing up.
Make sure to leave extra room between each piece so they don’t overlap when sewing them down later. Finally, pin all of the layers securely together before taking them to your machine to begin stitching down the applique pieces. With a few basic tools and supplies, creating an applique template couldn’t be easier!
Preparing The Fabric
It’s essential to prepare the piece of fabric that you want to use for reverse applique. Start by laying down a layer of fabric, and then place another piece on top. With your sewing machine set with straight stitches, start stitching along the edges of both pieces together.
This is an important step in mastering reverse applique techniques. Once you have stitched around the layers of fabric, trim away any excess fabric from around the edge so it looks neat and tidy.
Then shift your focus to attaching the template onto the second layer of fabric which will be used as a guide when cutting out shapes or patterns into the first layer – this process is what creates those beautiful designs! To ensure accuracy and precision, mark off a few inches beyond where you plan to cut, making sure everything is well secured before beginning this final phase.
Attaching The Template To The Fabric
First, I’ll need to prepare the fabric layers. Place the appliqué fabric and the background fabric right sides together. Pin them securely in place and press them with an iron. Then, take a piece of scrap fabric that is slightly larger than my template size and place it underneath both pieces of fabric. This will prevent any lines from showing on the wrong side due to machine stitching.
Next, I’m ready to attach my template to the top layer of fabric using pins or a basting glue stick. Make sure all edges are secure before starting to sew around it with a zigzag stitch and matching thread color. For extra stability, go over each line twice if needed; this will create a nice clean edge for your design shape.
Finally, once I have sewn around all sides of my template shape, I can start cutting away excess fabric inside the marked area carefully – leaving enough seam allowance so that my stitches don’t pull apart when finished!
Cutting Away Excess Fabric
Reverse applique is an exciting way to add texture and depth to a sewing project, and it’s not as hard as you may think! According to the Craft Council, reverse applique has been used for centuries in embroidery. Here are four easy steps for how to do reverse applique on a sewing machine:
- Pin fabric layers together with the right sides facing each other.
- Trace the template design onto the wrong side of the top layer using satin stitches or regular applique techniques.
- Cut away the excess fabric from the bottom layer along traced lines.
- Decorate the edges of the cutout by painting them with fabric paint or manipulating the raw edges with additional fabrics.
Now that your base shape is ready, it’s time to transfer the template design to a sewing machine. To achieve this, simply stitch around the edge of your cut-out using decorative stitching.
Transferring The Template Design To A Sewing Machine
Now that you’ve gathered all your materials, it’s time to transfer the template design onto the sewing machine. To do this, begin by laying out your featured fabric on a flat surface and pinning down the appliqué fabric of choice in place with pins.
Then, use a fabric marker or tailor’s chalk to trace the outline of the pattern onto the appliqué fabric so that when sewn together, it will match up perfectly with the featured fabric underneath.
When doing reverse applique on a machine, the stitching should be done from the right side of the fabric for the best results. Therefore, make sure you have traced everything clearly because any mistakes can easily be seen once finished!
Once everything is marked out accurately, carefully remove both pieces from each other while leaving pins in place to keep them properly aligned. This way they won’t shift as you stitch them together later.
The final step before beginning your stitching project is to attach an embroidery presser foot onto your machine if necessary; some machines come equipped with one already installed but others may require manual attachment depending on make and model.
After ensuring that the proper presser foot is attached and ready to go, you’re now ready to choose thread and needle size – two very important factors in successful traditional applique projects!
Choosing Thread And Needle Size
The selection of thread and needle size for reverse applique on a sewing machine is like picking the right paint brush to create a masterpiece. To start, using satin stitching will provide a decorative finish that reinforces the fabric layers and seam allowance.
Opting for an eyelet fabric can also add some subtle sparkle to your design. Lastly, if you’re looking for something more rustic or shabby-chic then use a blanket stitch instead – it’ll give your project that chic vintage look!
With so many options available, you’ll be able to find the perfect combination to make your vision come alive. Now let’s get started with stitching around the template design – let creativity take center stage!
Stitching Around The Template Design
Now that you’ve selected the perfect thread and needle size for your reverse appliqué project, it’s time to get stitching. Here is a guide on how to stitch around the template design:
- Trace your embroidery design onto the right side of the fabric using the tailor’s chalk or disappearing ink pen. Make sure to trace the pattern 1 inch larger than its original size.
- Pin another piece of fabric behind the traced pattern and secure it with pins along the outside edges.
- Set up your sewing machine and use a straight stitch setting to sew along the outer edge of the pattern while keeping both layers taut as you go. The stitches should be close together and run through both layers of fabric so they are visible from either side when complete.
- Once completed, carefully trim away any excess fabric from inside the design including all extra seam allowance but leave enough room for maneuvering if needed. This will reveal the hidden layer of fabric underneath which has been stitched into place revealing an intricate heart shape!
Removing Excess Fabric From Inside The Design
Reverse applique is a unique sewing project that can add an interesting dimension to any garment or home decor item. To begin, you will need one appliqué fabric piece of your choice and one base fabric that is both compatible with each other in terms of textile weight and construction.
According to The Spruce Crafts website, the most popular fabrics for reverse applique include lightweight cotton, linens, silk, chiffon, and organza. Once your two fabrics have been chosen, place them right sides together on top of each other and pin them into place.
Cut out the design you would like from within the layers using sharp scissors or a rotary cutter, taking care to make sure all edges of the cut-out shape match up perfectly so that when finished, it looks as though it were made with one single layer of fabric.
Then take away the excess pieces from inside the design – be careful not to accidentally snip off any cuts made around its outline! With this step complete, you’re now ready to secure these raw fabric cut edges with a satin stitch.
Securing Edges With Satin Stitch
Now that you have your t-shirt fabric, black fabric, and pattern pieces cut out and pinned together, it’s time to get started. I recommend using a whip stitch to secure the edges of the applique before stitching with a satin stitch. This will make sure everything stays in place while you sew.
To do this, simply run a line of stitches along the outside edge of the applique using two strands of thread from your cotton fabrics. Make sure to keep your stitches small and even for the best results!
Once that’s done, switch over to a satin stitch on your sewing machine. Set the length so it’s about 2mm long or shorter if possible – this creates an extra tight bond between the layers of fabric by compressing them down around each stitch.
You’ll also want to use slightly finer dress fabric when working with satin stitching as well; otherwise, it can create too much bulk and pull away from your project.
Start at one corner and work your way inward until the entire shape is filled in with stitches. To finish up, carefully trim any excess threads or fraying edges after completing your satin stitched piece. Doing this now will save you lots of time later on when doing any finishing touches on the applique!
Finishing Touches On The Applique
Let’s say you’ve just finished your reverse applique project and are ready to put the finishing touches on it. You can add a few fabric embellishments, like pom-poms or tassels, to make the design stand out even more. Here are some other ways to personalize your applique:
- Sewing Pieces Together: Use extra pieces of fabric from both the print and applique fabrics to create a unique look. Stitch them together in different shapes and sizes for added texture and depth.
- Embellish with Threads: Give your project an extra artistic touch by stitching threads in various patterns and designs over the top of the existing work. This will create an eye-catching effect that is sure to draw attention.
- Add Trim or Lace: If you’re feeling creative, try adding trims or laces around the edges of your appliqued design. This will give it an elegant look while also making it one-of-a-kind!
With these simple ideas, there’s no limit to how creative you can get when finishing up your reverse applique projects. Now let’s explore some creative variations on reverse applique.
Creative Variations On Reverse Applique
Reverse applique is a great way to add interest and texture to any sewing project. With some creative variations, you can take this technique to the next level!
To begin with, you don’t have to use just one layer of fabric for your reverse appliqué; why not try combining two or more fabrics together? This adds an unexpected element that really catches people’s attention.
You could also experiment with hand-stitching instead of using a sewing machine – it gives a look that is unique and rustic. Another idea is to play around with different shapes and sizes when cutting out the top layer of fabric, as this will create interesting patterns in the background layer once it’s been stitched down.
All these techniques can be done on a regular sewing machine – there are no specialized tools required! However, if you want something extra special, there are lots of fun tools available specifically designed for reverse appliques that make creating intricate details easier.
Specialized Tools For Reverse Applique Projects
Creating reverse applique projects on a sewing machine requires several specialized tools. From fabric scissors to marking pens, each tool plays an important role in making your project come together perfectly. Here are some of the most essential supplies for completing any reverse applique project successfully.
Sewing Machine – Any type of sewing machine will work for reverse applique, but you may want to invest in one that has adjustable stitch length and width capabilities so you can adjust it to fit your project’s needs. A walking foot attachment is also helpful when working with multiple layers of fabric while dressing the fabric up or down as needed.
Fabric – You’ll need at least two different types of fabrics for this type of project: a sturdy backing fabric like wool felt or cotton canvas; and a lighter-weight top layer such as quilting cotton or linen.
When selecting your fabrics, consider how they coordinate with each other and if they have contrasting textures that will add dimension and interest to your finished piece.
Markers – Marking pens are used to draw out designs on the top fabric before stitching them into place. Water soluble markers are great for temporary lines and disappearing ink markers leave behind only faint markings after stitching them out.
Specialty tools such as tracing wheels, tailor’s chalk, needles, pins, clips (or wonder clips), thimbles, tweezers, and seam rippers can all be useful when crafting reverse applique projects too! Now that we have our necessary tools in order let’s move on to tips for working with multiple layers of fabric.
Tips For Working With Multiple Layers Of Fabric
When working with multiple layers of fabric for a reverse applique project, it’s important to consider the type of fabric you’re using.
Natural fibers such as wool and cotton will tend to shrink when exposed to heat, so be sure to pre-wash your fabric before sewing.
- To make things easier on yourself, try layering two pieces of second-hand fabric together—this way you don’t have to worry about one layer shrinking more than the other!
- Additionally, use an extra wide stitch length and backstitch at both ends when securing each seam; this helps keep all fabrics from shifting while stitching them together.
- Using the right needle size is also essential in avoiding skipped stitches and frayed edges. Generally speaking, heavier fabrics require bigger needles and lighter fabrics require smaller ones.
- You’ll also want to opt for sharp or ballpoint needles if you’re dealing with stretchy material like lycra or jersey knit.
- Finally, always double-check that you haven’t caught any additional layers of fabric in the stitch by pressing down lightly around each seam after sewing—this step can help avoid unsightly puckers in the finished product!
With these tips in mind, you should feel confident working with multiple layers of fabric for your next reverse applique project.
Advantages Of Using A Sewing Machine For Reverse Applique Projects
Now that you understand the basics of working with multiple layers of fabric, it’s time to tackle a reverse applique project. This technique involves cutting away certain sections of fabric and stitching them back together for an interesting layered effect.
- A sewing machine helps streamline this process so you can quickly create intricate designs on your apparel or home decor projects.
- Using a sewing machine makes reverse applique faster than hand-sewing techniques since you can use different stitch settings to customize the look.
- You’ll also be able to better control how tight or loose each stitch is by adjusting the tension setting on your machine. Additionally, some machines may come with special feet attachments that make cutting out shapes easier and more precise.
- Plus, if you want to add decorative elements like beads or sequins, then having a sewing machine gives you another creative option for embellishing your design.
- Having access to a reliable sewing machine can really open up new possibilities when it comes to reverse applique projects.
Not only will you benefit from being able to work through these projects much quicker but it also provides the freedom to experiment with various types of fabrics and textures as well as explore different kinds of stitches for added texture and complexity in your creations. With all these advantages, there’s no reason not to bring out your inner artist!
Conclusion
Reverse applique is a creative and exciting way to add texture and dimension to your sewing projects. Using a sewing machine, you can create unique designs with multiple layers of fabric that are sure to impress even the most experienced sewers. With the right tools and techniques, reverse applique projects become much easier and more enjoyable!
One interesting statistic about using a sewing machine for reverse applique is that it can save up to 42% of the time spent on hand-stitching compared with traditional methods. This makes it an incredibly efficient method for creating intricate pieces in minimal time – perfect if you’re looking for quick results without sacrificing quality.
You get all the benefits of working with several layers of fabric while still being able to use modern technology such as a machine’s embroidery foot which allows you to quickly stitch out detailed patterns with ease. So why not give reverse applique a try today? I’m sure you won’t regret it!
FAQs
What setting do you use on a sewing machine for applique?
Most sewing machines have a zig-zag stitch setting that is specifically designed for applique. You can adjust the width and length of the stitch to get the desired effect.
What is the best sewing machine stitch for applique?
The best stitch to use for applique is a satin stitch. This is a very strong and durable stitch that will ensure your applique stays in place. It is also very decorative, giving your project a professional finish.
What is reverse applique textile technique?
Reverse applique is an artistic textile technique in which one layer of fabric is cut away to reveal another layer of fabric underneath. The process involves cutting into the top layer of fabric and folding back the edges, then stitching it in place. This technique is often used to create intricate designs and patterns on fabric.
What is the easiest way to applique?
The easiest way to applique is to use a fusible web such as HeatnBond or Steam-A-Seam. This will allow you to quickly and easily layer fabrics together and then press them with a hot iron to permanently fuse the layers together.
What size needle is best for applique?
The size of the needle used for applique depends on the type of fabric being used and the thickness of the threads being used, but a size 9 or 10 sharp needle is usually best.
What size needle should I use for machine applique?
The size of the needle used for the machine applique will depend on the weight of the fabric being used. Generally, a size 75/11 or 80/12 needle is recommended.
What are the two types of applique?
The two types of applique are needle-turn applique and fusible applique. Needle-turn applique is a technique in which fabric is hand-sewn onto a background fabric with a needle and thread and then turned under to create a neat edge. Fusible applique is a method of applique in which fabric pieces are glued to a background fabric with a heat-activated adhesive.
What are the methods of applique?
1. Needle-Turn Applique: This is the traditional method of hand applique, in which fabric is held in place and sewn down with a slip stitch.
2. Reverse Applique: This method involves cutting away layers of fabric and then stitching them down.
3. Machine Applique: This method uses a sewing machine and zig-zag stitch to attach fabric to a background fabric.
4. Fused Applique: This method involves fusing fabric shapes to a background fabric before stitching.
5. Raw-Edge Applique: This method involves cutting fabric into shapes and then stitching them around the edges without turning under the raw edges.
