Do you own a Brother sewing machine? Are you looking for an easy way to create perfect buttonholes every time? Then look no further! With just the right presser foot, your sewing projects will become so much easier.
In this article, we’ll explain how to use buttonhole foot on Brother sewing machine and why it’s the best tool for creating beautiful buttonholes quickly.
If you love quilting or dressmaking, then having access to the right tools is essential if you want to make quality garments. The buttonhole foot was designed specifically for making perfectly sized buttonholes in all kinds of fabrics from cotton knitwear to thick woolen coats.
It helps ensure that each buttonhole looks neat and professional without any unsightly stitching errors. Plus, it can save time by allowing you to sew multiple buttonholes at once with ease.
For those who are new to using a Brother sewing machine, learning how to use the buttonhole foot correctly can be daunting – but don’t worry! This article provides step-by-step instructions on how to attach the foot and thread up your machine correctly so that you can start creating amazing pieces of clothing with ease. So let’s get started!
Related Topic: What is a Free Arm on a Sewing Machine? Learn The Difference Now!
What Is A Buttonhole Presser Foot And What Does It Do?
A buttonhole foot is an attachment used with a sewing machine to make buttonholes. It is designed to guide the fabric evenly when creating the buttonhole so that the stitching is even and precise. The foot is attached to the machine and then the fabric is placed underneath it.
The machine then automatically sews the buttonhole with the correct size and shape. Buttonhole feet are available for most sewing machines and come in a variety of sizes and shapes for different applications. Buttonhole feet can also be used to make other types of embellishments such as scalloped edges and decorative stitching.
Prepare Your Brother Sewing Machine For Making The Buttonholes
Many sewers may think that using a buttonhole presser foot on their sewing machine is too difficult. However, with the right preparation and knowledge, anyone can easily use this type of foot to make beautiful buttonholes!
Before beginning your project, it’s important to ensure that you have all the proper supplies – like an appropriate size for your sewing feet or embroidery machine – as well as familiarize yourself with both the sewing machine feet and its manual.
Ensure that your chosen sewing foot is suitable for making buttonholes by checking whether it has a transparent plastic guard at the front. This will help prevent the fabric from getting caught up in the bobbin area while stitching out each hole.
Additionally, if there are any specific instructions provided by the manufacturer regarding how to attach this foot to your machine, be sure to follow them closely before proceeding.
When attaching the presser foot correctly, it should fit snugly into place on top of your needle clamp screw and remain relatively stable when used on thick fabrics such as denim or canvas.
If needed, refer back to your sewing machine manual for further information about adjusting tension settings and other techniques related to operating this particular accessory. With everything prepped and ready, now comes the fun part: positioning the presser foot onto your fabric so you can start creating stunning buttonholes!
Position The Presser Foot On Your Fabric
Positioning the presser foot correctly is key for completing a buttonhole correctly. Before putting it in place, check that your Brother sewing machine has the correct variant combination; otherwise, you might get an invalid variant combination message when attempting to sew.
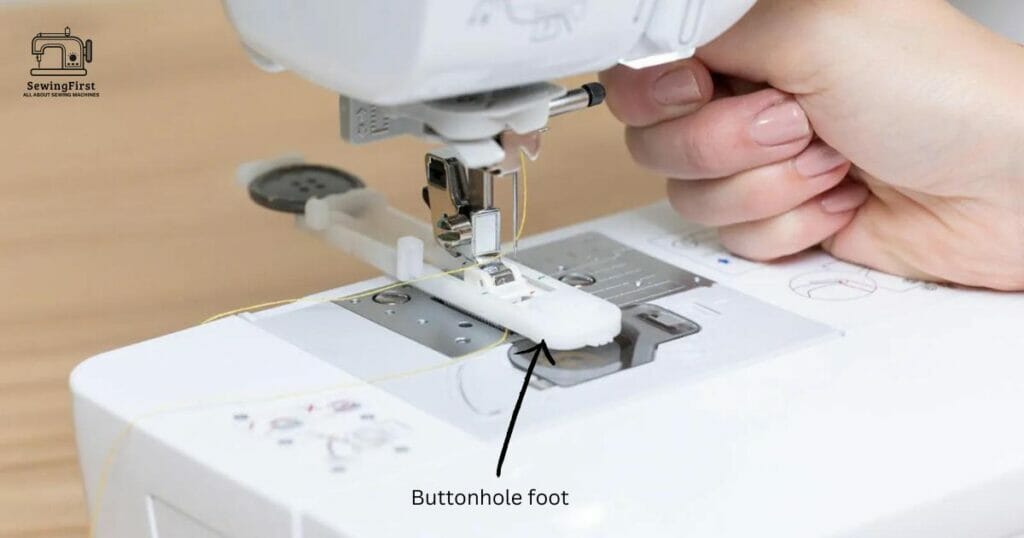
To position the presser foot on your fabric, lift up the lever at the back of your sewing machine and slide the buttonhole foot under it so that it locks into place.
Your needle should be aligned with one of the four slots found on the side of this specialized foot. Depending on what type of buttonhole you are making, select either slot 1 or 4 which will give you a wider stitch range than 2 or 3.
Once everything is set, lower down the presser bar until it makes contact with the fabric and begin stitching away!
By ensuring that all components have been properly put together before starting any sort of sewing process, you can guarantee positive results every time. With proper preparation complete, we’re ready to move on to actually creating our finished product – let’s start by learning how to sew a buttonhole!
Sew A Buttonhole
With a few simple steps, sewing a buttonhole can be an easy and enjoyable experience. From selecting the right type of foot to setting up the stitch length, it is important to take your time with each step for successful results. But once you have everything prepared, all that’s left is to sew!
The first thing to do when sewing a buttonhole is to choose the appropriate presser foot for your machine. Most Brother machines come equipped with a special buttonhole foot specifically designed for this task.
Once you have selected the correct foot, attach it securely to your machine by aligning the two holes on either side of the foot with those on the machine’s needle bar bracket.
Then select a zigzag or straight stitch on your machine and adjust its width and length settings according to what’s recommended in your instruction manual (usually between 2-3mm).
Now comes the exciting part – actually stitching out the buttonhole itself! To begin, start at one end of where you want your finished hole located and slowly guide your fabric under the presser foot as you gently pull down on both threads from behind.
As you approach the other end of where you want your finished hole positioned, stop with just enough room so that when backstitching over it later there will be some overlap.
Now carefully position each corner into place around where they need to go without moving them too much while keeping tension on both threads from behind.
Finally, complete your buttonhole by backstitching over each side until you reach where you started again – and voila! You’ve successfully created a beautiful handmade buttonhole.
Different Types Of Buttonhole Presser Feet
Have you ever wondered what the different types of buttonhole presser feet are and how they work? A buttonhole foot is an attachment to a sewing machine that helps you create buttonholes.
It also comes with a specialized lever that allows for precise stitching around buttons or any other objects that require secure closure. In this article, we will explore the various types of buttonhole presser feet available:
Buttonhole Foot
This type of foot has two slots on either side so it can be used for both small and large buttons. Additionally, there may be a special mark on its surface to indicate the size of the hole that needs to be made in order for your project to look professional. The most common use for this kind of foot is when creating clothing items such as shirts and jackets.
Wide Table Button Sewing Foot
This type of presser foot works best on wide tables where more than one row of stitches can be accommodated at once. It features multiple grooves along its base so it can accommodate several rows of decorative stitching, making it ideal for quilting projects and larger items like curtains.
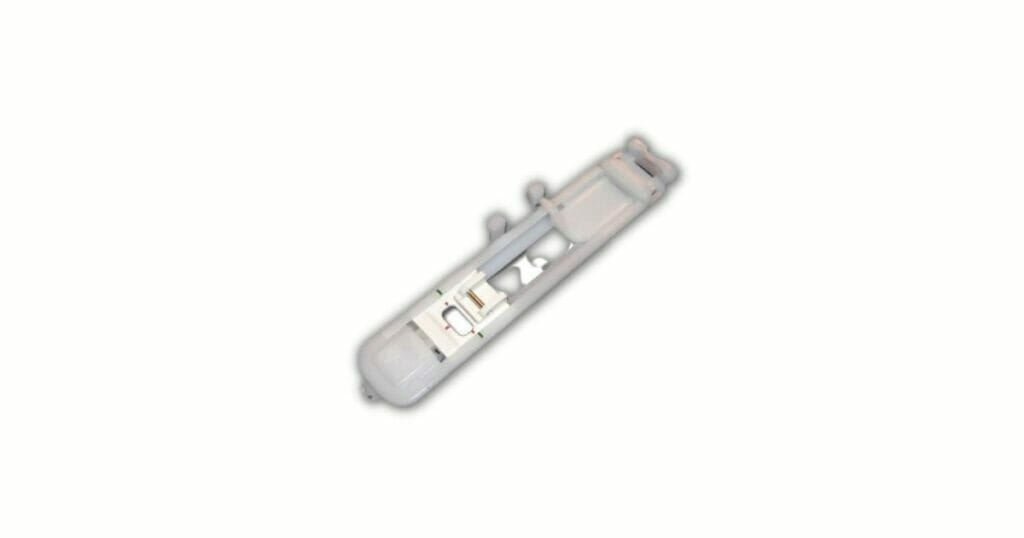
Automatic Buttonhole Presser Foot
This type of foot uses sensors to measure the exact size and shape needed before automatically adjusting itself accordingly while allowing the user to make adjustments if necessary. This makes it much easier to sew uniform-sized buttonholes without having to manually adjust each one individually.
The key difference between all these types lies in their design and purpose; however, all have been designed with convenience in mind so users can complete tasks quickly and easily.
From basic models offering simple functionality to advanced options with automated settings, there’s sure to be a presser foot suitable for every application imaginable! With these incredible tools at hand, even novice sewers can achieve excellent results effortlessly.
Automatic Buttonhole Presser Foot
An automatic buttonhole presser foot is one of the most popular types of buttonhole feet on brother sewing machines. It offers a quick and easy way to create perfect buttonholes for all sorts of projects. Here are some key features that make this type of foot so useful:
- The button guide plate ensures accurate placement and sizing for each stitch, making it easier to sew uniform-looking holes in any fabric.
- This type of foot also comes with an adjustable depth setting, allowing you to customize the size of your stitches according to the project at hand.
- An automatic buttonhole foot even includes stitching options such as zigzag or straight stitch, giving you more control over how your finished product looks.
The automated design makes using an automatic buttonhole presser foot simple and efficient – no matter what kind of project you’re working on! Whether you’re new to sewing or experienced, this tool can help take the guesswork out of creating beautiful buttons quickly and easily.
With its versatile capabilities, there’s no limit to what kinds of designs you can achieve with this handy attachment. Now that we know what an automatic buttonhole presser foot has to offer, let’s explore what is a Manual Buttonhole Presser Foot.
Manual Buttonhole Presser Foot
The buttonhole presser foot is the perfect way of adding a professional touch to any garment. It’s like having your own personal tailor at home! With its versatility and precision, it can make all sorts of amazing creations from simple dresses to intricate quilts with ease.
So if you’re looking for an easy-to-use tool that will take your projects to the next level, look no further than the manual buttonhole presser foot.
When using this handy accessory on Brother sewing machines, there are several steps one must follow in order to get optimum results. Firstly, check the machine’s user manual for details on how to attach the buttonhole presser foot.
Then locate the upper thread spool cap located inside the accessory pouch and place it into position according to instructions given in the user guide.
Next, slide the open plate of the Buttonhole Foot onto the needle bar so that it passes through the slot provided by the machine base plate.
Finally, fit the computerized sewing machines’ auto-locking mechanism as per the manufacturer’s instructions before starting work.
Once these steps have been taken care of properly, you’ll be ready to start creating beautiful designs with your new friend – The Manual Buttonhole Presser Foot! Here are some tips and tricks that’ll help you make use of this nifty gadget:
- Read up on policy for details related to parts replacement or maintenance needs
- Ensure upper thread tension is set correctly before beginning the project
- Use accessories provided in the pouch efficiently
- Keep track of fabric edges when working around curves or corners.
By following these guidelines you can ensure maximum performance from your manual buttonhole presser foot and create flawless garments every time! Transitioning smoothly into our next section we’ll discuss the purpose of a buttonhole stabilizer plate.
What is The Purpose Of a Buttonhole Stabilizer Plate?
The purpose of a buttonhole stabilizer plate is something that many sewers have wondered about, especially when using a Brother sewing machine with its special buttonhole foot.
This small piece of metal works to reinforce the stitches made during buttonhole stitching and it’s important for creating an even look on your projects.
Using this tool can make all the difference in how professional a project looks after completion- buttons need reinforcement in order to remain secure and a good quality buttonhole stabilizer plate will help keep them looking their best.
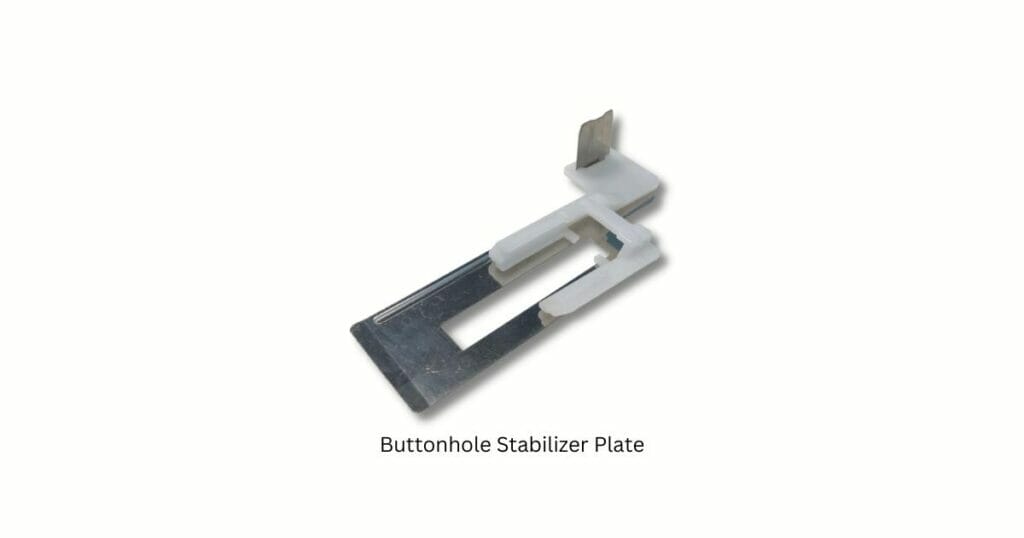
The plate also helps to strengthen the overall structure of the fabric that you are working with, ensuring that any stress or strain created by adding buttons does not damage or weaken the material itself.
The use of a buttonhole stabilizer plate along with a Brother sewing machine’s specialized buttonhole foot makes sure that projects stay neat and tidy while they are being sewn together and afterward as well.
With proper use, these two components create results that every sewer takes pride in producing. By having an understanding of what role each item plays within the project at hand, one can take full advantage of their capabilities to ensure quality craftsmanship every time.
Sliding Buttonhole Presser Foot
A buttonhole presser foot is like a zipper on your sewing machine, allowing you to easily make beautiful and professional-looking buttonholes. It’s an invaluable tool for any serious seamstress or tailor.
By using the proper size foot, set up correctly in accordance with the specific instructions of your sewing machine, you can create perfect buttonholes every time.
When it comes to pressing buttons onto fabrics, having a sliding buttonhole presser foot attached to your sewing machine is essential.
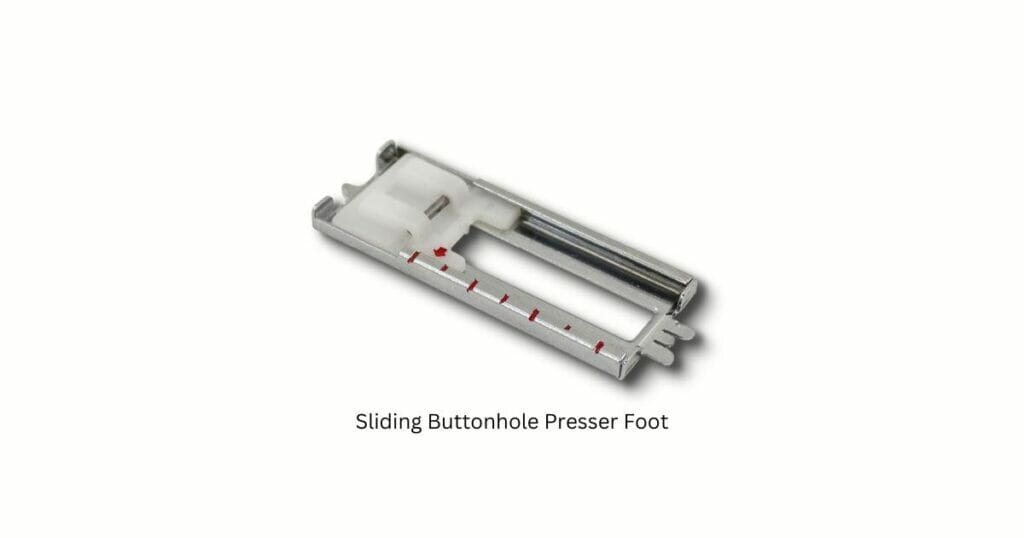
This type of attachment allows for variable sizes so that you can customize each buttonhole according to its purpose—from tiny step buttonholes for doll clothes to large ones for coats and jackets. The adjustable size settings also allow for precise control over the look and feel of the finished product.
Using this specialized foot requires some practice but once mastered will give you plenty of satisfaction from producing perfect results.
With just a few adjustments, such as selecting the right buttonhole size, attaching the appropriate zipper foot, and then following through with step-by-step instructions outlined by your sewing machine manual, soon enough you’ll be creating flawless handiwork that looks store-bought!
Low Shank And High Shank Buttonhole Presser Feet
Sewing machines come in all shapes and sizes, with varying presser feet for different projects. Buttonhole projects are no exception – the perfect buttonholes require two things: a low-shank or high-shank sewing machine and a buttonhole foot.
The low-shank and high-shank buttonhole presser feet differ in size and shape, but both can be used to create beautiful buttons for your next project.
The imagery of fabric swatches laid out before you, each one carefully chosen to fit the pattern of a shirtdress, skirt suit, or blazer-coat; twin needles poised above it ready to stitch together an intricate design.
Buttons provide the finishing touch – they must look perfect! That’s where the right type of buttonhole presser feet comes into play. Low-shank models will only fit onto specific types of machines while high-shank versions can be interchanged between more modern machines.
The difference lies in their ability to produce either step-by-step single holes or four-step auto-sizing options depending on what kind of effect is desired for the final product.
With careful measurement, quality engineering, and experienced craftsmanship, this small detail makes all the difference when completing any button project.
1-Step Buttonhole Vs. 4-Step Buttonhole
Buttonhole presser feet come in two types: one-step buttonholes and four-step buttonholes. The one-step foot is the most commonly used, as it is much simpler to use than the multi-step buttonhole mechanism.
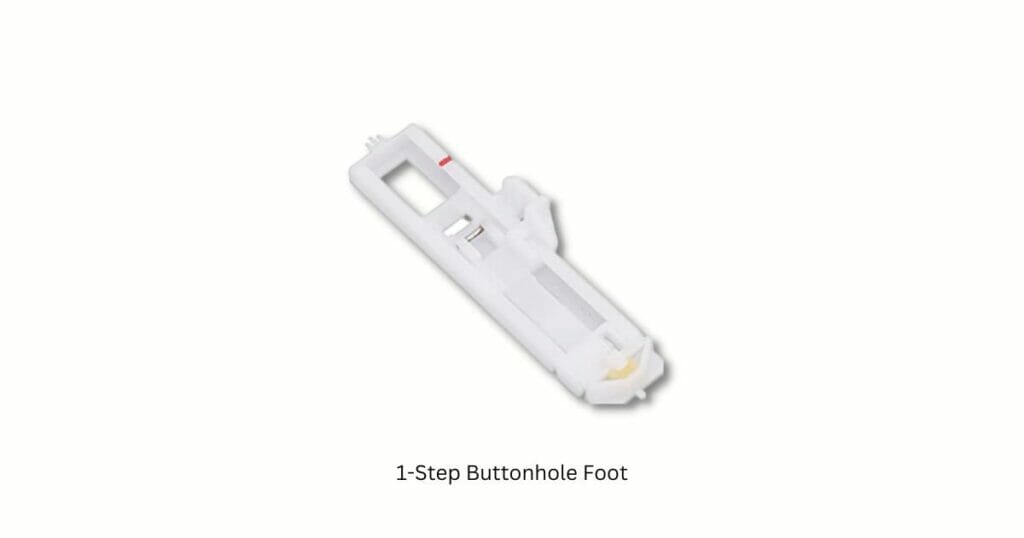
It attaches to any low-shank or high-shank sewing machine and can be used for maximum buttonhole lengths up to 7mm. With this type of foot, you simply sew around the edges of a bar tack twice, creating a complete stitch that requires no further manipulation.
The four-step buttonhole foot, on the other hand, is more complex but offers greater versatility when making perfect buttonholes. This type of foot works with both low-shank and high-shank machines and provides multiple steps such as stitching along each side of the fabric and then across the bottom before finally returning back along each side again.
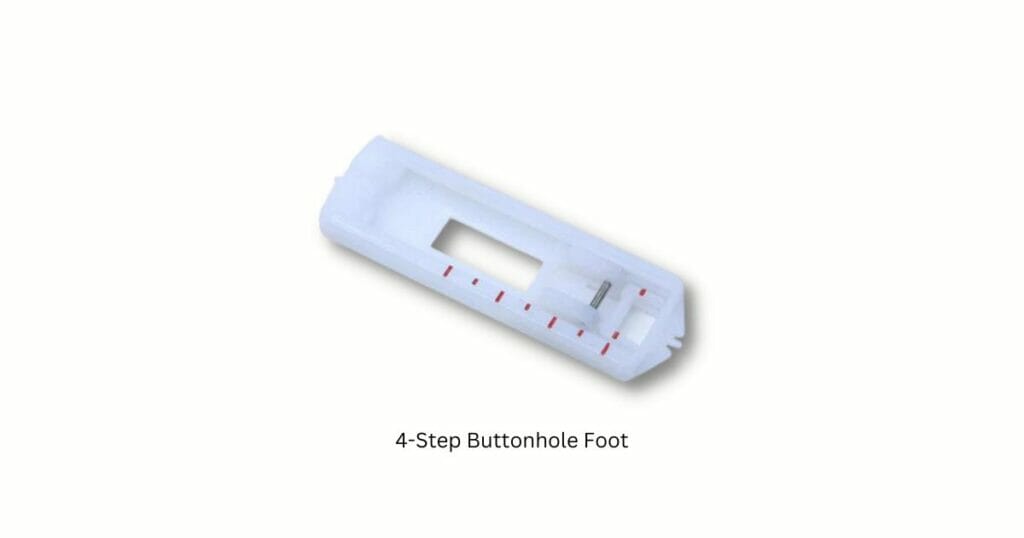
As this process takes longer to do than using a single step foot, it gives you greater control over your design and allows for customizing elements like the size or shape of your finished product.
Transparent Buttonhole Presser Foot
What if I told you that there was a way to effortlessly make buttonholes with your Brother Sewing Machine? Not even believing it myself, I had to investigate further and found out about the amazing Transparent Buttonhole Presser Foot!
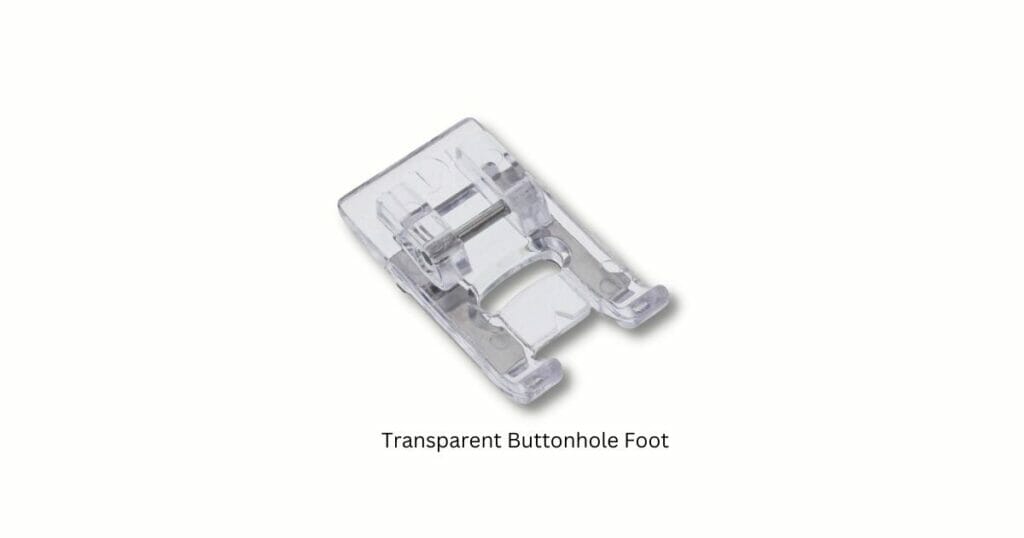
It’s like a miracle worker when it comes to making perfect buttonholes on any fabric. Let me tell you all about this amazing tool – from its features to how easy it is to use:
Features
The transparent design of the presser foot makes guiding fabrics for flawless buttonholes super simple. *
- With the help of an adjustable keyhole buttonhole slider, you can easily select either 3-step or 4-step zigzag stitch lengths for different types of applications.
- Suitable for most models of Brother sewing machines (check compatibility before purchase).
Benefits
- Easily create professional-looking garments using the precise measurements given by this transparent presser foot.
- You don’t have to worry about misaligned or unevenly sized buttonholes as they will look neat every single time.
- Spend less time worrying over buttons and more time enjoying your sewing projects!
So why wait? Get yourself one right away and start stitching those fabulous creations with ease!
Without a doubt, this Transparent Buttonhole Presser Foot will enable you to craft beautiful pieces in no time at all – leaving everyone wondering where did you get such a great piece made?!
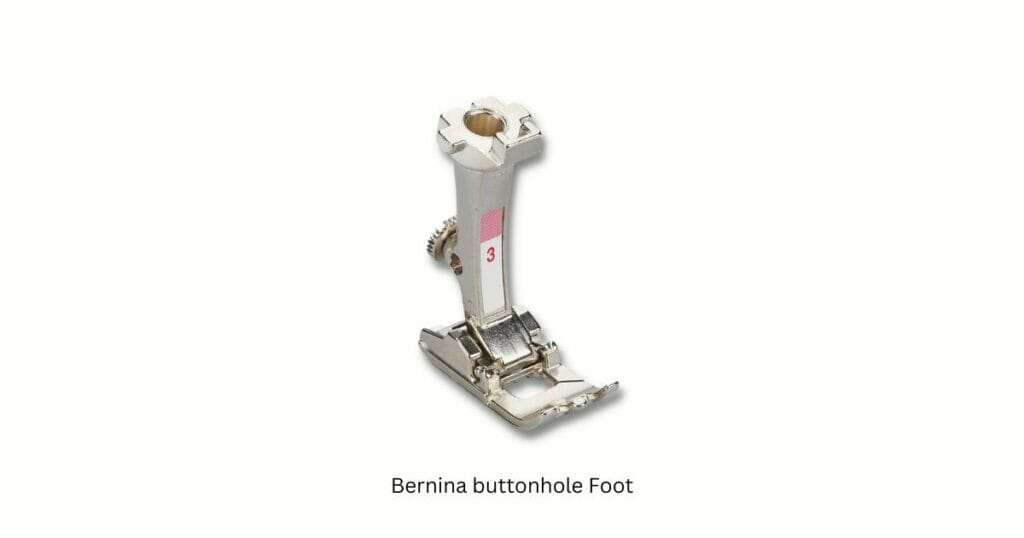
Bernina Buttonhole Foot
The Bernina buttonhole foot is an effective tool for sewing a buttonhole on your Brother sewing machine. This specialized foot comes with adjustable settings that make it easy to create perfect-looking buttonholes in any fabric.
The best part about this foot is that you can easily adjust the stitch width and length so that each buttonhole will be perfectly sized for whatever type of buttons you are using.
Using the Bernina buttonhole foot requires some practice, but once you get used to it, creating beautiful buttonholes becomes a breeze.
All you have to do is install the foot correctly onto your machine, choose the right stitch setting according to your fabric weight and desired look, and then carefully guide the fabric through as instructed by the manual.
It’s important to note that if you don’t feel comfortable or confident enough doing this yourself, there are professional sewers who offer their services online or at local shops who could help you out.
Overall, while it may take some time to get used to working with a Bernina buttonhole foot on your Brother sewing machine, with patience and practice anyone can learn how to use one effectively and achieve beautiful results every time!
With their adjustable settings, precise guiding lines, and ease of learning – these specialized feet should be in everyone’s arsenal when it comes to making quality garments. Now let’s move on to discuss Pfaff Sensormatic buttonhole foot.
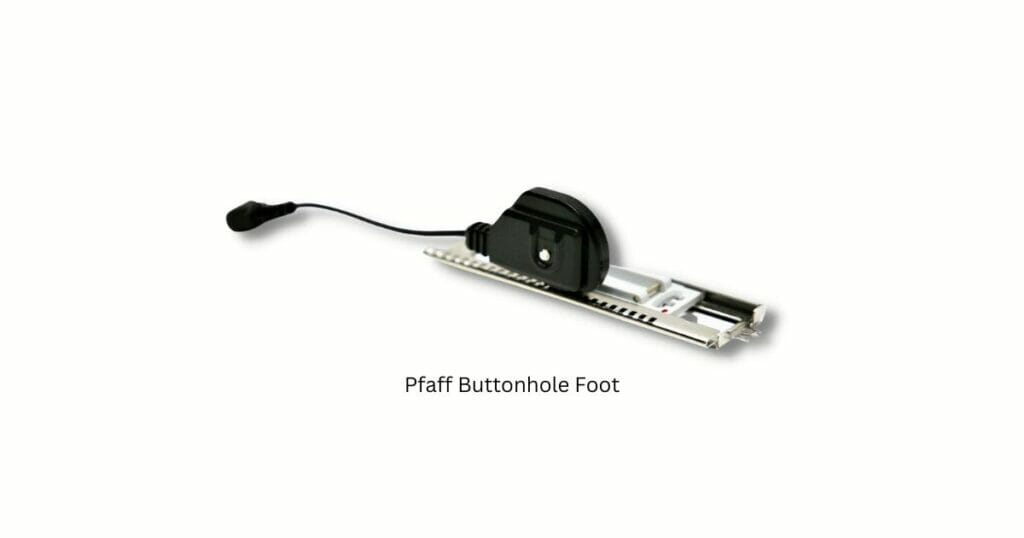
Pfaff Sensormatic Buttonhole Foot
The Pfaff Sensormatic buttonhole foot is the holy grail of sewing machine accessories! This revolutionary product literally takes all the guesswork out of creating beautiful, consistent buttonholes.
If you’re looking for a perfect finish on your garments every time, this presser foot will make it happen without breaking a sweat. Here are four amazing features that make the Pfaff Sensormatic Buttonhole Foot an absolute must-have:
- Automatically adjusts to any fabric thickness – no more worrying about making sure your settings are just right before beginning a project;
- Adjustable length and width – allows you to customize each buttonhole according to your specific needs;
- Works with both standard and decorative stitches – giving you the maximum flexibility in designing.
- Easy installation – fits most home machines like a glove.
With so many incredible benefits, the Pfaff Sensormatic Buttonhole Foot is simply unrivaled when it comes to crafting professional-looking projects at home.
Tips For Using A Buttonhole Presser Foot
Using a buttonhole presser foot on your Brother sewing machine can be daunting, but with the right tips, you’ll be able to master it quickly. There are three main things to keep in mind when using this type of foot:
- fabric preparation,
- setting up the machine correctly,
- and stitching techniques.
Let’s explore each one in more detail.
Fabric Preparation
It is a key to successful buttonholes. Start by stabilizing the area where you will place the buttonhole(s). This means adding some extra layers underneath the project before starting so that the fabric doesn’t move or stretch while working with it.
It’s also important to mark where you want to place your buttonholes as accurately as possible – use tailor’s chalk or marking pens for this task.
Here are some other helpful points related to fabric preparation:
- Select a thread that matches or complements your chosen material
- Use good quality interfacing (if needed)
- Cut fabrics precisely following grain lines • Always check tension settings before beginning work
Setting up the machine correctly
It is essential too. First off, make sure that everything is properly threaded, and then turn on your machine and select a zig-zag stitch mode suitable for making buttonholes. Pay attention to details like width and length settings – these should match what’s recommended for specific types of buttons that you plan to use.
Here are several other factors worth considering during setup:
• Check needle size/type carefully
• Make sure there’s enough space between the needle plate and throat plate when necessary
• Place holder at a desired position depending on the size of the buttonhole required.
Conclusion
In conclusion, using a buttonhole presser foot can be a great way to add detail and texture to any project. With the right tools and techniques, sewing machines like Brother or Bernina can help you achieve professional-looking results with ease. Whether you’re looking for an automatic option, one that requires manual adjustment, or something in between — there’s sure to be a buttonhole presser foot that works for your needs.
No matter which type of machine or presser foot you use, make sure to use stabilizer plates when possible; they’ll help ensure that your stitches stay even and neat. And don’t forget: practice makes perfect! With enough time and patience, I’m confident anyone can learn how to sew beautiful buttonholes on their own machine.
FAQs
How do you use a buttonhole on a Brother sewing machine?
To use a buttonhole on a Brother sewing machine, first, make sure that everything is properly threaded and select a zig-zag stitch mode suitable for making buttonholes.
Then, stabilize the area where you will place the buttonhole(s) and mark where you want to place your buttonholes as accurately as possible. Finally, adjust the width and length settings to match what’s recommended for specific types of buttons that you plan to use.
How do you use a buttonhole foot on a sewing machine?
A buttonhole foot is a special attachment for your sewing machine that helps you make perfect buttonholes. To use it, first, attach the foot to your machine and adjust the width and length settings to match what’s recommended for the specific types of buttons that you plan to use.
How do you use a button foot fitting Brother?
To use a button foot fitting Brother sewing machine, first, attach the foot to your machine and adjust the width and length settings to match what’s recommended for the specific types of buttons that you plan to use. Then, stabilize the area where you will place the buttonhole(s) and mark where you want to place your buttonholes as accurately as possible.
Why is my buttonhole foot not moving?
If your buttonhole foot is not moving, it could be due to a few different factors. First, make sure that the presser foot lever is in the down position and that the needle plate is properly aligned with the throat plate.
Additionally, check to see if there are any obstructions in the area where you plan to place your buttonholes. Finally, make sure that the width and length settings are set accordingly.
What tension should I use for buttonholes?
The tension setting for buttonholes will depend on the type of fabric you are using. Generally, a medium-tension setting is recommended for most fabrics. However, if you are working with a lightweight fabric, you may need to adjust the tension to a lower setting. For heavier fabrics, you may need to increase the tension slightly.
Can you sew a buttonhole with a regular foot?
No, you cannot sew a buttonhole with a regular foot. A buttonhole presser foot is specifically designed to make buttonholes and has a special slot that allows the needle to move in a zig-zag pattern. Without this special slot, it would be impossible to create a buttonhole with a regular presser foot.