
Knitting sweaters is a relaxing hobby, but sometimes you just don’t have the time to knit a whole sweater. Maybe you only have time to make a few inches of progress before you get distracted. Or maybe you just want to try something new. Either way, knitting short sleeves is a great option.
Shortening a sweater without a sewing machine is easy. All you need is a pair of scissors, a needle, and thread. In this tutorial, I’ll teach you how to do it yourself.
I’m going to walk you through every step of the process on how to shorten a sweater without sewing machine, so you can learn how to shorten a sweater by cutting without a sewing kit.
Related Topic: How to Shorten Straps on a Dress Without Sewing Machine
Things You Will Need: (Step-By-Step Guide)
Shortening the sweater, required some basic sewing skills and sewing techniques and you are good to go. Here are some basic items you will need:
- Sweater
- Scissors
- Needle
- Thread
Step 1: Cut off the Sleeves
The first thing you’re going to do is cut off the sleeves (excess fabric). This will be easier if you take your sweater out of its original sleeve casing. If that’s not possible, then you may have to remove the stitches from the sleeve cap.
To do this, simply pull on each stitch until they come loose. Then, cut them all off.
Once you’ve removed the stitches from the sleeve, you should have two pieces of fabric. One piece should be the front of the sweater and one should be the back. The front piece should be longer than the back piece.
Step 2: Fold the Front Piece in Half
Now, fold the front piece in half lengthwise.
This will create a seam where the front and back meet.
Step 3: Sew the Seam Together
Now, sew the seam together using a straight stitch. Make sure you use the right size needle for the yarn you are using.
You may also want to add some decorative stitching around the edge of the seam.
Step 4: Turn the Fabric Inside Out
Next, turn the fabric inside out. This will help keep the seam flat when you sew it closed later.
Step 5: Sew the Back Piece to the Front Piece
Sew the back piece to the front piece along the seam line. You can also use fabric glue or double-sided tape to hold the pieces together while you sew.
When you’re done, you should have a tube with a seam running down the middle.
Step 6: Trim the Tube
When you finish sewing the back piece to the other side, you should have an even amount of fabric left over. Now, cut off any extra fabric.
If you’d like, you can leave the seam as is or you could even finish it off with a zig-zag stitch.
Step 7: Finish the Raw Edges
Finish the edges of the tube by folding over the raw edges. cut off fraying edges as well.
Then, pin the edges together and sew them up.
Step 8: Attach the Sleeve Casing
Attach the sleeve casing to the top of the tube.
Make sure you attach the sleeve casing to the side of the tube closest to the armhole.
Step 9: Add Stitches Around the Edge
Add some decorative stitching around the outside of the tube.
Step 10: Sew the Top Closed
Sew the top closed.
Sweater Shortner Tips and Tricks
There are lots of ways to shorten a sweater without a sewing kit. Here are some tips and tricks to help you shorten a sweater without a machine.
Use a Different Yarn
Instead of using the same yarn, you used to knit the entire sweater, use a different color. For example, if you used the worsted weight yarn for the body of the sweater, then switch to sport weight yarn for the sleeves.
Cut Off Excess Fabric
When cutting off excess fabric, make sure you don’t cut through the stitches. That way, you won’t lose any of the integrity of the knitting pattern.
Use a Knitting Tool
A knitting tool makes shortening a sweater much faster. Simply use the tip of the tool to push the stitches into the fabric.
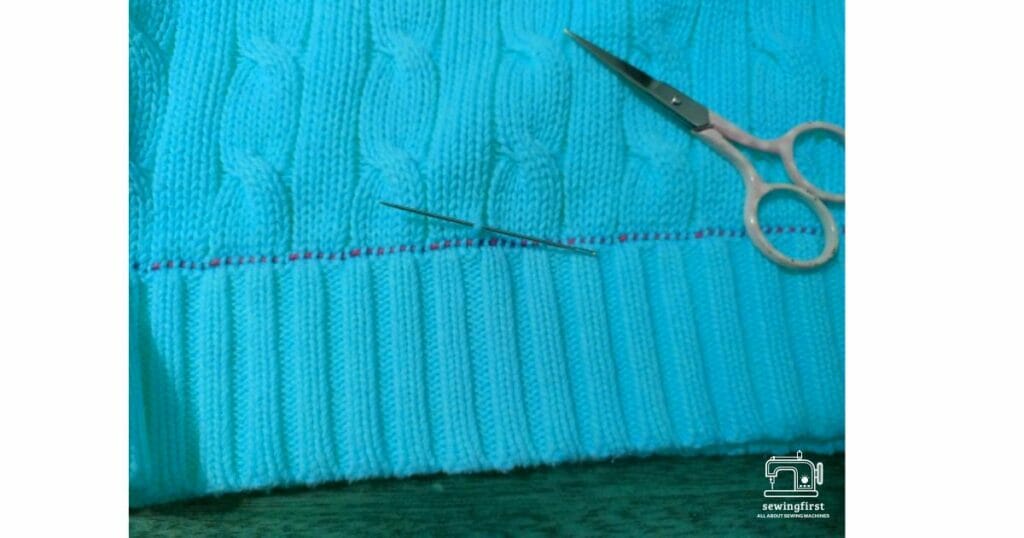
Use a Scissor
Sharp Scissors work well for trimming off excess material. Just snip away at the stitches.
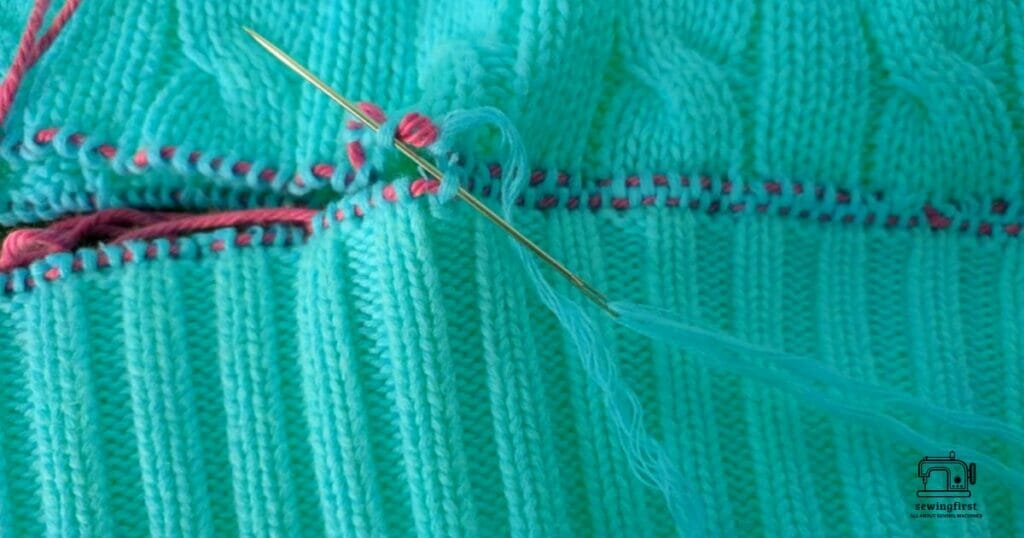
Use a Needle
Needles are great for pulling apart stitches. If you need to remove more than just a few stitches, try using a large needle instead of a regular sewing needle.
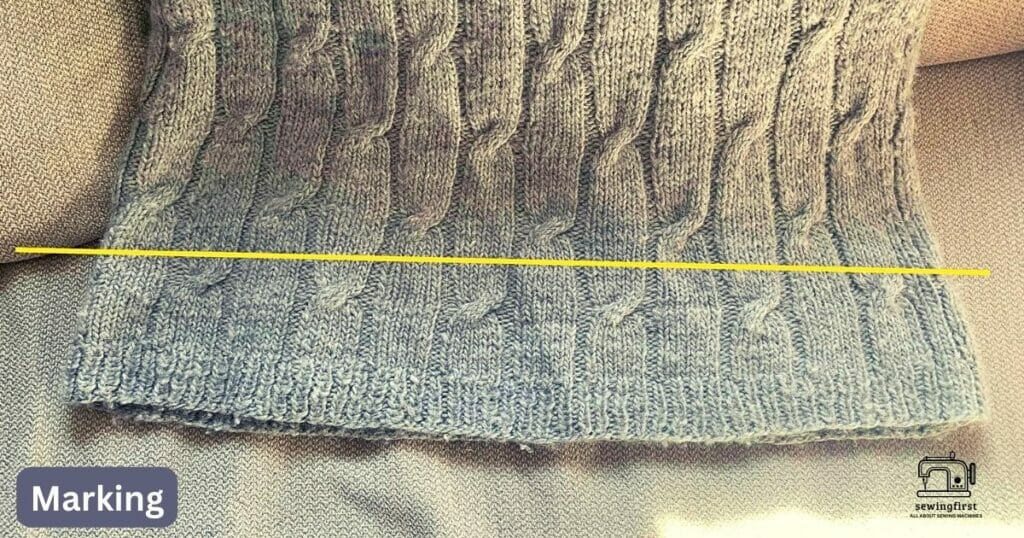
Use a Ruler
Rulers are helpful for measuring how far to go before you start removing stitches. They come in handy when you need to measure from one point on your garment to another.
Use a Tape Measure
Tape measures are useful for determining how much material you’ll need to cut off. Use a ruler to mark off how many inches you need to cut off. Then, simply measure that distance from the center of the sweater.
Use a Pattern
If you know what size you want your finished sweater to be, you can easily find patterns online. The patterns usually include instructions on how to shorten a sweater without using a sewing machine.
Fabric Glue and Tape: For Closing the Sweater Hems
You may not always have access to a sewing machine. In those cases, you can use fabric glue or double-sided tape to close the hems of your sweaters.
To use fabric glue, follow these steps:
- Apply a small dot of fabric glue to the edge of each hem.
- Press the two sides of the fabric together.
- Allow the fabric glue to dry completely.
- Once the glue has dried, fold the fabric back down and press the edges flat.
- Cut out the excess fabric along the folded line.
- Remove the fabric glue once the fabric has been pressed flat.
- To prevent fraying, apply a little bit of clear nail polish to the inside of the hem.
You can also use double-sided tape to sew up the hems. Follow these steps:
- Place the pieces of tape side by side.
- Start at the bottom of the seam and pull the tape taut.
- Continue pulling the tape until the whole piece is pulled tight.
- Trim off the extra tape.
- Turn the sweater right side out.
- Sew the remaining seams.
- Finish the sweater as desired.
Fusible tapes are another option. You can use them to attach the hems to the sweater. Fusible tapes are available in several sizes. To use fusible tape, follow these steps:
Lay the pieces of tape face down on top of each other. Stitch around all four sides of the tape with a zigzag stitch and Cut off the excess tape.
Turn the tape over so it’s facing the wrong side of the fabric and Iron the tape onto the fabric. Let the iron cool before moving on to the next step. For best results, let the tape sit for about 30 minutes after applying it to the fabric.
When the time comes to finish the sweater, turn the tape right side out. Sew the remaining seams and finish the sweater as desired.
Kinds Of Fabrics for your Sweater
There are different types of sweater fabrics. Some are thicker and some are thinner. Here are some common types of sweater fabrics:
Cotton
Cotton is a popular choice because it’s comfortable and easy to care for. It’s also inexpensive. Cotton is often blended with polyester to create a soft, durable fabric.
Polyester
Polyester is a synthetic fiber that provides warmth and comfort. It’s lightweight and wrinkle-resistant. Because it doesn’t absorb moisture as cotton does, polyester tends to last longer than cotton.
Wool
The wool is warm and cozy. It was also very expensive. Wool is often blended with acrylics to make it softer and more pliable.
Acrylic
Acrylic is a manmade fiber that feels similar to wool but costs less. It’s also easier to dye than wool.
Silk
Silk is luxurious and elegant. Silk blends well with other fibers such as cashmere and silk chiffon.
Cashmere
Cashmere is a fine, soft yarn made from goat hair. It is extremely expensive. Cashmere is often blended with silk to create a smooth, silky feel.
Fabric thickness is an important thing for your sweater. The thicker the fabric, the warmer it will be. If you’re looking for something light and airy, choose a thin knit or woven fabric. If you want something thick and warm, select a heavier knitted fabric.
Whereas lightweight fabrics tend to wear out quickly, heavy fabrics hold their shape better. Heavy fabrics are usually sturdier than lighter ones. They may not be as comfortable, though.
If you like sweaters with a lot of texture, look for a bulky knit. A bulky knit is a type of knitting that creates a fuzzy surface.
Sheer fabrics are great if you want to add a little sparkle to your sweater. Sheer fabrics have no body to them. They’re lightweight and sheer. They can be used alone or combined with other fabrics.
Types Of Yarns for Knitting a Sweater
Knitters often ask which type of yarn to use for knitting sweaters. The answer depends on whether you’re planning to crochet or knit a sweater.
If you’re planning to crochet a sweater, you need to have a crocheted yarn that has enough elasticity to allow you to easily pull the stitches through the hook. This means choosing animal fiber yarns, such as wool, alpaca, llama, angora rabbit fur, silk, cashmere, and bamboo.
On the other hand, if you’re planning to knit a sweater, you need a yarn that’s strong enough to hold its shape after being knitted. This means selecting a yarn made from plant fibers, such as cotton, linen, hemp, ramie, jute, sisal, and flax.
When choosing yarns for knitting sweaters, remember that some yarns work better than others depending on the stitch pattern used. For example, cotton yarn works well for stockinette (knit) patterns, but not for garter (crochet) patterns. Likewise, nylon yarn works well for ribbed (crochet) patterns, but not flat (knit) patterns.
To help you decide which yarn to use for knitting a sweater, here are some tips:
- Choose a yarn that feels soft and smooth to the touch.
- Avoid yarns that feel scratchy or rough.
- Select a yarn that doesn’t stretch out too much during knitting.
- Consider the weight of the yarn. Lighter weights are usually softer and smoother. Heavier weights are stronger and stiffer.
- Look at the label to determine the fiber content.
- Check the gauge of the yarn. Gauge refers to the number of stitches per inch.
- Try different yarns until you find one that fits your knitting style.
- Use a swatch to test the fit of the finished garment.
- Don’t forget to wash your yarn before beginning to knit.
Overlock Stitch: Why do you need it for your Sweater?
If you want to add details like buttons or pockets to your sweater, an overlock stitch will help you get the job done quickly and easily.
An overlock stitch is a sewing technique used to secure the ends of knitted stitches. The overlock stitch creates a strong bond between the knit and purl rows. This helps keep the fabric sturdy and prevents unraveling.
One popular stitch is called the Kitchener stitch. This involves making two loops at each end of the sleeve, then joining those ends together. Another option is to knit one row of single crochet (sc) along the top edge of the sleeve, then work another row of sc across the bottom edge.
When working these stitches, remember to leave enough room between the stitches to allow the fabric to stretch. Otherwise, the garment may become too tight after being shortened.
Can Serger Machine shorten your Sweater?
Yes! A serger will help you cut through bulky sweaters quickly. The serger cuts the fabric while stitching it together. This makes the process much faster. In addition, the serger creates a clean, professional look.
Sergers come in various models. They differ based on how many needles they have, what type of thread they use, and whether or not they have automatic needle selection. Most sergers have an adjustable throat plate. This allows you to adjust the length of the finished product.
Conclusion
You might think that shortening a sweater would require a lot of time and skill. It turns out that you can actually accomplish this task quite easily using an old pair of scissors and a needle. All you need to do is cut off the sleeves and hem the bottom of the sweater.
This method works perfectly fine for sweaters that aren’t particularly thick. However, if you’re dealing with thicker material, you might want to consider getting a sewing machine instead.
FAQs
Does the knit fabric have the ability to be cut and sewn?
The answer is yes. Knit fabrics are made from interlocking loops of yarn. These loops create a very durable surface that’s easy to sew.
Can I shorten a sweater without reattaching the ribbing?
Yes, but you’ll need to make sure that the ribbing doesn’t slip when you remove the sleeves. If it does, you’ll need to reattach it.
Are knitwear items capable of being hemmed?
Knitwear items are usually able to be hemmed. You just need to know where to place the seam. For example, if you’re creating a skirt, you should attach the hem to the inside of the waistband.
When cutting a sweater, how should I proceed so that it doesn’t unravel?
If you’re going to cut the sweater into pieces, you’ll need to leave about 2 inches of extra fabric around the edges. This way, you won’t have any loose threads.
What is the best way to hem a sweater?
There are several ways to hem a sweater. One of the most common methods is to fold the raw edge under and stitch it down. This keeps the fabric from fraying.