
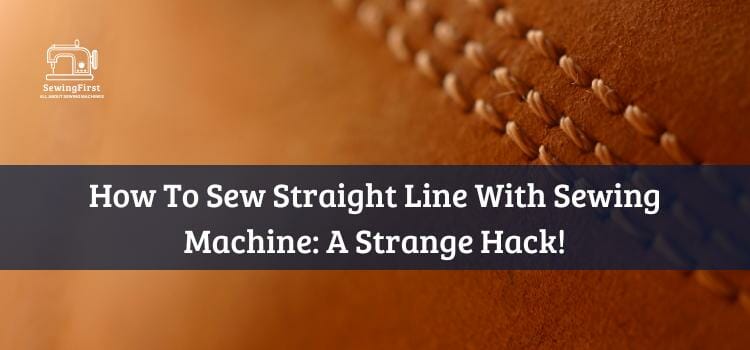
Are you looking for a way to enhance your sewing skills? Do you want to be able to sew expertly and quickly? By learning how to sew straight line with sewing machine, you can do just that! Sewing perfectly straight seams is an essential skill in almost any kind of garment making.
It’s not as hard or daunting as it may seem – if you have the right tools and techniques at your disposal. In this article, we’ll show you exactly how to master the art of stitching perfect straight lines on a sewing machine.
We’ll also provide some helpful tips to improve your technique and make sure your garments are finished beautifully every time. So grab your fabric, thread, and scissors – let’s get started!
Related Topic: How To Secure a Stitch With Sewing Machine: Learn The Perfect Stitch!
Selecting The Right Fabric
Choosing the right fabric is key to any successful sewing project. When selecting your pieces of fabric, it’s important to look for edges that are straight and free from fraying.
This will help you achieve neat, accurate seams when joining two pieces together. If there are any irregularities in the edge of the fabric, use a rotary cutter or scissors to trim them away before beginning to sew.
It’s also important to pay attention to the weight of each piece – make sure both fabrics have similar weights so they don’t pull on one another as you sew. All these factors can prevent lumps or puckers from forming along those all-important straight seams!
For best results, prewash your fabric before starting any project. Doing this will ensure that the finished garment won’t shrink after being washed and dried. It’ll also give you a chance to check if colors bleed or run into one another; this could ruin a beautiful finish on your sewing projects! With all these points in mind, you’ll be ready to get started with preparing the fabric for sewing.
Preparing The Fabric For Sewing
Now that you’ve chosen the perfect fabric for your project, it’s time to prepare it for sewing. To sew a straight line with a metal sewing machine, there are several steps involved in getting the fabric ready.
Let’s take Alex and her blouse as our example. She needs to make sure she has these three things: a seam allowance of 5/8 inch, a fabric marker or tailor’s chalk, and her DIY seam guide.
- First up is measuring and marking the line on which Alex will be sewing. With her ruler and fabric marker, she’ll measure out 5/8 inch from the edge of her fabric where she wants to begin stitching; this allows enough space between the edge of the material and the seam so that any decorative elements can fit within them.
- From there, using either her DIY seam guide or tailor’s chalk to draw a straight line along all sides of the pattern pieces indicates exactly where each stitch should go – ensuring accuracy when piecing together garments!
- Next comes cutting off the excess material around the lines drawn – this ensures no bulkiness when attaching one piece of fabric to another. Using sharp scissors or rotary cutters helps achieve clean edges without fraying beyond what was marked by Alex earlier with her fabric marker.
- Finally, pressing down lightly on each side of the seams before starting to sew gives an even surface for making neat stitches on both sides of the garment when sewn together later.
Alex now has everything prepared and ready for sewing a perfectly straight line with her metal sewing machine – next up is measuring and marking the exact spot where they will meet!
Measuring And Marking The Line
Before you can sew a straight line, it’s important to measure and mark the line accurately. To help with this process, many sewing machines come equipped with an adjustable seam guide that attaches to the front of your machine.
Additionally, there are special presser feet available such as an edge guide that helps keep stitching lines parallel and even. Whether you use one or both of these options is up to you – just make sure you get accurate measurements before beginning!
The next step is to use a piece of paper or fabric marking tool to draw out a row of stitching along the desired length. This will give you something to follow while sewing so that your lines stay perfectly straight. If using a fabric marking pencil be sure not to skip over any small details during this stage so nothing gets missed when transferring marks onto the material later on.
Once all markings have been made, double-check everything for accuracy before starting in order to ensure success. With proper measurements and precise markings, it should be easy enough for anyone who desires mastery of their craft to create beautiful results every time they sit down at their sewing machine!
How To Sew Straight Line With Sewing Machine: Attaching The Presser Foot
Did you know that the average sewing machine has up to 24 different presser foot attachments? This comes in handy when it’s time to sew a straight line. To get started, attach your desired presser foot to the shank of your machine.
Once the foot is secure, lower the presser foot lever and adjust the needle position using a magnetic seam guide or by aligning with an edge on the needle plate.
Next, set your stitch length and width according to what type of fabric you are working with. How do you choose this setting? It depends on if you’re finishing seams for garments or quilting fabrics. Generally speaking, use shorter stitches (2-3mm) for heavier materials such as denim while longer stitches (4-6mm) are better suited for lightweight fabrics like silk.
Now you’re ready to start stitching! Guide your fabric along with both hands; one hand will be keeping tension even on both sides of your fabric while the other moves forward and backward guiding the material under the needle evenly as it sews a neat row of straight stitching.
As long as you keep these tips in mind there should be no issue creating accurate and professional-looking sewing seams. With some practice, you’ll soon master how to sew perfectly straight lines with ease!
Setting Your Stitch Length And Width
Now that you have your sewing machine foot attached, it’s time to set up the stitch length and width. Adjusting these settings will ensure that you’re able to create straight lines with precision when using your sewing machine.
First, let’s start with the stitch length setting. This is usually found on a dial or lever near the needle of the machine and can be adjusted by turning either until desired results are achieved.
Generally speaking, if you want tighter stitches then select a smaller number while longer stitches require selecting a larger number. You should experiment with different settings depending on what type of fabric you’re working with and which look best for the project at hand.
Next, we’ll move on to adjusting the stitch width setting. Similarly to changing the stitch length, this too is done through manipulating a dial or lever next to where the needle sits in order to achieve perfect tension – resulting in beautiful straight lines!
Just like before, practice makes perfect, and testing out various combinations of both length and width will help develop your sewing skills over time.
Once finished adjusting these two settings, double-check them one last time before beginning any stitching work; this way you can be sure that everything is properly configured for an optimal outcome!
Threading The Machine And Bobbin
Threading the machine and bobbin is an essential step for sewing a straight line. To begin, you’ll need to raise the presser foot of your machine. This will give you access to the needle and bobbin area so that thread can be inserted properly. Then take your spool of thread and unwind it onto the thread holder located on top of the machine.
Next, pass it through two or three small guides before entering the tension plates. Continue by pulling some thread towards the back of the machine where it’ll enter into a small opening leading to the bobbin case – which should already be correctly installed in its place under the needle plate. Now pull out about 6-8 inches of thread from both sides of this opening and cut off any excess threads with scissors.
The next step is to actually thread your needle with ease – just follow these simple steps: First, bring up your sewing needle, then hold your spool horizontally and slide a loop of thread around it in an anti-clockwise direction until it’s secure (you may also need to do this for computerized sewing machines).
Finally, guide down one end of this looped thread into an eyelet at the front side of your sewing needle; make sure it passes all the way through without snagging or tangling! With everything now set up correctly, you are ready to start learning how to sew a perfectly straight line quilting stitch or taking part in professional sewing classes if needed.
Starting To Sew
To start sewing a straight line, you’ll need to use the machine arm and feed the dogs. The machine arm is what moves along the fabric as it stitches, while the feed dogs are small metal teeth that pull your material through.
It’s important to get these two parts in sync if you want perfect parallel lines. To do this, lower the presser foot onto your fabric and adjust the needle position until it’s slightly off-center from where you plan on stitching. This will help ensure that each stitch gets pulled into the same spot when going forward or backward over them.
If things go wrong during sewing, don’t panic! You can always unpick any mistakes with a seam ripper or by adjusting the tension of your thread. Once everything is set up properly, keep an even pace with your hands and make sure not to tug on the fabric too hard.
With patience and practice, you’ll soon be able to create perfectly straight seam lines easily! Transitioning smoothly from one section to another requires focus and attention – let’s move on and discuss how to pivot at corners for complex shapes next!
Pivoting At Corners
Straight stitches are essential if you want to sew a professional-looking garment. To get those straight lines, it helps to use the right techniques and tools. Computerized sewing machines have made getting perfect straight seams easier than ever before.
When you’re ready to transition from one line of stitching to another at corners or curves, there are some useful sewing techniques that can help guide your progress. Start by marking the corner with tailor’s chalk on both sides so you know where to pivot.
With the needle in the down position, raise the presser foot and turn your fabric 90 degrees to the left or right – whatever direction is necessary for your design. Place the edge of the fabric along one side of the marked guideline and lower the presser foot again. Sew slowly as you follow this row of stitches around each corner until you reach your starting point; then cut off any excess threads and move on!
Pivoting when making tight turns can be tricky but don’t be discouraged; practice makes perfect! With patience and persistence, soon enough you’ll be able to create neat rows of stitches while pivoting around corners like a pro.
Finishing Off A Seam
Once you’ve sewn a few rows of stitches, it’s time to finish off the seam. To do this, there are several things to keep in mind:
- Start by turning off your sewing machine and removing the piece of fabric from the throat plate.
- Inspect the back side of your work for any skipped stitches or other issues that may have occurred while sewing.
- Once you’re happy with the appearance on the back side, use an iron to press open both sides of the seam. This will help make sure all those rows of stitches are straight and secure.
- Finally, trim away any excess threads along each edge of the seam allowance using scissors or a rotary cutter so they don’t get caught up in future projects.
With these steps completed, you can be confident that your seams will hold up against wear and tear throughout their lifetime. Now that everything is set, let’s move on to needle position adjustment – another important factor when creating quality garments!
Needle Position Adjustment
Now that you’ve got the basics of sewing straight lines down, let’s look at some tips to ensure a perfect stitch every time. The first step is adjusting your needle position. This will help you achieve those perfectly straight seams and avoid any wonky or crooked stitches in your projects.
Depending on the type of fabric you are using, different needle positions could be more suitable for achieving precision stitching.
It’s important to remember when starting out with a new project that testing out various needle settings can have a huge impact on the end result. If something doesn’t look quite right don’t be afraid to experiment until you find what works best for your fabrics and seam allowances!
And if it gets too confusing – there are tons of online tutorials available from experienced sewers who know all the tricks of the trade and can make taking up this hobby much easier.
Making sure your needle position is adjusted correctly isn’t just important for getting professional-looking results; it also helps extend the life of your machine by preventing undue strain on its parts. So take the time to set things right before embarking on any new projects – trust us, it’ll save you a lot of headaches (and money!) down the line!
Troubleshooting Common Issues
Sewing is an adventure, and the journey of mastering it begins with troubleshooting common issues that arise. Being confident in our abilities to tackle problems such as straight-line sewing will give us a feeling of accomplishment and pride.
When you first start out trying to sew straight lines, it may seem impossible. But by using a quilting guide bar or ditch quilting foot, your fabric won’t move around while sewing and create crooked seams.
It’s also important to make sure your machine isn’t leaving behind any sticky residue which can cause the fabric to bunch up when stitching over it. With these tips in mind, we are ready for our next challenge: working with different fabrics!
Working With Different Fabrics
Now that you know how to sew a straight line with your sewing machine, let’s explore the different fabrics you can work with. You’ll want to be aware of the raw edge of each fabric before beginning any project.
Different fabrics may require special needles and settings on your sewing machine for optimal results. Here are some tips when working with various kinds of fabrics:
- Natural Fibers:
- Cotton – use sharp needles and regular thread, as well as shorter stitch lengths
- Linen – adjust tension slightly higher than normal, or else risk puckering
- Wool – use a ballpoint needle and decrease the presser foot pressure
- Synthetic Fabrics:
- Polyester – increase presser foot pressure; use polyester thread
- Nylon – loosen tensions since stitches tend to pull tightly into the fabric
- Acrylics – set up zigzag stitching at the widest setting; serge edges for extra strength
- Miscellaneous Fabrics:
- Denim/Canvas- Use longer stitch lengths and heavier weight threads like cotton-covered polyester
- Leather/Suede – A Teflon-coated needle works best for these materials; also reduces presser foot pressure
You don’t have to limit yourself to using scraps from old projects either! There are plenty of online retailers that offer affordable fabric samples so you can test out new techniques without breaking the bank.
Just make sure they offer free returns if needed! If you do decide to purchase something bigger, please consider clicking through one of our affiliate links which helps support this site. Now it’s time to move on to joining seams with a serger.
Joining Seams With A Serger
Did you know that the average person spends over 7 hours a week sewing? Joining seams with a serger is an important part of any project, whether it be making clothes or quilts. It’s all about getting those edges neat and tidy, so let’s get started!
First things first, when joining two pieces of fabric together with a serger, make sure both sides are lined up evenly before starting.
Once everything is in place, set your machine to the correct stitch length and width for the type of seam being sewn. Then begin stitching by feeding the fabric into your machine from left to right. Make sure to keep the tension consistent as this will help prevent puckering and bunching along the seam line.
To practice using a serger without actually working on a garment or other item of clothing, try sewing on paper first.
This will give you valuable experience threading and setting tensions while also allowing time for experimentation and mistakes. Be sure to use lightweight paper such as tracing paper or tissue paper – not regular copy paper – which can damage some machines if used incorrectly.
With enough practice, you’ll soon be ready to tackle real projects with ease! And don’t forget – there are lots of new techniques out there like decorative stitches and rolled hems that can take your garments from ordinary to extraordinary. Onward we go towards mastering curves and corners!
Making Curves And Corners
Once you’ve learned how to join seams with a serger, the next skill up is learning how to make curves and corners. It can be intimidating at first, but once you get the hang of it, sewing around curves and corners becomes second nature!
The key to making both tight and gentle curves is all in the foot pedal speed. When you approach a curve or corner, adjust your foot speed accordingly – slow down for tighter turns and speed up when approaching wider ones.
This will help keep the fabric from puckering or pulling as much. Be sure to also practice guiding the material with your hands while using the presser foot as leverage against the fabric. If necessary, decrease or increase tension on the machine to accommodate different types of fabrics.
When stitching along an edge that has some give-like elasticity or stretchiness, use longer stitches than usual so that there won’t be any strain caused by stretching on the thread. Longer stitches help ensure that everything stays where it should without having too much pressure pla
ced on one area of fabric versus another. Doing this will create a smoother line overall! Now that we’ve explored how to sew curves and corners, let’s move on to sewing in a straight line on stretchy fabric.
Sewing In A Straight Line On Stretchy Fabric
Sewing on stretchy fabric can be a bit of a challenge. It may not seem so, but stretching the fabric while you are sewing it can cause your stitches to become misaligned or even crooked.
To ensure that all of your projects come out looking professional and tidy, there are some techniques to keep in mind when sewing with this type of material.
The first thing to remember is to use the appropriate needle for the job. A larger-sized needle will penetrate thicker fabrics more easily and reduce the chances of skipped or uneven stitches from occurring.
Also, make sure to select a thread that matches your fabric’s weight and texture as closely as possible; otherwise, you could end up with puckers or gathers along the seam line.
Lastly, using an adjustable foot pedal helps maintain control over speed and tension – both important factors for achieving straight lines when stitching on elastic materials.
Make sure to take your time, slowing down if necessary, so that each stitch looks perfect before moving on to the next one! With these tips in hand, you’ll be able to sew beautiful straight seams every time on your favorite stretchy fabrics!
Conclusion
In conclusion, sewing a straight line with a sewing machine is not as difficult as it may seem. With the right fabric and the correct presser foot setting, anyone can create professional-looking garments in no time. And if you’re feeling intimidated by your own creative projects, don’t worry – just take things one step at a time and you will be amazed at what you can achieve!
FAQs
How do you sew a perfect straight line?
1. Set your stitch length to the longest setting.
2. Start sewing with a few backstitches to secure the thread.
3. Place a ruler along the fabric edge you’d like to follow and use it as a guide.
4. Sew slowly and keep the fabric as flat as possible.
5. Stop sewing with a few backstitches at the end.
Why isn’t my sewing machine sewing a straight line?
There are a few possible reasons why your sewing machine is not sewing a straight line. Firstly, check to make sure that the needle is properly seated and that the presser foot is at the correct height.
Secondly, check to see if the fabric is being pulled or pushed as it passes through the machine. If the fabric is not being pulled evenly, it will cause the stitching to be uneven. Finally, check the tension on the thread. If the tension is too tight or too loose, it can cause the stitches to be uneven.
Why is my straight stitch wavy?
The most common reason for a wavy straight stitch is incorrect tension. Sometimes the upper tension is too tight, and sometimes the lower tension is too loose. To fix this, try adjusting the tension dials on the sewing machine until the stitches look even.
What part of the sewing machine helps to keep stitching straight?
The feed dogs are part of the sewing machine that helps keep stitching straight. They are the metal teeth located under the needle plate that move the fabric along while stitching.
