
Are you looking for a way to revolutionize your sewing projects? Have you been stuck in a rut of using only the same few stitches on every project, and are ready to try something new? If so, it’s time to learn how to sew a gathering stitch on a machine!
A gathering stitch is an interesting technique that can be used on all kinds of fabric. It adds texture, dimension, and movement to otherwise plain garments. In just three paragraphs, we’ll provide you with the tools needed to make this technique work for you.
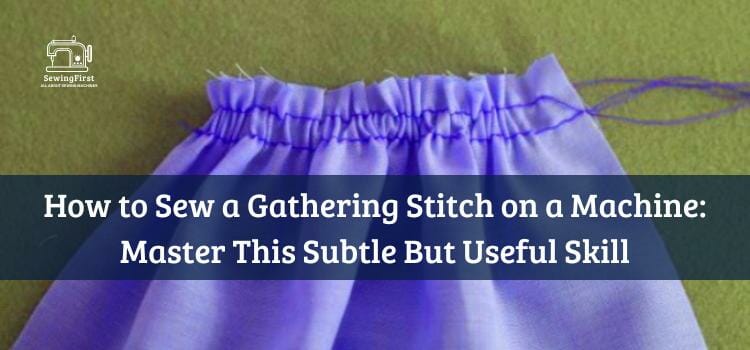
So what exactly is a gathering stitch? Well, it’s simply a method of pulling up threads along one edge of fabric while stitching down another edge at the same time. This creates beautiful gathers or pleats in any material – from lightweight chiffon or silk fabrics to heavier twills or wools – allowing your creativity to really take flight! With its stunning visual impact and easy application process, this technique will quickly become an essential part of your repertoire.
Ready to get started? Let’s begin by breaking down the steps necessary for mastering this powerful tool! By following these instructions step-by-step and applying them as needed during future sewing projects, you’ll soon have professional-looking results without having to call in reinforcements. So let’s get going – it’s time to learn how to sew a gathering stitch on a machine!
Related Topic: How To Back Stitch On A Singer Sewing Machine: The Easiest Way – 2023
What Is A Gathering Stitch?
Have you ever heard of a gathering stitch? It’s an essential tool for creating beautiful, textured fabrics – and it all starts with your sewing machine! A gathering stitch is made by attaching two pieces of fabric together using a presser foot on the sewing machine.
This attachment moves the top piece of fabric through the needle as the lower layer remains stationary. The thread tails created from stitching gather the upper piece into pleats or bunches, causing it to become shorter than its counterpart.
To master this technique, you’ll need to invest in a special Gathering Foot designed specifically for this purpose. With this addition, you can easily create texture and movement within your projects that will make them stand out! Now that we know what a Gathering Stitch is, let’s take a look at some types of gathering stitches available.
Types Of Gathering Stitches
Now it’s time to talk about the different types of gathering stitches you can use on your machine. The gathering is an essential skill for sewing, and having access to multiple methods makes it easier than ever before!
- Zigzag stitch: This type of stitch creates a row of stitching with parallel lines that look like zigzags. It’s best used when working with lightweight fabrics, as heavier ones may become distorted due to all the extra threads in the bobbin pulling at them.
- Elastic thread: Using elastic thread in place of regular thread allows you to create more substantial gathers while still being able to adjust them easily if needed. The fabric will be gathered much tighter than with a regular thread, so this method is great for creating fitted garments or corsets.
- Overlock stitch: An overlock stitch is similar to a zigzag stitch but has wider loops, resulting in a stronger thread that won’t fray or come undone after repeated wear and tear. This type of gathering works well for thicker fabrics such as denim or upholstery material.
- Pin tucks: For smaller areas where only minimal gathering is required, pin tucks are ideal. This involves making small pleats in the fabric and then securing them with short rows of straight stitching along each side – perfect for adding subtle details without overwhelming the design.
By experimenting with these various techniques, you’ll soon find one that works best for whatever project you’re undertaking! With strong threads and precise needles, there are endless possibilities when it comes to gathering fabric – get creative and start exploring today!
Thread And Needle Requirements
The first step to sewing a gathering stitch on a machine is to make sure your thread and needle are appropriate for the job. For best results, use an all-purpose polyester or cotton-wrapped polyester thread in both the top and bobbin threads.
The seam allowance should be about 1/4 inch wide, so select a needle size that’s compatible with this width. A strong bobbin thread tail is important for proper gathering; if you don’t have one, choose a bobbin case designed to produce it.
Once you’ve chosen the correct thread and needle combination, set up your machine accordingly. It’s also wise to wind two bobbins at once since they’ll get used up quickly when doing any kind of gathering work. Make sure each bobbin is filled with enough basting threads to complete your project before starting out as well.
Now that we know what type of thread and needles are needed, let’s move on to set our machine up properly so we can start stitching!
Machine Settings For A Gathering Stitch
Before we can begin sewing a gathering stitch on our machine, it’s important to adjust the settings properly. With the right setup, your quilting experience will be much easier and enjoyable. To get started, you’ll need to attach a gathering foot or presser foot to your machine.
This specialized foot is designed specifically for this technique and comes with many longarm quilting accessories. Once that’s installed, set up your machine according to the manufacturer’s instructions.
Make sure all of the tension knobs are adjusted correctly and that the bobbin thread has been loaded properly. Additionally, determine which type of stitch length works best for the fabric you’re using – shorter stitches create more gathers while longer stitches provide less fullness in the gathered area.
Finally, decide if you’d like to use a straight or zigzag stitching pattern; both have their own unique effects when used for gathering techniques so make sure to experiment beforehand! Now you’re ready to start making practice samples!
How to Sew a Gathering Stitch on a Machine: Making A Practice Sample
Creating a gathering stitch on a machine is like driving an Indy car; careful attention to detail and focus are key. To get started, you’ll need fabric, thread, the right sewing foot, and your trusty machine. Let’s begin by making a practice sample with the basting stitch.
First, adjust both the thread tension and needle tension until they’re balanced – not too tight or loose. Then select the longest basting stitch possible from your machine settings that will still hold the fabric together when gathered.
Place the fabric underneath the presser foot of the sewing machine and sew along it in one continuous line for about ten inches using this basting stitch. Once complete, gently pull at each end of your basting stitches to gather up your fabric into pleats according to your desired method of gathering.
When finished, tie off each end with small knots so you can keep track of how much gathers have been made and make any necessary adjustments before starting your project! With these simple steps, you’ll be ready to measure how much fabric needs to be gathered for your project – let’s do it!
Measuring The Fabric For Gathers
Measuring the fabric for gathers can be a tricky process. The key is to make sure that you have enough fabric edges so that your gathering stitch doesn’t cause the fabric layers to separate too much.
For medium-weight fabrics, aim for 1/4 inch of the gap at each end of the running stitch line. This will help ensure you don’t pull up too many threads when going through the gathering process.
Once you have determined how wide you want your gathers to be, it’s time to measure out and mark where your stitching lines should go on both pieces of fabric. Make sure to leave an even amount of extra material between each side of the seam allowance. You can use tailor’s chalk or pins if needed to secure them in place before beginning your stitches.
With everything measured and marked, now all that remains is preparing the fabric for sewing gathers!
Preparing The Fabric For Sewing Gathers
With intricate precision, it’s time to prepare the fabric for sewing the gathering stitch. Medium-weight fabrics such as cotton or linen are best suited for this technique. Here is what you’ll need before getting started:
- A straight stitch setting on your machine
- A piece of dental floss
- Specialty sewing machine feet
- The piece of fabric that was measured in the previous section.
Once all these items have been gathered and placed nearby, make sure the presser foot of your machine is lowered so that it won’t catch any material while stitching. Make sure to keep a steady hand when pulling up the bobbin thread from underneath the fabric; if not done correctly, then puckering may occur at certain points along the seam line.
Lastly, adjust the needle position according to where you wish to begin stitching – usually leftmost near an edge – and feed the fabric under until secure with no slack whatsoever remaining beneath it. With everything ready and in place, we can now move on to positioning our fabric under the presser foot.
Positioning The Fabric Under The Presser Foot
Positioning the fabric correctly is essential for a successful gathering stitch. To begin, place your fabric piece under the presser foot of your sewing machine with the wrong side up and facing you. Depending on the type of fabric you are using, there may be certain adjustments to make.
For finer fabrics or those with a looser weave, use a scrap of fabric beneath it as padding to keep them from slipping during stitching. This way, you can ensure that they remain in place while you sew.
Lastly, adjust the tension dials on your machine so that they match the weight and texture of your fabric pieces. With these steps complete, you’re ready to move on to the next step: creating a gathering stitch!
Step-By-Step Guide To Sewing A Gathering Stitch
Now that you have positioned the fabric under the presser foot, it’s time to step up your sewing game with a gathering stitch! Gathering stitches are great for adding texture and volume to slippery fabrics like chiffon. With just a few simple techniques, you can easily create beautiful ruffles on any piece of fabric.
Before starting, make sure your machine has a zigzag stitch setting and an adjustable tension dial. If you’re working with thicker fabric or want more precise gathers, consider investing in a specialized ruffler foot attachment. Now let’s get started!
First, adjust the length of your zigzag stitch according to the type of fabric you’re using – shorter stitches work best for lightweight materials while longer ones work better for heavier textiles. Then set the tension so that when both pieces of fabric are pulled together at each end they will form even gathers throughout the entire length.
Finally, use a wide straight stitch along one side of the two layers of fabric as a guide for stitching several rows of small zigzag stitches parallel to it. This will help keep your gathers even from top to bottom as well as prevent them from slipping out over time.
With these tips in mind, try experimenting with different settings until you find what works best for your project. Once you’ve mastered this technique there’s no limit to what kind of creative looks you can achieve! By adjusting certain techniques such as thread weight and needle size, accurate gathers become easy and repeatable every time.
Adjustment Techniques For Accurate Gathers
Adjusting the settings on your sewing machine is essential for achieving accurate gathers. It may take some trial and error to get it just right, but once you do, all of your gathering projects will be a breeze! Here are 3 tips that can help:
- Adjust the stitch length- The longer the stitch length, the looser and more gathered the fabric will become. When working with heavier fabrics or if space requirements require tighter gathers, use a shorter stitch length.
- Increase tension levels– If your thread isn’t pulling enough fabric into each row of stitching, try increasing your top tension level slightly until it produces perfect gathers every time.
- Strengthen Stitches- Cross two lines of stitching over one another in order to create an extra secure line that won’t come undone easily when manipulating or stretching out the gathered fabric. This technique works best for heavy-duty fabrics like denim and upholstery-weight materials.
By following these steps you’ll have no trouble creating beautiful gathers for any project! With careful adjustment techniques, you’ll ensure accuracy while seeing stunning results with ease.
Finishing Your Project With Gathers
Once you have the gathering stitch set up on your machine, it’s time to finish up your project with gathers. To achieve this look, begin by setting the raw edge of the fabric against the machine’s presser foot and lowering the needle into place.
Use a gentle zigzag stitch to sew along each side of the gathering thread until you reach the end. Once finished, use some embroidery floss or a seam ripper to remove any excess gathered threads from the fabric before moving on.
When working with lightweight fabrics like chiffon or organza, be sure to take extra care when sewing as these materials can be quite delicate. You may want to opt for hand-sewing instead or reduce your stitching speed so that there is less tugging at the material while gathering.
Additionally, choose a medium-length gather rather than long gathers which are more prone to showing through on lighter fabrics.
Now that you know how easy it is to create perfect gathers every time, let’s move on to troubleshooting common problems such as puckering and uneven stitches!
Troubleshooting Common Problems
Have you ever had trouble gathering stitches on your sewing machine? It can be quite daunting to work out where the problem lies. Fortunately, there are some simple steps that you can take to troubleshoot any common problems:
- Check your bobbin tension – if it’s too tight or loose, this could cause issues with the gathered stitches not forming correctly.
- Inspect the needle – make sure it is seated properly and facing in the right direction for optimal performance.
- Make sure the fabric is straight and not twisted before stitching – this will help ensure a smooth row of stitching will form.
If none of these solutions seem to help, try adjusting the stitch length or width. You may also need to switch up the type of thread being used as different types respond differently when gathered.
If all else fails, consult an experienced seamstress who can diagnose more complex issues like incorrect tension settings or jammed feed dogs.
Taking preventative measures by regularly cleaning and oiling your machine will decrease the likelihood of having any further difficulties while sewing gathers. Now let’s explore how to add embellishments after sewing those beautiful gathers!
Adding Embellishments After Sewing Gathers
Once you have your gathering stitch sewn, it’s time to add some embellishments. This can be as simple or elaborate as you’d like. You could use decorative threads in contrasting colors to make the stitching stand out more or even embroidery designs that are stitched over the seam line. If you want to go all-out with a project, consider adding some sequins and beads for an eye-catching effect.
Another option is to use lace trim along the seamline for a beautiful feminine look. This creates gorgeous texture and movement when paired with gathered fabric. If you’re feeling adventurous, try combining multiple types of trims together for an extra special design element!
Finally, buttons are always a classic way to finish off any sewing project. They come in so many different shapes, sizes, and colors – there’s sure to be one perfect for whatever garment or accessory you’re making! With just a few stitches you can bring your creation to life with this timeless decoration.
Different Uses Of Gathering Stitches
Now that you know how to sew a gathering stitch on your machine, there are plenty of different uses for it. Gathers can be used to add volume and shape to skirts, dresses, sleeves, and even trousers. They’re also ideal for making ruffles – simply attach one end of the gathered fabric onto the garment and then fluff out the rest at the other end.
A gathering stitch is also perfect for creating drapery; use it to create soft pleats or drapes in curtains and upholstery fabrics alike.
Finally, they’re great for adding detail to handbags, pillows, and quilts too! With so many possibilities available using a gathering stitch, you’ll find yourself turning to this technique time and again when sewing projects. Next, let’s look into maintenance tips for your sewing machine.
Maintenance Tips For Your Sewing Machine
Keeping your sewing machine in tip-top shape is essential to successful projects. To ensure that your machine operates smoothly, here are some maintenance tips:
First and foremost, clean it regularly! This includes the bobbin area, lint build-up near the feed dogs, as well as wiping down the outside of the machine with a damp cloth periodically – don’t use any harsh chemicals or soaps. You should also oil it every now and then; just make sure you check your user manual for instructions on where exactly to apply it.
Second, if you find yourself running into issues while sewings, such as skipped stitches or tension problems, try troubleshooting first before taking it to a repair shop.
Look at simple things like threading the machine correctly and making sure both needles are properly inserted. Changing out old needles can help too. If all else fails, consult an expert who knows how to fix machines inside and out!
Finally, be mindful when using accessories on your machine – they need regular cleaning and care as well. Make sure to unplug them properly each time after use to avoid potential damage from electrical surges or current leakage. And always store them away safely when not being used. Taking these steps will keep your sewing experience enjoyable and hassle-free!
Conclusion
In conclusion, gathering stitches are a timeless technique for adding texture and dimension to all sorts of projects. With the right machine settings, thread, needle, and a bit of practice, you can master this skill in no time! By learning how to sew gathers on your sewing machine, you’ll be able to create beautiful pieces that will last through the ages – like an heirloom quilt or a chic gathered skirt.
Once you’ve honed your skills with gathering stitches, don’t forget to pay attention to maintenance tips such as changing needles regularly and inspecting tension levels. This way, I can ensure my machine is running smoothly when it’s time to tackle another project.
FAQs
How do you see a gathering stitch on a sewing machine?
A gathering stitch is a type of stitch that is used to create volume and fullness in fabric. On a sewing machine, it is typically created by setting the stitch length to the longest setting and setting the stitch width to the narrowest setting. The sewing machine will then create a long, straight stitch with tiny gaps between each stitch.
What stitch should you use for gathering?
The most common stitch used for gathering is a basting stitch. Basting stitches are loose and quick to sew, so they can be easily pulled to create gathers in fabric.
How do you do a gathering stitch on a Singer sewing machine?
To do a gathering stitch on a Singer sewing machine, start by winding a bobbin with the gathering thread. Then set the stitch length on the machine to 4.0 to 4.5. Attach the gathering foot onto the presser foot. Place the fabric under the presser foot and start stitching. As you sew, the gathering thread will pull the fabric together and create gathers in the fabric. When you reach the end of the fabric, tie off the threads with a knot.
What is the best tension for gathering?
The best tension for gathering depends on the type of fabric and desired look. Generally, a tension setting of 4 or 5 is best for gathering lightweight or medium-weight fabrics, while heavier fabrics may require a tension setting of 6-8.
How do you get perfectly gathered fabric?
To get perfectly gathered fabric, you will need to use a gathering stitch. This is a type of stitching that is used to create gathers in fabric. To do this, set your sewing machine to a long stitch length and sew a line of stitches along the top of the fabric, leaving extra thread at the end of each line. Then, pull the threads at the ends of the line to draw up the fabric, creating folds and gathers. Once the desired amount of gathering has been achieved, secure the gathers in place by sewing a row of stitches along the top of the fabric.
What is gathered stitching called?
Gathered stitching is also known as pleating or ruching.
What is the stitch length for gathering?
The stitch length for gathering is usually set to the longest stitch length available on the sewing machine. This will allow the fabric to gather more easily.
What is the ratio for gathering fabric?
The ratio for gathering fabric can vary depending on the type of fabric, the look you are going for, and the amount of fullness you need. Generally, a ratio of 2:1 is used, meaning twice as much fabric is gathered as the length you need.
