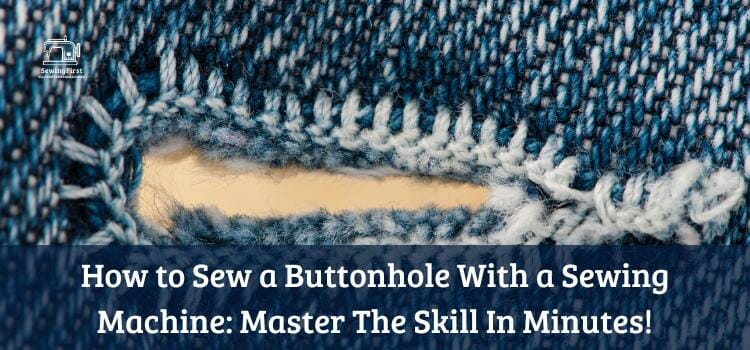
Sewing a buttonhole with a sewing machine can seem daunting, but it doesn’t have to be! With the right knowledge and tools, you can create perfect buttonholes in no time.
In this article, I’m going to show you how to sew a buttonhole using your sewing machine like a pro – even if you’re just getting started with sewing. By the end of this article, you’ll know exactly what steps are necessary for creating beautiful buttonholes without any hassle. So let’s get started!
Are you ready to take your sewing skills up a level? Then don’t miss out on this must-know guide on how to sew a buttonhole with a sewing machine.
We’ll start by looking at what type of stitches are best used when making these nifty openings; then we’ll go through each step required for completing the task successfully. You’ll also learn about some helpful tips that will make sure all of your projects come out looking their very best.
Whether you want to add an elegant touch to clothing or strengthen items around the home, knowing how to masterfully craft buttonholes is essential for adding those finishing touches. Get ready – because after reading this article, you’ll be able to easily create professional-looking results every single time!
Related Topic: How to Use Buttonhole Foot on Brother Sewing Machine (The Ultimate Guide 2023)
Table of Contents
ToggleOverview
Did you know that 80% of people who own sewing machines don’t even know how to make a buttonhole? If you’re one of them, this article is for you! Making a buttonhole with your sewing machine requires some skill and practice but it’s also an innovative way to spruce up any project.
You’ll need a few materials, such as a seam ripper, buttonhole foot attachment, thread, scissors, or a buttonhole cutter. Your sewing machine should have the capability of stitching what’s known as the “buttonhole stitch”. This type of stitch will create the opening through which your buttons fit.
With all these pieces in place, let’s explore what materials are needed to get started.
Materials Needed
I’m going to need a few things before I can get started sewing my buttonhole. First, make sure you have the correct presser foot that fits your machine – this is essential for accurate stitching!
Next, gather some matching thread and a sharp needle, plus two small pieces of scrap fabric. You’ll also want to leave yourself enough room on either side of the buttonhole when prepping the fabric.
Now let’s talk about thread tails – be sure to leave long tails at both ends so they don’t unravel in your project as you sew. Before starting any kind of machine work or handwork, it’s important to double-check check all supplies are ready to go. Once everything is gathered and close by, we’re finally ready to start preparing our fabric for this awesome DIY buttonhole!
Preparing The Fabric
Now that you have the necessary materials, it’s time to prepare your fabric for sewing a buttonhole. Before moving on to marking and cutting the buttonhole, we must first make sure the pieces of fabric are ready to go.
Start by taking out your fabric pen or other fabric marking tool and transfer any desired buttonhole markings onto the right side of the raw edge. Make sure these markings are accurate so that they can be used as a guide when creating the actual buttonholes later on in this process.
Next, use a sharp pair of scissors to cut away excess threads from around the marked area. This will help ensure accuracy with both stitching and measuring during the next steps of making a beautiful machine-sewn buttonhole.
Finally, press lightly around each marked area using an iron set at medium heat – this helps avoid shifting fabrics when working with multiple layers down the line.
Let’s now move on to marking and cutting our buttonholes!
Marking And Cutting The Buttonhole
Next up, it’s time to mark and cut the buttonhole. Before you start, make sure that the sharp scissor is handy! To begin, decide on the position of your buttonhole – this will depend on where the button sits on your garment. Once you have decided, use a straight stitch to sew along each side of the buttonhole using your sewing machine.
Don’t forget to lower the feed dogs so they don’t get in the way while stitching. When finished with both sides of the buttonhole, adjust your stitch dial setting to its widest width before cutting through the center. Cut carefully across with your scissors until you’ve made an opening for your buttons!
This may take some practice but soon enough you’ll be making perfect buttonholes like a pro. Now let’s move on to setting up our sewing machine for creating beautiful buttonholes!
Setting Up The Sewing Machine
Setting up the sewing machine to sew a buttonhole is like building blocks for your project – it’s essential to get it right. To do this, you need to make sure that your modern sewing machine has the correct settings and attachments.
First, attach a buttonhole lever or foot on the machine if available. Then, adjust the tension of both threads; the bobbin thread should be tighter than normal while the top thread should be looser than usual. You can find these specific instructions in your machine manual as they vary from model to model.
Once everything is ready, set up your machine to run zigzag stitches over the length of the marked line – this will create a secure and durable buttonhole!
Make sure you practice stitching on some scrap fabric before starting so that you’re confident when working on your project piece. After all of these steps are taken care of, you are now ready to begin attaching a buttonhole foot for more intricate designs.
Attaching A Buttonhole Foot
Before you can start sewing a buttonhole, the right foot needs to be attached. A buttonhole foot is used for machine-sewn buttonholes and will help keep your fabric in place as you sew. Here’s how to attach it:
- Unscrew the thumb screw on the back of your presser foot holder with a flat-head screwdriver.
- Slide off the regular presser foot and slip on the buttonhole foot instead.
- Push down gently until it clicks into place and then tighten up the thumb screw again securely.
- Depress the lever at the side of your machine and make sure that only about 1mm of space is left between them – this ensures that there’s enough pressure when stitching!
Now that everything is ready, you are almost ready to start sewing a perfect machine-sewn buttonhole slit with smooth, even buttonhole stitching around its edges – but first, let’s look at selecting the right stitch type for your project!
Selecting The Right Stitch Type
Sewing buttonholes is an art, and the right stitch type can make all the difference. It’s easy to get overwhelmed by all of the options, so here are some tips on how to choose the best stitch for your project.
First off, there are two types of buttonhole stitches: vertical and horizontal. Vertical buttonholes require a zigzag stitch that alternates between left and right movements while stitching.
Horizontal buttonholes use a straight or modified straight stitch with a few small backstitches at each end. Both stitches should be done with matching thread color against whatever fabric you’re working with – this will ensure the strongest results.
For projects like blazers, jerseys, and coats where extra strength is required, using a reinforced vertical buttonhole is recommended. This uses multiple rows of thread for increased durability when worn regularly over time.
For everyday garments like shirts, skirts, and pants it’s perfectly fine to use either option – just remember to test out different settings until you find one that works best for your fabric!
Finally, once you’ve chosen the perfect stitch type for your project don’t forget about securing threads at the start and end of work – this will keep them from fraying over time.
Securing Threads At the Start And End Of Work
Now that the buttonhole is marked, it’s time to secure the threads at the start and end of your work. To ensure a perfect buttonhole every time, use these tips for sewing:
- Use embroidery floss or thin thread when beginning and ending your stitching. This will give you extra strength and durability while also creating a neat finish on both sides.
- Make sure your scrap piece of fabric is properly secured with pins before starting to stitch so that the stitches don’t slip out during the sewing process.
- Once you have finished stitching, tie off the ends with a few knots in order to prevent them from fraying or coming undone over time.
When making stretch buttonholes, be sure to use special techniques such as stretching the fabric tautly as you sew and using an appropriate needle size for this type of material. With some practice, you’ll soon master how to make perfect buttonholes every time!
Sewing The Buttonhole
Did you know that the average person will sew up to 23 buttonholes in their lifetime? Now, it’s time to start sewing yours! To begin making your keyhole buttonhole with a standard sewing machine, all you need is a piece of fabric and one of those fancy machines.
First, make sure that the size of the stitch setting on your machine matches the size of the buttonhole you want to create. Then decide how wide and long you would like your buttonhole to be and mark off the area on your fabric.
Next, use a stabilizer or tape if necessary to keep everything secure while you are stitching. After that, set up your machine for zigzag stitching and position the needle at one end of where you marked off your desired area for the buttonhole.
Finally, slowly guide your fabric through as you hold down firmly on both sides of the actual garment – all while keeping an eye out for any puckering or pulling along each side of the buttonhole. Make sure not to rush this step so that every stitch looks even once finished! Once completed, move on to finishing off the edges by following some additional steps.
Finishing Off The Edges
Now that you have created your buttonhole, it’s time to finish off the edges. To ensure a professional-looking buttonhole, use a fray check on each of the four sides. Make sure to apply this evenly and correctly so that all layers of fabric are sealed together.
To really secure the entire buttonhole, go over the outside two sides with a chalk pencil or water-soluble pen. This will help lock it in place the fold and prevent any potential unraveling once it’s washed. Moreover, by marking off these two outer sides, you can better visualize where exactly the opening should be when it’s time to cut!
Finally, run an iron along both edges for good measure before cutting them open with scissors or a seam ripper. You don’t want too much heat since we don’t want to melt down our hard work but enough pressure to make sure everything is set in stone!
By taking extra care during this finishing step process, you’ll end up with a beautiful buttonhole – one that looks like it was professionally sewn! Ready? Let’s get started releasing those bobbin threads!
Releasing Bobbin Threads
Let’s embark on the next exciting step in our journey of sewing a buttonhole with a sewing machine. Releasing bobbin threads is essential to making strong and durable hand-worked buttonholes, as it helps keep them secure and intact when finished.
The first thing you need to do is locate the bobbin tension dial or screw near the faceplate of your sewing machine. Then, adjust it until there is no resistance when pulling up the thread from the bottom spool pin.
Once that’s done, hold onto both upper and lower threads before cutting them free from each other. Now bring these two threads up through the needle plate, then guide them over towards the left side so they can be tied together at the top – this will create an even tension for all stitches along your buttonhole. Finally, make sure all affiliate links are properly connected between your fabric and presser foot for steady movement during stitching!
Testing The Fit Of The Buttonhole
Now that you’ve released your bobbin threads and have finished sewing the beautiful buttonhole, it’s time to test its fit. To do this, press down on each end of the stitched area with a pin or thimble, then use scissors to carefully cut open the middle of the buttonhole. Be sure not to cut too close to the stitches!
Once you’ve opened up the buttonhole, slide one edge of an appropriate-sized button through it as if you were going to fasten it in place. If it still feels slightly tight when going through, try using a seam ripper or small pair of embroidery scissors to trim any excess fabric from inside.
Remember: once trimmed, there is no going back so take caution before snipping away!
If everything looks good after testing out how well the buttons fit into their holes, congratulations – you just created your own stunningly professional-looking buttonholes! Now all that’s left to do is add reinforced bar tacks for extra security and durability – but let’s save that step for our next section.
Adding Reinforced Bar Tacks
Once the buttonhole has been sewn, it’s time to reinforce the bar tacks. This is a simple but important step that will ensure the durability and longevity of your project. Here are some tips for adding reinforced bar tacks:
- Use a strong thread in both the needle and bobbin when sewing the bar tack so it won’t break easily.
- Sew multiple rows of stitches close together at each end of the buttonhole for extra strength.
- Securely anchor the beginning and end threads by backstitching or knotting them off before cutting away any excess fabric from around the edges of the buttonhole.
- Make sure to use an appropriate size needle and presser foot for your chosen fabric type – this will make all the difference!
- Test out different stitch lengths until you find one that works best with your material; too long of a stitch may cause puckering or gathering of fabric near the buttonhole opening.
With these tips in mind, you’ll be able to create beautiful, durable reinforced bar tacks every time! Now let’s explore some alternatives to making a buttonhole if hand-sewing or machine-sewing isn’t an option.
Alternatives To Making A Buttonhole
Now that you’ve mastered the art of making buttonholes with a sewing machine, let’s explore some alternatives. First, up is hand-sewing your own buttonhole.
This old-fashioned way of creating a security hole for buttons may take a bit longer as it requires patience and precision when working with fabric and thread. However, if done correctly, it will leave you with an even stronger end result than what can be achieved by using a sewing machine.
Next, we have interfacing fabric to make the buttonhole more durable. Interfacing not only strengthens the fabric around the hole but also helps keep the shape intact after years of wear and tear. To do this method simply cut out two pieces of interfacing in identical shapes and sizes to fit over either side of the buttonhole area then stitch them together along the edges.
The key is to use an interface specifically designed for garment construction so you know it will last through multiple washes without fraying or fading.
Finally, there are unique solutions like using eyelets instead of traditional buttons – these small metal rings add interesting detail while still providing enough strength to hold your garments together securely!
Whatever alternative you choose, just remember that practice makes perfect so don’t be afraid to try something new until you find the best solution for your project needs. With these tips in mind, let’s move on to troubleshooting common problems when sewing a buttonhole.
Troubleshooting Tips
If you have trouble sewing a buttonhole with your machine, there are several things you can do to troubleshoot the issue. First, make sure that all of the pieces are properly threaded and tensioned. If they aren’t, then it won’t work as effectively as it should.
Additionally, check the bobbin area and clean out any lint or debris that may be stuck in there. This will also help ensure that everything runs smoothly when you’re trying to sew a buttonhole.
Finally, if none of these solutions work for you, consult your machine’s owner manual or contact customer service for more assistance. With a few simple tips, you’ll soon be able to create perfect buttonholes on your machine!
Conclusion
Thanks for taking the time to learn how to sew a buttonhole with your sewing machine! Buttonholes can be intimidating, but once you understand the basics and practice this technique a few times, it will become second nature.
Did you know that over 1 million buttons are produced every day? That’s an incredible number of tiny fasteners all ready to hold our clothing together in style. With your new skill, you’ll be able to make sure those buttons stay where they belong by creating perfect buttonholes each and every time.
Now that you know the steps involved in making a buttonhole, why not put them into practice and start experimenting? Take some scrap fabric and create a variety of sizes and shapes so that when it comes time to work on your next project, you’ll have plenty of experience under your belt. I’m sure you’ll find yourself confidently zipping through buttonholes like a pro!
FAQs
What stitch do you use for button holes?
Most commonly, a buttonhole stitch is used for buttonholes. This stitch creates a neat, secure finish and is especially useful for thicker fabrics.
How do you machine sew a buttonhole without a buttonhole foot?
1. Mark the position of the buttonhole on the fabric using a fabric marker or tailor’s chalk.
2. Set your machine to the buttonhole stitch setting.
3. Sew around the markings, backstitching at the beginning and end.
4. Sew a few stitches back and forth at the beginning and end to secure the threads.
5. Cut the center of the buttonhole open using a seam ripper or sharp scissors.
6. Gently pull a thread loop out of the center of the buttonhole.
7. Pull the threads to the wrong side of the fabric and tie them into a knot.
8. Trim any excess threads.
How do you sew a buttonhole with a straight stitch?
Buttonholes are traditionally sewn using a zigzag stitch, however, it is possible to sew a buttonhole with a straight stitch. To do so, first, mark the placement of the buttonhole on the fabric. Next, create an opening by hand-stitching a series of small backstitches along the line. Once the opening is complete, sew a series of vertical straight stitches around the edges of the opening.
Can modern sewing machines sew buttonholes?
Yes, many modern sewing machines are able to sew buttonholes. Some machines may require the purchase of a specific foot to sew buttonholes, while other machines may come with a variety of feet for different stitching needs.
How do you sew a buttonhole manually?
1. Mark the buttonhole location with a fabric pen or tailor’s chalk.
2. Cut a slit in the fabric just wide enough for the button to fit through.
3. Use a backstitching technique to reinforce the sides of the buttonhole.
4. Sew a zigzag stitch around the edges of the buttonhole.
5. Secure the ends of the zigzag stitch with a few small stitches.
6. Trim the excess threads and fabric.
Where is the buttonhole lever on a sewing machine?
On most sewing machines, the buttonhole lever is located on the side of the machine, near the lower part of the arm. It is usually a small silver lever with a ridged edge.
How many times should you stitch between holes when sewing on a button?
Most tailors and seamstresses recommend stitching the button on in an “X” pattern, which would be four times. However, depending on the size and weight of the button, you may need to stitch more times for extra security.
How do you mark and sew a buttonhole?
1. Mark the buttonhole with the tailor’s chalk. Measure out the length and width of your buttonhole and draw a line with the chalk.
2. Set the machine to a buttonhole stitch setting.
3. Sew a row of stitches along the line you drew. Sew slowly and carefully, making sure to stop and back-tack at the beginning and end of the row.
4. Move the fabric away from the needle and press the buttonhole lever or foot. This will automatically sew a row of buttonhole stitches.
5. Sew a second row of stitches in the same manner.
6. Secure the stitches by back-tacking at the beginning and end of the row.
7. Cut a slit in the center of the buttonhole. Use a seam ripper or sharp scissors to make the slit. Make sure the slit is no larger than the button you plan to use.
8. Sew a row of small stitches around the edges of the buttonhole to secure the edges.
9. Press the buttonhole with an iron to flatten the edges and make the buttonhole look neat.