
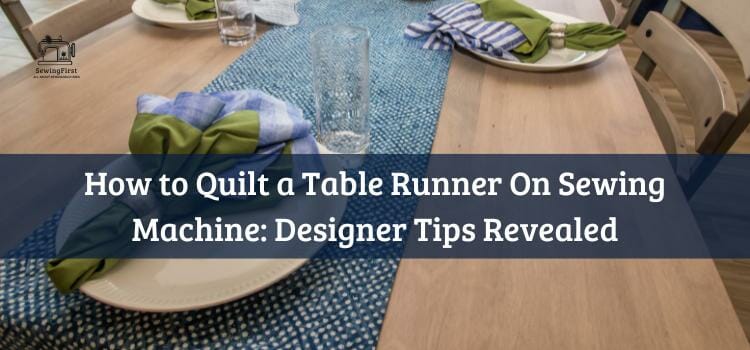
Are you looking for a creative way to spruce up your dining room table? Quilting is an excellent hobby that can help you create beautiful, one-of-a-kind pieces. And it doesn’t have to be too difficult or time-consuming. With the right tools and some patience, anyone can learn how to quilt a table runner on a sewing machine.
Whether you’re an experienced sewer or just getting started with this craft, this article will show you everything you need to know about creating beautiful table runners from fabric scraps. You’ll learn what materials are necessary, tips and tricks for making the process easier, as well as some examples of completed projects.
By the end of this article, you’ll have all the information needed to turn your own ideas into reality with a stunning handmade quilted table runner! Let’s get started so we can get your pride and joy finished in no time!
Related Topic: How to Make a Sewing Machine Extension Table: Be the Pro You Wanted To Be
Overview Of Quilting
Quilting is a craft that has been around for centuries, but with the advent of modern sewing machines and tools like rotary cutters, it’s easier than ever to create beautiful quilted pieces. Crafting your very own quilted table runner can be a rewarding experience – one that will bring color and style to any dining room or kitchen.
To make this project happen you’ll need some special materials, including fabric pieces and a reliable sewing machine. Let’s dive into what supplies you’ll need in order to get started on creating an elegant quilted table runner.
How to Quilt a Table Runner On Sewing Machine: Materials Needed
Now that we have an overview of quilting and what it involves, let’s gather the materials needed to make a table runner. The supplies you’ll need include batting fabric, two different pieces of quilt fabric for the top and back, cotton thread in matching colors (or bobbin thread if desired), and several pieces of batting for padding.
Be sure to select fabrics with similar weights so that when pieced together they will create one cohesive piece. Plus, pick hues that coordinate or contrast nicely – this way your finished product will be both attractive and functional!
When selecting fabrics for your project consider how each material will work best depending on its intended use: thicker cotton is ideal for backing while thinner weaves can be used as accent layers.
Consider also whether you want to add additional texture by using a variety of prints, solids, and textures within your design. With all these elements in mind – let’s take a closer look at which types of fabrics would be perfect for crafting our own quilted table runner.
Selecting Fabric
It’s time to select the fabric for our table runner. A popular theory suggests that it is best to use excess fabric from other projects, but this doesn’t always have to be the case. When selecting fabrics for a quilted project you must consider more than just aesthetics – durability and usability are also key factors.
To make sure your project stays in place, choose fabrics with enough weight so they won’t shift or bunch up while being stitched together. Also, make sure to leave extra space around the edges of each piece when cutting out shapes – especially if you plan on leaving thread tails after stitching seams!
Finally, pick rectangles and strips of fabric that will create an interesting patchwork design. Marking these pieces before sewing can help keep everything organized as you go along.
Prepping The Fabric
Now that we have chosen the fabric for our table runner, it’s time to start prepping. Before beginning any quilting project, be sure to add a seam allowance of ⅛-inch around each piece. This will provide additional stability when stitching and make allowances for shrinking fabrics after washing.
To do this accurately and evenly, use your sewing machine’s darning foot or walking foot attachment along with some safety pins and a small square of fabric as guides. These tools can help ensure all pieces are cut at the same width and length – important for making even stitches in the final product. Once everything is set up correctly, you’ll be ready to move on to marking and cutting out our pieces!
Marking And Cutting The Pieces
Once we have the fabric prepped, it’s time to start marking and cutting out our pieces. Quilting a table runner can be done in several ways, but for this project let’s quilt as you go (QAYG). This method involves piecing together the top layer of fabric along with batting/filling before stitching on each piece.
To begin, mark off straight stitch lines about 3-4 inches apart across your main fabric piece – these will serve as guidelines when piecing together the various fabrics and batting that make up the quilt.
Then cut strips from each of your chosen fabrics at least 5 inches wide – leaving enough extra fabric for a border if desired – and lay them side by side until you’ve achieved your desired design.
Be sure to leave room between pieces for diagonal seams which will provide additional stability during construction. Finally, use some safety pins to secure all your pieces together so they don’t shift while sewing. Now we are ready to move on to piecing our QAYG table runner together!
Piecing The Runner Together
Now that our fabric and batting pieces have been marked, cut, and pinned together, it’s time to start piecing the runner together. We’ll begin by sewing along the straight stitch lines we marked out earlier – this will be a basic quilting pattern to hold everything in place.
Then take one of your wide strips of fabric and sew it onto the main piece using a ¼ inch seam allowance – make sure the edges are aligned before stitching. Continue doing this until you’ve worked through all of your chosen fabrics and have achieved your desired design.
Once finished with piecing, add any optional sashing or extra borders for contrast with other blue fabrics if desired – ironing each addition as you go helps ensure crisp seams when finally sandwiching the layers together. Now we can move on to completing our table runner!
Sandwiching The Layers
Now that the pieces of our quilt are laid out, it’s time to get everything ready for sandwiching. To create a quilt sandwich we need three layers: a top layer of lovely fabric, middle batting (or wadding), and a bottom backing piece.
First, take the rectangle fabric piece with the lengthwise grain facing up and lay it on your work surface. On top of this smooth out the batting so that there is no bunching or wrinkling – make sure it completely covers the entire fabric surface beneath. Lastly, place the remaining pretty fabrics right side down onto the batting – you can mix in different prints here to add texture if desired.
Once all three layers have been arranged neatly into position, gently pin through all layers at their edges using safety pins or straight pins spaced 3 inches apart – this will hold them together while sewing. Now our quilt sandwich is ready for us to set up the sewing machine!
Setting Up The Sewing Machine
Now that the quilt sandwich is ready, it’s time to set up the sewing machine. Before starting any motion quilting we need to ensure our raw edges are properly secured so they don’t fray or come undone during stitching. To do this, start by threading a bobbin with regular or thicker quilting thread and then install it into the machine.
Next, attach a walking foot to your sewing machine – these specialized presser feet help evenly distribute layers in order for them to remain flat while moving beneath the needle. Once attached begin adjusting settings such as stitch length, width, and tension until you reach desired levels for proper stitch formation. Lastly, trim away excess batting around the perimeter of each piece before beginning any quilting motions!
Quilting Techniques
With a steady hand and creative flair, it’s time to quilt the table runner! Begin by selecting any motifs or patterns that you’d like to stitch onto your piece of batting. Consider using square pieces of batik fabrics as templates for easy tracing – they’re perfect for adding texture and contrast throughout the project.
Use extra fabric yardage from your original design if necessary, then turn on the machine to join the upper thread with the bobbin thread in order to create an even lockstitch.
Once all layers are secured, use this opportunity to get creative! Try out different quilting techniques such as meandering lines, echoing shapes, or stippling designs in various directions.
Take it slow at first until you reach desired speed and pressure levels before making long continuous stitching motions across all sections of material. With practice and patience soon enough your table runner will be ready to show off its beautiful features!
Finishing Details
Now that the quilting process is complete, it’s time to finish up our table runner. Start by securing each layer with a purpose thread of your choice – preferably one in a color similar to the underlying fabric for best results. This will give the finished product an even more cohesive look and feel.
For any exposed edges, such as those around borders or curves, you can use bias tape or binding in matching colors of fabric as desired.
For this step, we recommend using bobbins with cotton thread so that everything stays securely sewn together no matter how much wear and tear there may be on the piece.
Ultimately these decisions come down to personal preference when selecting which blues and prints to choose from – but either way, the project should still turn out beautifully!
Working With Bias Tape Or Binding
Now that you’ve finished the quilting process and secured all layers, it’s time to add those extra details like bias tape or binding. Working with these materials can take a bit of practice but once you get the hang of it, they’ll really make your table runner look complete.
To begin, measure out how much bias tape or binding is needed for each edge on your project. Then cut this fabric into strips so that when laid flat there are no gaps in between them. Once everything is prepped, use an iron to press down each strip before pinning them onto the edges of your runner – making sure not to stretch the material too tightly while doing so.
Finally top stitch around the perimeter of the piece using matching thread and voila! Your table runner should be ready for embellishment…
Adding Embellishments
Now that the basics are complete, it’s time to make your table runner stand out even more with a few extra touches. Embellishments like buttons or bows can add interesting detail to any project – and let’s be honest, who doesn’t love a little sparkle? So why not take this opportunity to dress up your piece with something special?
For instance, you could sew on some colorful fabric flowers for a vintage look, or use sequins instead of thread when top-stitching around the edges. If you’re feeling really adventurous you might even consider adding in lace trim or applique pieces as well!
No matter what decorations you choose to include, just have fun and get creative – because at the end of the day, it’s all about creating something unique and beautiful.
Finishing Touches
Now that you’ve added all the decorative touches, it’s time for a few finishing moves. Start by double-checking your seams and making sure they are securely stitched. This will give your table runner extra stability as well as help make sure no stray threads come undone in the future.
Next, take some scissors and snip off any loose ends – this includes both fabric threads and any pieces of trim or embellishments that may be sticking out too far.
A little bit of attention to detail can go a long way when it comes to creating something truly special! Once everything looks neat and tidy, then you’re ready to move on to caring for your new creation.
Caring For Your Table Runner
Caring for your table runner will help keep it looking like new for many years to come. Here are a few tips to get you started:
1. Whenever possible, try to avoid machine washing and air-dry instead. If that’s not an option, choose the gentlest cycle and always use cold water.
2. To remove any wrinkles or creases, use the steam setting on your iron – just make sure there is no direct contact with the fabric!
3. When storing away in between uses, fold up neatly and place in a breathable bag such as cotton or muslin so that moisture can still escape. This will also protect against dust build-up over time.
4. Finally, don’t forget to clean off any spills immediately with a damp cloth – this will prevent staining later down the line.
With these simple steps in mind, you’ll be able to enjoy your beautiful quilted table runner for many more years of entertaining guests! Now let’s look at some troubleshooting tips if ever something goes wrong.
Troubleshooting Tips
When it comes to quilting on a sewing machine, no matter how much experience you have, there can be some issues that arise. It’s important to know what these problems are and how to troubleshoot them so you don’t end up with an unfinished project!
First of all, make sure that the thread is securely in place before starting your stitching – this will help avoid any tangles or knots during the process. Additionally, check that the tension settings on both the top and bottom threads are balanced. If they’re not, it could cause puckering or uneven stitches.
To ensure smooth sailing throughout your quilting journey, use sharp needles and high-quality fabric as well as make sure your bobbin is full at all times.
Also, take time when piecing together sections of fabric – this will help prevent unwanted bunching while working with thicker layers. With these tips in mind, you’ll be able to masterfully create beautiful table runners for years to come!
Conclusion
In conclusion, quilting a table runner on your sewing machine is an enjoyable way to create beautiful and unique home décor. With the right supplies, some patience, and a steady hand, you can make a stunning piece that you’ll be proud of for years to come. I encourage any crafty person to give it a try – there’s something special about being able to say you made it yourself!
The process may seem daunting at first but with practice comes perfection. As you refine your skills, take the time to appreciate each step in the process. Even if something doesn’t turn out how you expected or hoped, remember that mistakes are part of learning and growing. It’s all part of the journey!
Lastly, don’t forget to care for your creation properly once it’s finished. Show off your handy work proudly while also taking proper steps to prolong its life so that others can enjoy it too!
FAQs
How do you quilt a table runner on a regular sewing machine?
1. Begin by preparing the table runner for quilting. Step one is to press the runner and prepare a quilt sandwich. This includes layering the quilt top, batting, and backing.
2. Secure the sandwich in place by pinning or basting it together.
3. Select a machine quilting pattern that is appropriate for the size and shape of the table runner.
4. Load the quilting pattern into the machine, or select a stitch pattern, such as a stipple stitch or a meandering line.
5. Begin quilting the table runner, starting in the center and working your way out to the edges.
6. Once the quilting is complete, remove the pins or basting and press the project one last time.
7. Trim any excess batting or backing fabric to the size of the table runner.
8. Finish the table runner by binding the edges.
How do you quilt as you go table runner?
Quilting as you go (QAYG) is a technique to quilt a quilt top as you are piecing it. The steps for quilting as you go, table runner, are:
1. Cut out the fabric pieces for the patchwork table runner.
2. Sew the pieces together to form the top of the patchwork table runner.
3. Place a piece of batting behind the patchwork table runner top and baste it together.
4. Quilt the patchwork table runner top by stitching in the ditch, or in other quilting patterns of your choice.
5. Trim the edges of the patchwork table runner and bind it with quilt binding.
6. Attach the quilted patchwork table runner top to a backing fabric and quilt it with a walking foot.
7. Trim the excess batting and backing fabric from the edges of the quilted table runner.
8. Add a hanging sleeve to the back of the quilted patchwork table runner and hang it up.
Can you quilt a table runner without batting?
Yes, it is possible to quilt a table runner without batting. You can use a number of techniques such as free motion quilting, running stitch quilting, and decorative stitch quilting. However, it is important to note that the table runner will not have the same level of thickness and softness as one with batting.
