
Do you want to learn how to oil your Brother sewing machine? Oiling a sewing machine is essential in order to keep it running smoothly and efficiently. It’s not difficult, but there are certain steps that must be followed in order for the job to be done properly. In this article, we’ll discuss exactly what needs to be done in order to oil your Brother sewing machine correctly.
Whether you’re an advanced sewer or just starting out, having the knowledge on how to service and maintain your own equipment can be incredibly empowering. After all, wouldn’t it feel great if you were able to take care of something yourself instead of relying on someone else?
That’s why understanding how to oil a sewing machine Brother is so important – it gives you the confidence and know-how needed for mastering any project! So let’s get started and see how easy it can be to master the process of oiling a Brother Sewing Machine!
Related Topic: How To Oil a Brother LS 2125 Sewing Machine: 3-Step Guide
What Is Oiling A Brother Sewing Machine?
Oiling a Brother sewing machine is an absolute necessity to keep your precious fabric-stitching tool running smoothly. It’s one of those essential activities that every sewer should know and it can make all the difference between a well-functioning, efficient machine and one that isn’t performing up to its potential!
But don’t worry – oiling a Brother sewing machine doesn’t have to be intimidating or overwhelming. With just a few basic supplies, you’ll be able to easily oil this high-quality piece of equipment with minimal effort!
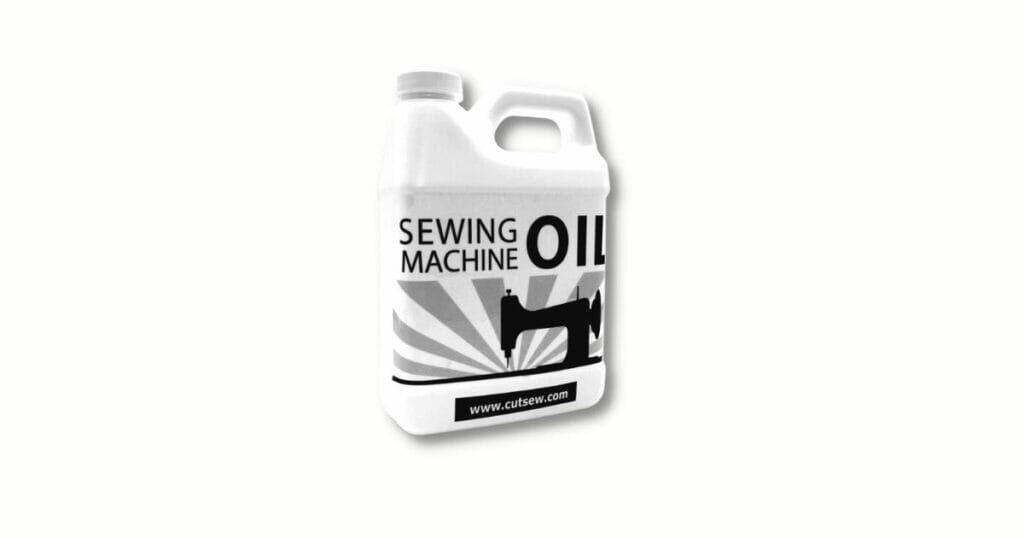
The first step in oiling your Brother sewing machine is gathering the materials needed for the task. You’ll need some universal sewing machine oil, which will help lubricate all moving parts such as the hook cover, needle bar, and more.
Additionally, you might also want something like a soft cloth or brush so you can wipe away any excess oil after application. Once you’ve gathered these supplies, it’s time to begin oiling your Brother Sewing Machine!
Start by carefully removing the hook cover from the front of your machine and then using the cloth or brush to remove any dirt or debris around the area. Afterward, take the universal sewing machine oil and apply it directly onto each moving part within view (avoid getting too much on).
Make sure not only that each component has been adequately covered but also that no residue remains behind when done. Finally, once everything looks good at last reattach the hook cover back into place before testing out your newly oiled Brother Sewing Machine!
Materials Needed For Oiling The Sewing Machine
You’re about to embark on a journey, one that will take you through the inner workings of your sewing machine and how to properly oil it. To do this correctly, however, there are some materials you’ll need to have at hand first. But what exactly?
It goes without saying that industrial or white sewing machine oil is necessary for lubricating the various parts inside your Brother sewing machine. However, don’t be fooled into thinking that’s all you need; a specially designed cleaning kit for machines can help make sure everything stays in top condition!
Kits often include items such as cloths, brushes, and Advantage Sewing Machine Lubricant Oil – perfect for getting rid of any troublesome dust and dirt particles that may accumulate over time.
Finally, having a separate “machine-cleaning” brush specifically made for removing lint from your device is also highly recommended. Not only does this ensure the smooth operation of the unit but helps keep potentially damaging debris away from its delicate components too!
By using these materials together with quality oils like those mentioned above you’ll be able to expertly maintain your Brother sewing machine – no matter where life takes you next!
Why Is It Important To Oil The Sewing Machine?
Maintaining a sewing machine is essential to producing quality results with any sewing project. Oiling the machine regularly helps keep it in optimal condition and ensures that your projects are completed without any issues.
Oil lubricates all of the moving parts inside the machine, such as the needle plate, hook assembly, and other mechanisms, preventing them from becoming dry or worn out. Without oiling your sewing machine on occasion, you’re likely to end up with uneven stitching, broken needles, skipped stitches, and jamming of fabric pieces – not an ideal outcome for any type of craft-making!
To oil, your sewing machine properly requires only a few drops of oil applied directly onto the moving parts. It’s important to make sure that no extra oil gets into any areas where it shouldn’t be – using a clean cloth can help here too.
And don’t forget to unplug the power cord before beginning; safety first always! Once finished with applying the drops of oil around moving parts, turn it off and leave for about 10 minutes so that all excess oil can dissipate before use.
Regularly taking care of your sewing machine will ensure long-lasting performance and prevent any frustrating moments when trying to complete your next sewing project. Don’t let something simple like neglecting this maintenance step get in between you and making amazing creations!
Keep those mechanical components running smoothly by giving them routine love through regular cleaning and oiling procedures.
Different Types Of Oil To Use For The Sewing Machine
Oiling your sewing machine is an important step in keeping it running smoothly, but which oil should you use? There are a few different types of oil that work well for Brother CS and PRW sewing machines. Let’s explore the best options available to keep your sewing machine humming along happily.
First, the manual that came with your sewing machine will likely recommend its own brand of specific oils or greases. If there are no recommendations listed in the manual, then any good quality lightweight oil will do. It’s always best to go with what your manufacturer suggests when possible!
Second, you can buy plastic oilers specifically designed for pcs sewing machines such as Brother CS and PRW models. These handy little bottles come pre-filled with premium-grade lubricants made specifically for these kinds of machines. Plus they have easy-to-use applicator tips so all you need to do is add a drop of oil where needed!
Thirdly, many home sewists swear by plain old 3-in-1 household oil for their regular maintenance needs. This type of multi-purpose oil works great on most parts of the machine and is often more affordable than buying specialty items from your dealer. Just make sure not to use too much; a single drop will usually be enough!
- These four options:
- manufacturer-recommended oils or greases,
- specialized PCS oils,
- and 3-in-1 household oil is all viable choices for maintaining the health and longevity of your Brother CS or PRW sewing machine.
Taking some time each month to give the internal workings a bit of love helps ensure smooth sailing down the line. With just minimal effort, our hardworking machines can remain happy and healthy partners in creativity! Ready to move on to cleaning out lint build-up? Let’s take a look at how often we should tackle this chore.
How Often Should You Clean The Sewing Machine?
Cleaning a sewing machine is like giving it a tune-up – essential for maintaining smooth and efficient operation. Whether you’re dealing with an industrial sewing machine, a Singer sewing machine, or something else entirely, regular maintenance should be part of your routine to ensure peak performance from the equipment. Here’s what you need to know about how often to clean your sewing machine:
- Fabric lint builds up over time and can cause problems with stitch quality and tension if not removed.
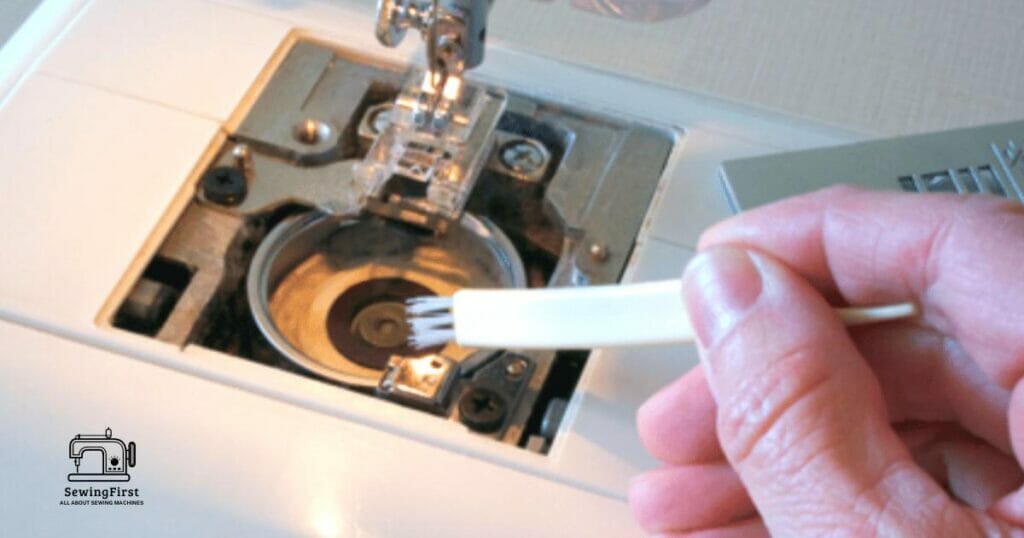
- Lint brushes are useful tools for removing fabric lint from hard-to-reach areas in the needle plate area around the bobbin case.
- Sewing machines should be cleaned regularly throughout their lifespan to keep them running smoothly; a good rule of thumb is once every 6 months.
Keeping on top of regular cleaning will also help prevent any unexpected breakdowns as well as prolong its life span.
Regular cleaning keeps your sewing equipment functioning at an optimum level, which means less frustration when trying to complete projects and better results overall.
Plus, taking care of your sewing machine helps maintain its value so that it lasts longer without needing costly repairs! With these tips in mind, now we can move on to understanding whether you should clean the machine before oiling it.
Should You Clean The Sewing Machine Before Oiling?
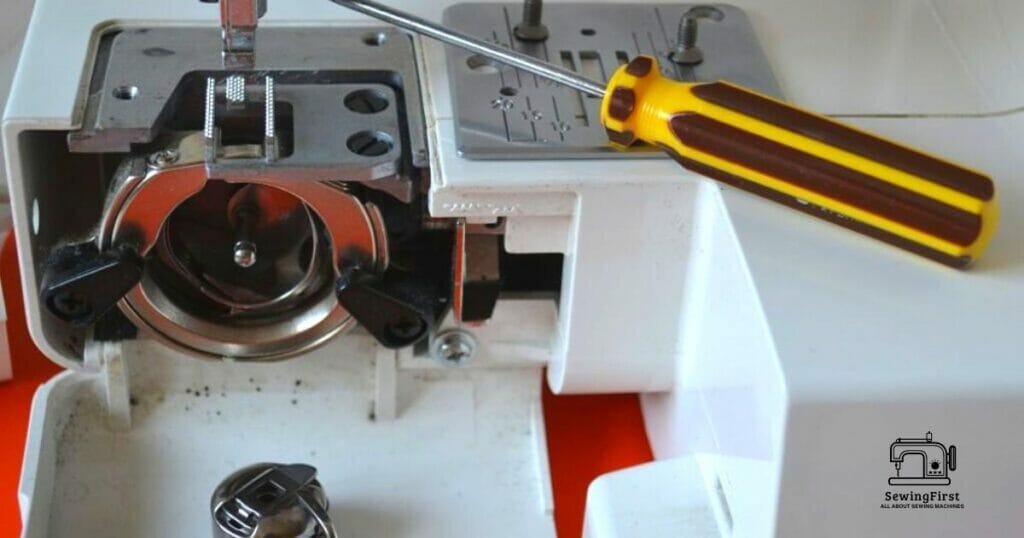
It’s essential to clean the sewing machine before oiling it. This will help ensure that dust, dirt, and other debris won’t get trapped in the parts of the sewing machine while oiling is taking place. It’s important to start by unplugging your sewing machine and gathering the necessary supplies – like a screwdriver, lubricant oil, and cleaning cloths.
Once you have all these items on hand, you can begin prepping for an oil change:
- Remove any attachments or decorative covers from your sewing machine;
- Unscrew & remove certain panels with a screwdriver depending on your model;
- Test out the speed without thread so you don’t damage feed dogs during use;
- Use cleaning cloths to wipe off visible dust from each component.
These steps are crucial for properly preparing your sewing machine for its much-needed maintenance session! If done correctly, this should provide your beloved device with better performance over time.
However, if at any point things don’t feel right or appear as though they may need further attention from a service center, then err on the side of caution and contact an expert immediately. Doing so could save you time and money down the line! With your sewing machine now ready for some TLC (Tender Loving Care), let’s move on to oiling part by part.
Oiling The Sewing Machine Part-By-Part
Oiling a Brother sewing machine is an essential task for any sewer and is key to ensuring your machine runs smoothly. It’s estimated that over 28 million households in the US own some type of sewing or embroidery machine, yet only a limited number know how to properly oil them. Here are five steps you should consider when oiling the different parts of your sewing machine:
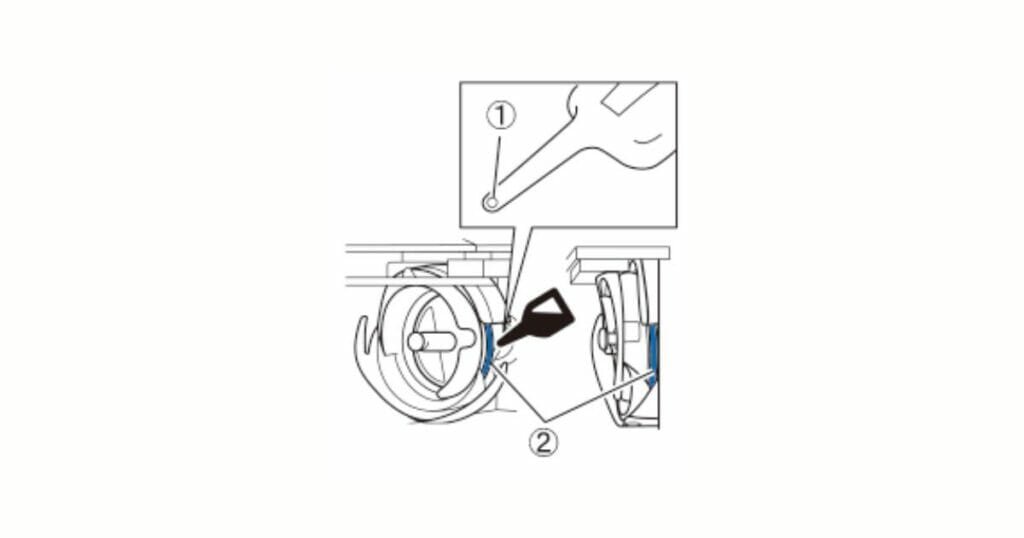
- Oil the hook race on top of the bobbin case with a drop of quality sewing machine oil.
- Place a piece of fabric underneath the needle plate and presser foot then use industrial cutting scissors to cut it into small pieces while pressing down lightly on the foot pedal at the same time. This ensures all areas have been sufficiently lubricated.
- Add a few drops of oil along each side and end of the feed teeth as well as around its edges.
- Use a bit of tissue paper to wipe away excess oil from handwheels and other exposed metal surfaces before running a few stitches through the fabric sample again.
- Lastly, sprinkle just enough powdered graphite dust onto moving parts like knobs and levers for additional protection against wear and tear due to friction caused by constant usage.
Oiling your sewing machine isn’t complicated but requires attention to detail so that every part is well-lubricated without building up too much grease or grime inside. After inspecting everything closely, take care not to forget about minor components such as eyelets, thread guides, tension discs, etc.
which can be easily overlooked yet play an important role in keeping your stitching even and consistent throughout various fabrics and materials used during projects. With these tips in mind, you’ll be ready to tackle cleaning your sewing machine next!
Step-By-Step Guide To Cleaning The Sewing Machine
Cleaning your sewing machine is an essential part of its upkeep. Not only does it help the longevity of your equipment, but it also ensures that you get a consistent and quality outcome for each project. To make sure your machine runs smoothly, follow this easy step-by-step guide:
- Unplug the machine from any power source before beginning – safety first!
- Carefully remove the needle + presser foot + bobbin parts to be cleaned separately
- Using a lint brush or a soft cloth, wipe away any dust particles from all of the surfaces including the embroidery machines – take special care with delicate areas
- With some warm water and mild soap on a dampened cloth, clean off any dirt residue from all plastic parts.
Taking good care of your sewing machine will ensure smooth operation and better results in whatever projects you decide to tackle. It’s important to remember that regular maintenance keeps everything running optimally so don’t forget to give it some TLC every once in a while.
When cleaning is done correctly, even complex designs can be achieved effortlessly using embroidery machines. Now that we’ve taken care of our cleaning duties, let’s move on to removing the needle + presser foot + bobbin.
Removing The Needle + Presser Foot + Bobbin
Now it’s time to get into the nitty-gritty of oiling your sewing machine. The first step is removing the needle, presser foot, and bobbin from your machine. It may sound intimidating, but don’t worry – we’ll make this as easy as possible!
To remove the needle and presser foot, you’ll need to locate the two screws that hold them in place on either side of the arm of your machine. Use a screwdriver (or a pair of tweezers if there isn’t enough clearance) to loosen these screws until they can be easily removed by hand. Once both pieces are free, gently pull them away from the arm of your machine.
For some models, you may also need to remove the bobbin case before being able to access all components and parts for cleaning or oiling.
To do so, simply lift up on the metal lever located at the top right corner of your machine and then slide out the entire bobbin case assembly with one smooth motion. From here you’re ready to clean each component separately and properly reassemble everything afterward.
Next up is removing the plastic plate.
Removing The Plastic Plate
Preparing the parts of a sewing machine for oiling can be perplexing and daunting, but with patience and practice, one can master this crucial maintenance ritual. Prior to removing the plastic plate, it is essential to remove the needle and presser foot as well as the bobbin. Now we’ll turn our attention to tackling the task of taking off the plastic plate on a Brother sewing machine.
To begin, locate the screws that secure it in place. Remove these screws first with an appropriate-sized Phillips head screwdriver – typically four are used with this model. Then you can take away the outer cover panel which will expose more screws securing the plastic plate itself. Carefully loosen each screw until all have been removed before attempting to pry away from its position at last.
It’s important to handle both sides even when it comes time to unmount the plate, so use caution and make sure your grip is steady while pulling apart and setting aside once disengaged. Be aware that some models may require jiggling around or light tapping in order to free up resistance;
if successful you will then see what lies beneath: likely metal components such as hooks, tension discs, thread guides, and other internal mechanisms related to operation should now be visible. With the removal of this part complete, you’ll soon be ready for further steps toward properly lubricating your Brothers Sewing Machine!
Removing The Needle Plate
Before you proceed to oil your sewing machine, there’s one crucial step that needs to be taken. It can seem intimidating, but don’t worry; with the right instructions and a little patience, you’ll have it done in no time. Are you ready? Let’s get started on removing the needle plate!
The needle plate is located underneath the presser foot of your Brother Sewing Machine. To remove it, first lift up the presser foot lever until it clicks into place. T
hen, grab hold of the needle plate casing and slowly pull it towards you – as if pulling off a lid from a jar – until it comes away easily. Next, take out any screws or bolts present which are holding the needle plate onto its mountings before carefully lifting it away from the machine body.
At this point, make sure not to disturb any wiring connected to the backside of the plate – gently move them aside instead – and set aside all pieces removed during this process for washing later on (or careful storage).
With that done, you’ve now successfully removed your Brother Sewing Machine’s needle plate and are ready to continue cleaning and oiling your beloved sewing buddy…
Removing The Bobbin Casing
Before we get to the next step of oiling your Brother sewing machine, let’s remove the bobbin casing. To do this properly and ensure that everything is put back together correctly, you’ll want to be familiar with the different parts of a sewing machine and how it works.
Start by lifting up the needle plate cover. Look for two screws or clasps on either side holding down the bobbin case in place; if they are not there, check around the sides as well. With these loose, gently pull out the bobbin case from its position near the top of your machine. Be careful when handling this part since it contains sharp edges that can easily injure you!
Now that you have removed the bobbin casing, take some time to inspect it closely and make sure all of its components are still functioning properly. If any pieces look worn out or broken then replace them before reassembling your machine.
You should also clean off any residue or dust buildup before moving on to our next task: spring cleaning your Brother sewing machine!
Spring Cleaning The Sewing Machine
It’s important to do a thorough spring cleaning of your sewing machine before oiling it. This will help ensure that the machine operates at peak performance and is free from dirt and debris that can create problems if left unchecked. With just a few simple steps, you’ll have your sewing machine running like new in no time!
Here are five essential items to check when performing a spring clean on your sewing machine:
- Check for dust build-up around moving parts such as the needle bar, feed dog, and bobbin case.
- Remove any lint or thread scraps inside the body of the machine.
- Wipe down all surfaces with a damp cloth. – Use compressed air to blow off hard-to-reach places like seams, crevices, and corners.
- Take out any removable parts such as presser feet or bobbins and inspect them for wear and tear. With these items checked off, you’re ready to begin reassembling the sewing machine in reverse order
- Starting with putting back any removable parts followed by replacing the bobbin casing. But before doing so, make sure you always use high-quality lubricants specifically designed for your specific model of a sewing machine as this helps maintain its longevity and efficiency over time.
Putting Everything Back In Reverse Order
Putting everything back in reverse order is like unwinding a ball of yarn—it can be tedious, but it must be done. Preparing the sewing machine for oiling requires taking apart all the pieces and reassembling them afterward. To make sure you do this properly, follow these steps:
- Clean out any lint or dust from your sewing machine before putting it together.
- Check if each component fits into its place and secure them tightly with screws when necessary. Carefully open up the case and locate where the oil should go, being mindful not to overfill it.
- Lubricate all moving parts such as cogs, pulleys, and gears that need lubrication by using an appropriate oil.
- Reassemble all the parts in their correct order and ensure they are tight enough so no loose threads come off while running.
After putting the sewing machine back together, you’ll want to test it out before starting any projects with it again just to make sure everything is operating correctly. This way, you can have confidence knowing that your beloved sewing machine has been given some extra TLC!
Testing The Sewing Machine After Oiling
Testing your sewing machine after oiling is an important step in keeping it running smoothly. After all, if you don’t take the right steps to maintain it properly, it won’t last as long or perform at its best. So how do you test a sewing machine after you’ve given it some much-needed lubrication?
First off, let’s make sure everything has been put back together correctly in reverse order. If something doesn’t seem right—like pieces are missing or loose—you’ll want to troubleshoot before continuing.
Once that’s done and you’re confident your machine is reassembled correctly, turn it on and stitch a few lines of fabric to check for smoothness and tension. It should be easy to pull the threads through without too much resistance.
If all looks good with the stitching results, congratulations! You have successfully oiled your sewing machine and can now move on to other projects knowing your trusty tool will keep up with whatever task comes it’s way.
Conclusion
In conclusion, it is important to oil your Brother sewing machine on a regular basis to keep it in good working condition. This simple maintenance will ensure that the machine runs smoothly and efficiently for many years to come.
It’s wise to use only quality oil when lubricating your machine, as anything else can potentially cause damage or wear down components prematurely. By following the steps above, you’ll have peace of mind knowing that I’m doing all I can to protect my investment.
FAQs
Where does the oil go on a Brother sewing machine?
The oil should be placed on all the moving parts of the Brother sewing machine. This includes the needle bar, feed dog, hook assembly, and the shuttle race. You should also oil the bobbin case, bobbin case race, and any other parts that move or rotate.
Where do I put the oil in my sewing machine?
Typically, most sewing machines will have a small oil port located near the hand wheel, above the needle plate. It is important to use only the oil made specifically for the machine; other types of oil can damage the machine.
How do you know if your sewing machine needs oil?
If your machine is skipping stitches, making loud noises, or having difficulty moving the fabric, it may be time to oil your machine. You can also refer to your machine’s manual to see if the manufacturer recommends a certain schedule for oiling the machine.
What happens if you don’t oil your sewing machine?
If you do not oil your sewing machine, it can cause a buildup of lint and dirt particles, which can lead to poor performance, difficulty threading, tension problems, and jams. Over time, it can also cause the machine to break down and malfunction.
How many times should I oil my sewing machine?
It is recommended to oil your sewing machine once a month, or every 10 hours of sewing, whichever comes first.
How do you maintain a Brother sewing machine?
1. Always store your sewing machine in a clean, dry place.
2. Clean and oil the machine regularly.
3. Check the tension regularly, as improper tension can cause problems with your sewing.
4. Check the needle frequently and replace it when necessary.
5. Read the user manual for your machine to learn about its specific maintenance needs.
6. Have your machine serviced professionally at least once a year.
How do you oil a Brother Innovis sewing machine?
1. Unplug the machine and lay it on a flat surface.
2. Locate the oiling points on the machine. These should be clearly marked with a drop symbol.
3. Put a few drops of sewing machine oil on a lint-free cloth and dab it on the oiling points.
4. Wipe away any excess oil with a clean cloth.
5. Plug the machine back in and test it out to make sure it is running smoothly.
Which oil is best for sewing machine?
The best oil for a sewing machine is a lightweight, non-detergent, synthetic oil. This type of oil will not damage the delicate mechanisms of the sewing machine, and it will not leave behind a residue that could cause parts to stick or jam.
