
The intricate and beautiful art of quilting is one that requires immense skill, patience, and a lot of hard work. It’s an activity that can be incredibly rewarding for those who take the time to learn it; however, many people assume they need a sewing machine in order to make their own quilt. But what if you could create something so unique without relying on technology or machines?
What if you could make a quilt with nothing but your hands and your mind? With creativity, dedication, and passion – anything is possible! In this article, we will explore how to make a quilt without a sewing machine – proving once again that power comes from within.
Related Topic: How to Sew Burlap with a Sewing Machine: Techniques Simplified!
Table of Contents
ToggleOverview of Quilting
Quilting has been around since ancient times and was traditionally used as both practical protection against cold temperatures, as well as decorative embellishment for clothing. Through modern techniques like layering fabrics together with batting, adding designs through embroidery or applique, and hand-quilting by stitching them all together – anybody can craft a stunning masterpiece! So let’s get started on our journey to creating something truly remarkable without having to rely on any mechanical aid.
What Is Hand Quilting?
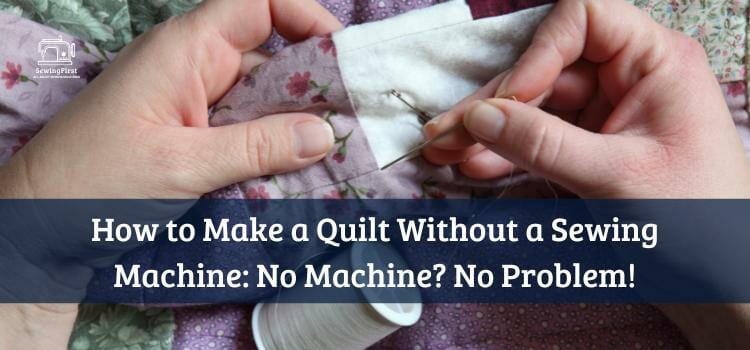
What could be simpler than making a quilt without using a sewing machine? Isn’t it often thought that in order to make something beautiful, you need the latest technology? Well, hand-quilting proves otherwise. It is an art form that requires patience and skill but produces stunning results.
Hand quilting involves taking fabric pieces, rotary cutters, safety pins, and thread – plus a good old-fashioned needle! – and piecing them together by hand. You will also need a quilting hoop or frame to hold your project taut as you stitch. Of course, there are many tools associated with this craft; however, these supplies can easily be sourced at most local craft stores.
The time taken to master the technique of hand-quilting varies from person to person. But if you have the dedication and enthusiasm for creating something unique then it’s well worth investing your time into learning how it’s done. Quilting loops create stunning patterns on intricate designs.
So don’t let the absence of modern machinery put you off giving it a try! Investing in quality fabrics, threads, and rotary cutters will provide great value for money —and may even inspire others around us who don’t think they can achieve such beauty without relying on technological advances.
What Supplies Do You Need For Hand Quilting?
Hand quilting is a powerful skill to possess and it can be used to create beautiful, homemade quilts. But what supplies do you need for hand quilting? To get started with this classic craft, you’ll need:
- fabric scissors
- running stitch needles
- a variety of fabrics to make the quilt blocks
- fabric markers or tailor’s chalk for marking patterns on your fabric,
- a batting layer.
Fabric scissors are essential since they will help you accurately cut the right sizes for your pieces. A running stitch needle is an important tool that allows you to sew together the layers of fabric and form intricate designs in your work.
You’ll also need at least five different fabrics so that you can combine them into unique-looking quilt blocks. Fabric markers or tailor’s chalk keeps any lines or shapes visible as you sew along them. Lastly, the batting layer adds loft and warmth when making the finished product.
All these items combined provide everything necessary for creating a stunning handmade heirloom piece that will last a lifetime! With all of these tools in hand (literally!), let’s take a look at which fabrics are best suited for hand quilting projects…
What Fabrics Are Best For Hand Quilting?
Making hand quilting a reality takes patience, creativity, and the right fabric. Take it from Laura, an artist who’s been making handmade quilts for over 20 years; she says that when selecting fabrics for her projects, there are three main factors to consider:
- layers of fabric
- pieces of fabric
- and strips of fabric.
Ultimately, your choice of fabrics will determine how successful your quilting tasks can be.
For those new to hand quilting techniques, finding the best fabric is essential. Consider starting with cotton or linen blends as they’re lightweight yet durable enough to handle various cutting and stitching tasks.
If you plan on layering fabrics together with glue instead of sewing them together, choose materials like fleece which have more flexibility than traditional fabrics like denim or twill. When piecing different fabrics together into one piece of art – such as a patchwork-style quilt – make sure each material has a similar weight so they don’t shift during the gluing process.
Overall, high-quality fabric choices can mean the difference between a successful project and hours wasted trying to stitch two heavy materials together without any luck!
With the proper selection of materials and an eye for detail when positioning pieces of fabric next to each other on the quilt top layer before beginning construction with either thread or fabric glue – anyone can create a unique work of art that stands out among even machine-made alternatives.
How To Make A Quilt Without A Sewing Machine
Believe it or not, making a quilt without a sewing machine is possible. According to the American Quilter’s Society, over 25% of quilts are made with only hand-sewing techniques! This means that you too can make a beautiful and unique finished quilt by using traditional methods.
When crafting your own quilt without a machine, the most important part is choosing the right fabrics. You need to select pieces of fabric that will layer together well, so they create a sturdy yet visually stunning outcome once all combined in one piece.
The thickness of each layer of fabric should be considered carefully as this affects how easily you’ll be able to sew them together – something which may have been easier if done on a quilting machine!
Once you’ve selected the layers of fabric for your project, the next step is to start assembling everything into one united piece.
From there, you’ll need to use various stitching techniques such as blanket stitch and running stitch in order to secure the materials together – but don’t worry, these simple stitches are easy enough even for beginners! With some patience and practice, soon enough you’ll have created yourself a fantastic rag quilt ready to show off!
Making A Start: Choosing Fabric For Your Rag Quilt
Making a quilt without a sewing machine can seem like an insurmountable feat, but with the right fabrics and some patience, it is possible to create beautiful hand-sewn patchwork quilts. Choosing fabric for your rag quilt is the first step in this process. Here are three key tips when selecting materials:
First, consider seam allowance when purchasing fabric as this will affect how much of each pattern or color you need. As a rule of thumb, 3/8” seams should be used when making a baby quilt.
Second, pick out your favorite fabrics that stand out against one another; solid colors paired with bold prints make for interesting designs. And lastly, plan ahead by taking into account what type of patchwork quilts you want to make.
The creative possibilities are endless! With these tools and techniques under your belt, you’re ready to begin threading and tying – but more on that later…
Threading And Tying: How To Cut The Thread For Hand Quilting
Threading and tying for hand quilting can be like weaving a tapestry of stitches. It takes patience, concentration, and the right supplies to get it just right. However, when you take the time to thread your needle correctly, you’ll find that creating beautiful patterns is easier than ever!
For those of us who don’t own a sewing machine or are new to quilting, hand-stitching may seem daunting. But with regular practice and the proper tools, even novice sewers can stitch intricate designs in their rag quilt projects.
The first step in threading and tying off your project is deciding on the desired number of stitches per inch (SPI). This will depend on how thick or thin you want your lines to appear.
Once you have this figured out, use a straight line as your guide while inserting each stitch into the fabric’s top layer. You might consider using masking tape or other temporary adhesives if needed – but make sure not to damage any delicate fibers by attaching too tightly!
For those looking for an alternative to the manual stitching, machine quilting using a regular sewing machine can provide more consistent results and faster overall construction times.
Whatever route you choose for producing stunning handmade creations, taking care of every detail is key – particularly when it comes to threading and tying off threads at the end of each row.
With careful consideration applied throughout every step of your process from start to finish, there’s nothing stopping you from achieving professional-looking results without having access to an expensive sewing machine.
The Stitches: How To Insert The Needle Via Quilt Top
The art of quilting without a sewing machine is one that experienced quilters have mastered. It’s an ancient technique, and while it may take some time to perfect, the zen of sewing through rows of squares by hand can be quite rewarding.
Inserting the needle into the quilt top is essential in creating a beautiful design. To start you need cotton threads – they are strong enough to hold your stitches together and will also help create texture within your quilt.
For those just starting out, practice makes perfect! You’ll want to make sure each stitch is as tight as possible before moving on to the next row.
And don’t forget: once you’ve finished inserting the needle via the quilt top, go back in again with another stitch! This ensures your pattern has even more strength and stability for years to come.
Whether you’re making a wall hanging or something larger like a bedspread, this simple yet effective step will ensure durability in your masterpiece for generations. As we move on to ‘needle backward: how to insert the needle again’, stay focused and determined; success awaits!
Needle Backwards: How To Insert The Needle Again
Needle backward stitching is one of the most important steps in constructing your quilt. It involves inserting the needle again through the backside of the quilt top to secure the stitches and can be done quite easily with some practice.
To start, gather all of your materials on a flat surface large enough for your finished size, plus extra fabric around its edges if using larger quilts such as queen-sized or bigger. Make sure that your thread tail has at least two inches of slack; cutting it too short will make it impossible to tie off later.
Then, take your threaded needle and push it through from the wrong side of the fabric into the front side – this is known as ‘needling backward’. Continue doing so until each stitch appears on both sides of the quilt top.
Once you’ve inserted all of your needles correctly, there’s only one step left: knot tying. This helps ensure that none of your hard work unravels over time. This process entails looping both ends together twice before pulling them tight to form a double knot – easy peasy!
With these simple techniques under your belt, you’ll have no problem creating beautiful homemade quilts without needing any fancy equipment.
Knot Tying: How To Tie A Knot In The Thread Tail
Starting out, cut squares from each piece of fabric that will become part of your quilt. Next comes the knot-tying portion – this is where you’ll take two strands of thread and tie them together in an overhand knot at least half an inch away from the edge so they won’t come apart easily as you work on it later.
Make sure you pull it tight before cutting off any excess; otherwise, your knots won’t stay secure when sewing several pieces into one cohesive square.
With everything securely held together with the help of strategically placed knots, it’s time to move onto loading keeping the basted quilt in the hoop! Here we’ll discuss how to use a quilting hoop for accurate stitching and maintenance.
Loading Keeping The Basted Quilt In The Hoop: How To Use A Quilting Hoop
Using a quilting hoop involves loading your basted quilt into the frame first; then you are able to rock and rotate the fabric while keeping it evenly stretched across the surface. This helps ensure even stitches when hand-sewing by providing more stability for the needle.
While this technique does take some practice, once mastered it opens up an entire world of creative possibilities for experienced crafters seeking a wider variety than basic knot tying provides.
Quilters who use this method find themselves better equipped to comply with current ice policy regulations due to less stress on their hands from manual labor.
With fewer strain injuries reported since implementing this tool into their craft routine, they can now enjoy longer periods of uninterrupted productivity – something any power-hungry enthusiast strives for!
What Are The Best Techniques For Making Advanced Quilts?
You may be wondering: can I make a quilt without a sewing machine? Absolutely! While it is true that having a sewing machine does make the process much quicker and easier, there are still plenty of techniques for making advanced quilts effectively by hand.
In this section, we will explore all the best techniques so you too can start creating beautiful, intricate pieces without requiring any expensive equipment.
The most important thing to keep in mind when crafting an advanced quilt without a sewing machine is precision – even minor discrepancies won’t look nice once everything has been put together.
To ensure your work looks as polished as possible, take the time to practice these techniques until they become second nature; it might seem tedious but it will pay off in the end with stunning results. One way to do this is by taking advantage of a nice policy like free online tutorials or video streaming services where you can learn from experienced crafters.
Another useful tip is to always use high-quality materials whenever possible – fabrics made from natural fibers such as cotton tend to last longer than those made out of synthetic material, plus they feel better against your skin due to their breathability! Investing in quality supplies will guarantee that your quilt turns out to look just how you envisioned it.
With these tips in mind, you’re now ready to begin making advanced quilts without needing access to a sewing machine – so let’s get started with some helpful hints before diving into work!
Tips Before You Start Making A Quilt Without A Pattern
Making a quilt without a sewing machine is no easy feat, but it can be incredibly rewarding when done right. Before you start your project, there are some tips to keep in mind that will help ensure success:
- Gather the right tools – You’ll need quality needles, pins, thread, and ivory-colored fabric for figure blocks.
- Take measurements – Carefully measure both your fabric pieces as well as any batting or backing you plan on using.
- Find supportive tutorials – Look online for video tutorials with detailed instructions on creating various kinds of hand-quilting stitches.
- Take your time – It’s important to take breaks while piecing together so that mistakes don’t occur due to fatigue.
- Be creative – Don’t hesitate to express yourself through unique pattern combinations and color choices!
Hand quilting takes dedication and patience, but taking the extra time to create something beautiful by hand makes it all worth it in the end.
Without patterns or machines involved, you have full control over every aspect of design from choosing fabrics to deciding how much texture should go into each stitch–the possibilities really are endless! Let’s explore further what kind of masterpieces can come out of this labor of love.
What Patterns Can You Create With Hand Quilting?
The idea of quilting without a sewing machine may seem counterintuitive, yet it’s something many people do. After all, the art of hand-quilting has been around for centuries, and there is an undeniable charm to this traditional craftsmanship that can’t be replicated with machines. So what patterns are possible when you decide to create a quilt by hand?
Surprisingly, the possibilities are endless! You can make any shape imaginable – from intricate stars and swirls to bold geometric designs. And if you want to go beyond basic shapes, you could try combining different colors or textures into unique patchwork patterns. The only limit is your own imagination!
What’s more, the laborious process of creating each design adds a special layer of satisfaction; it’s almost like you’re unlocking hidden potential within each stitch. It might take longer than using a modern machine, but it will also give you a sense of accomplishment that no amount of technology can replicate.
So why not start exploring the world of hand-quilting today? With its limitless creative possibilities, it promises hours upon hours of crafting joy – giving you the perfect opportunity to express yourself through fabric and thread.
Learning Hand Quilting Techniques: What You Need To Know
Are you looking for a way to express your creativity through quilting without the use of modern technology? Hand quilting is an art form that allows one to create beautiful patterns with their own two hands. To get started, here’s what you need to know about learning hand quilting techniques.
First, it’s important to understand the various stitches used in hand quilting and how they can be combined into intricate designs. Consider familiarizing yourself with some basic stitching techniques such as running stitch, backstitch, or French knots.
Once these are mastered, more advanced stitches like feathering or cable-stitching will become easier. Additionally, think about the materials you want to include in your design—from thread colors and fabrics to beads and buttons. You should also consider purchasing tools specifically designed for hand quilting such as thimbles and needles of various sizes.
Next up: practice! If you’re just starting out, try creating simple geometric shapes by connecting lines with a single color of thread for consistency.
As you gain more experience, begin experimenting with different combinations of yarns and textures until you find something that appeals to your creative eye. Don’t forget that learning any skill takes time; if at first, it feels overwhelming take breaks when needed so as not to burn yourself out too quickly.
With patience and practice comes mastery over this ancient craft – allowing you to bring forth unique works of art from your fingertips alone! So why wait? Start honing those skills today and see where your imagination leads you next!
Changing Direction: How To Make Choices When Hand Quilting
When hand quilting, it is important to think about what direction you want your stitches to go in. If you have chosen a star pattern, for example, will each point be created by going up-down or side-to-side?
Every decision makes a difference so take time to consider these choices before starting. To help decide which route to take, look at pictures of completed patterns online that use similar techniques and materials. This will give visual cues on how best to proceed.
You also need to think about what type of stitches you’ll be making; longarm, freehand, or applique. Each has its own unique style and offers its own benefits – from creating intricate designs through tiny needlework to achieving beautiful results quickly with larger stitching motions.
As well as being aware of the technique used, it is essential that you choose the right thread too – one that won’t break easily during construction yet still provides enough strength for durability once complete.
Hand quilting takes patience and dedication but if done correctly it can lead to stunning results! With a little research into material selections and stitch types combined with thoughtful consideration of design elements such as layout and color palette, you can transform any fabric piece into a brilliant work of art without relying on a single stitch from a sewing machine.
Conclusion
In conclusion, hand quilting is a wonderful way to create beautiful yet practical pieces of art that can last for generations. With the right supplies and fabric choices, anyone can make a stunning quilt without a sewing machine. Learning basic techniques and understanding how to use different patterns will help you in your journey of creating something unique and meaningful.
No matter what design decisions you make, be sure to take your time and enjoy the process! After all, isn’t that why we do this in the first place – to find joy in our craft? I’m sure if you put your heart into it, the result will be nothing short of amazing. So go ahead: get out some fabric and start stitching away! Who knows what kind of work of art awaits you at the end?
FAQs
How do you hand sew a quilt for beginners?
1. Gather your supplies. You will need a quilt top, batting, backing, quilting thread, needles, scissors, and a thimble.
2. Layer your quilt. Place the backing wrong side up on a flat surface. Place the batting on top of the backing. Place the quilt top on top of the batting.
3. Pin the layers together. Use safety pins or quilting pins to hold the layers together.
4. Thread your needle. Cut a length of thread about 2 feet long and thread your needle. Tie a knot at the end of the thread.
5. Start quilting. Working from the center of your quilt, sew a running stitch or a straight stitch through all three layers. Make sure to knot the thread at the beginning and end of each row.
6. Continue quilting. Continue stitching rows in this manner until the quilt is completely quilted.
7. Add a binding. Cut strips of fabric to make a binding for the quilt and hand-stitch them around the edge of the quilt.
How do you sew quilt pieces by hand?
1. Start by gathering the quilt pieces you want to join. Cut away excess fabric if necessary.
2. Place the two pieces right sides together. Pin them together, ensuring the edges are aligned.
3. Thread a needle with a quilting thread. Knot the end.
4. Starting at one corner, stitch a ¼ inch seam along the edges of the pieces.
5. Continue stitching the seam along the edges. Secure the seam at each corner with a back stitch.
6. Knot the thread when you reach the end.
7. Now press the seam with a warm iron and you’re done!
Is it better to quilt by hand or machine?
The answer to this question depends on the individual’s preference and the type of quilt they are creating. Hand quilting is generally slower and more labor intensive, but it allows for greater artistic expression and allows the quilter to create more intricate designs.
Machine quilting, on the other hand, is faster and more efficient, but it can’t create the same level of detail as hand quilting. Ultimately, it is up to the individual to decide which method works best for them and their project.
What are the two methods of quilting?
1. Hand quilting – This is the traditional method of quilting, which involves stitching the three layers of a quilt together by hand.
2. Machine quilting – This is a modern method of quilting, which involves using a sewing machine to stitch the three layers of a quilt together.
Can you quilt with any fabric?
No, not all fabrics are suitable for quilting. Generally, quilting fabrics are made from natural fibers like cotton, linen, and wool. They should also be tightly woven and have a smooth surface. Fabrics with high lycra content, such as spandex and jersey knit, are not suitable for quilting.
How long does it take to make a quilt by hand?
The amount of time it takes to make a quilt by hand varies greatly depending on the size, pattern, and level of stitching required. Generally, a medium-sized quilt can take anywhere from several days to several weeks to complete.
What stitch is used to hand quilt?
The most common stitch used to hand a quilt is a running stitch. This stitch involves a continuous line of small, evenly-spaced stitches.
Are hand pieced quilts durable?
Yes, hand pieced quilts can be durable, depending on the fabrics and thread used. Quality fabrics and threads will last longer than cheaper materials. Additionally, the care and maintenance of the quilt can play a role in its durability.