
Have you ever wanted to make a pocket square but felt intimidated by the idea of using a sewing machine? I know I have. But let me tell you, it doesn’t have to be intimidating!
With just a few tips and tricks, anyone can learn how to use a sewing machine to create their own perfect pocket squares with ease.
In this article, we will explore how to make a pocket square with a sewing machine and the steps needed in order to make your very own pocket square with a sewing machine – so don’t worry if you’re not familiar with things like needle sizes or thread types; everything is covered here. Ready? Let’s get started!
Related Topic: How to Sew Burlap with a Sewing Machine: Techniques Simplified!
What Materials Are Needed To Make A Pocket Square?
Making a pocket square using your sewing machine is an easy task that requires just a few materials. To make a standard pocket square, you’ll need a piece of fabric and the tools from your sewing machine.
You can use any type of fabric to create your pocket pieces—from silk to linen or even cotton-polyester blends. The size of the fabric will depend on how large you want the finished product to be.
Once you have chosen your fabric and gathered up all the necessary supplies, it’s time to start stitching! Depending on what kind of design you’re aiming for, there are various techniques for working with fabrics when creating pocket squares.
For instance, if you plan on pleating your pocket square, then basting stitches may be needed first before topstitching in order to create neat folds along the edges.
On the other hand, if you simply want to sew two straight lines together for a rolled hem look, then regular stitch settings should work fine.
No matter which technique you choose, making sure that seams are properly secured is key when constructing any garment item – and this includes pocket squares too!
Take care while following instructions closely so that each seam lays flat against the fabric without puckering or bunching up as this could ruin its overall appearance. With some patience and practice, soon enough you’ll be able to craft professional-looking pocket squares right at home with just your trusty sewing machine!
What is the Best Pocket Square Size to Choose?
When it comes to making a pocket square, size matters. After all, you don’t want your finished product to be too big or too small for the patch pockets of your suit jacket. So what is the best pocket square size to choose?
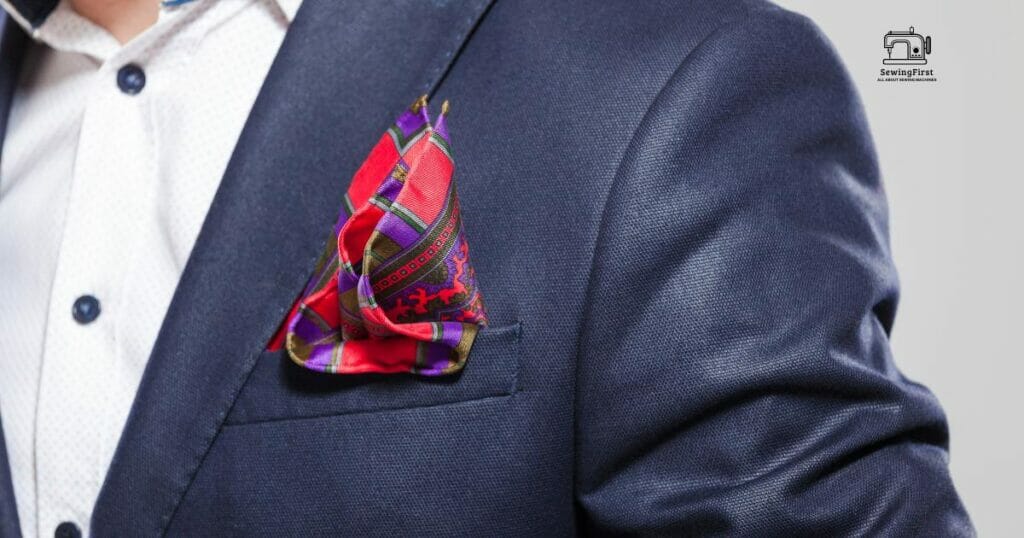
Generally speaking, most men prefer an 8×8-inch pocket square; this is because it’s large enough to create an elegant drape and folds easily into any standard pocket shape. The raw edge will give the pocket square a contemporary look and feel that works great with modern suits.
To sew up the edges of an 8×8-inch piece of fabric, use a straight stitch on your sewing machine along with a presser foot attachment.
If you’re feeling adventurous and looking for something different, then why not try out some other sizes such as 10×10 inches or even 14×14 inches? These larger sizes are perfect if you want more dramatic folds like puffballs or crowns – they just require careful handling while folding them in place so they fit neatly into your pockets without spilling over!
TIP: If you’re unsure about how big or small to make your pocket squares, get hold of a pattern from a craft store – these usually come with instructions on which type of fabric pieces work best when constructing specific types of pocket patterns.
What Are The Different Types Of Pocket Square Edges?
When it comes to pocket squares, the type of edge you choose can make all the difference. While there are several different types of edges with varying levels of complexity, each one is unique and adds a touch of style to your ensemble. Here’s what you need to know about the various options when creating a pocket square with a sewing machine!
Mitered Corners
One option for finishing off a pocket square edge is using mitered corners. This technique involves cutting fabric into an angled shape at each corner and then overlapping them before stitching them in place.
You’ll also want to use a seam allowance so that everything fits together perfectly without any fraying or loose threads. To ensure accuracy, consider investing in a rotary cutter, which makes precise cuts much easier than scissors do.
Topstitched Edging
For more decorative yet still simple, try adding a topstitched edging along the sides of the pocket square. This requires just straight-line stitches done around the perimeter and will give your design some extra character while keeping things neat and tidy.
If you’re feeling creative, consider trying out different colors or textures of thread as well as experimenting with fun stitch patterns like zigzag or scalloped designs for added flair!
Finally, if time is tight but you don’t want to sacrifice style, opt for securing the edges with safety pins instead of stitching them down. Simply pinning overhanging fabric pieces back onto themselves should be enough to keep them secure until they can be sewn later on.
TIP: When using this method, double-check that the pins aren’t visible from the front side and adjust accordingly if needed!
How To Cut And Prepare The Fabric For Sewing?
Have you ever wondered how to make a pocket square with a sewing machine? To start, you must cut and prepare the fabric accordingly.
- Take two pieces of fabric that are equal in size and lay them flat on top of each other so that they match up perfectly.
- Use your scissors or rotary cutter to cut out your pattern piece for the pocket pattern. Once this is complete, it’s time to move on to creating a continuous stitch around all four sides of the pocket square using your sewing machine.
- Be sure to have the right materials available such as thread and needle that matches the color of your fabric, and adjust the tension settings on your machine correctly.
- Make sure that you don’t miss any spots while stitching; otherwise, there may be gaps between stitches which will cause problems later on!
- Finally, press down firmly against the edges of the cloth before removing it from the machine – this will help secure all seams together nicely.
Now that we’ve got our fabric prepared properly let’s move on to actually sewing it together by hand.
How To Sew A Pocket Square With A Sewing Machine?
Many people think that sewing a pocket square with a machine is too complicated, but nothing could be further from the truth! With some time and patience, anyone can make their own simple pocket square in no time. Here are three steps you should take to get started on your sewing project:
- Choose a quality fabric for your pocket square – this will add the perfect pop of color to your trouser pockets.
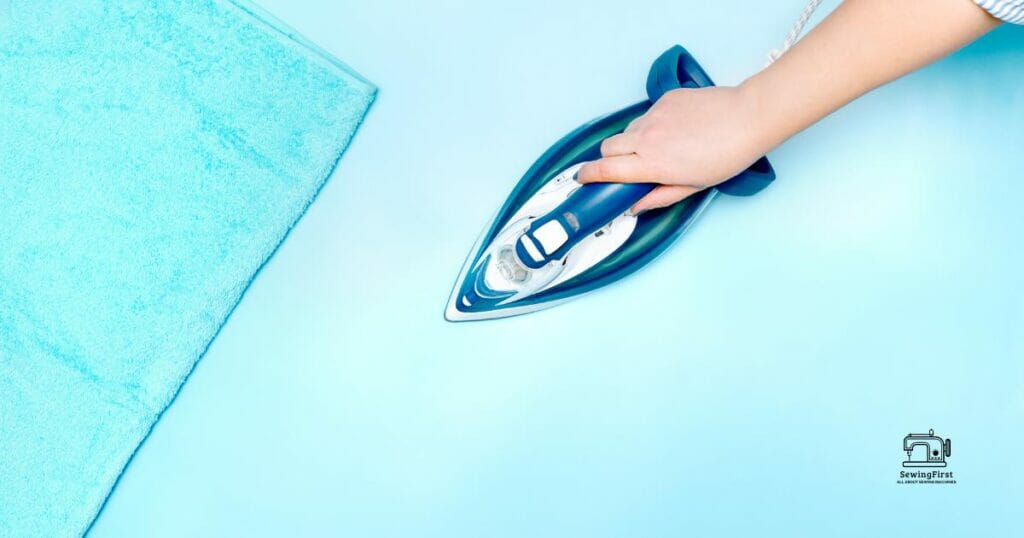
- Make sure you have the right tools for the job – such as good scissors, thread, and an iron.
- Follow instructions carefully when creating an inseam pocket for the square – this will ensure a polished finish every time.
Once you’ve completed these steps, it’s time to move on to the finishing touches for your pocket square. Just because you’re using a machine doesn’t mean you don’t have creative control over how your finished product looks; add special trims or decorative stitches to bring life into any basic design.
Finishing Touches For Your Pocket Square.
Reaching the finishing touches of your pocket square is like getting to the sweet end of a delicious dessert. The result could be something you can wear with pride and show off to friends or family. Here are some steps to make sure that your pocket square comes out looking professional:
- Preparing the Pocket Square: Use a seam ripper to remove any previous folds from the linen pocket squares, then lay it flat on an ironing board for easy access. Make sure that there aren’t any wrinkles in the fabric before beginning.
- Sewing the Pocket Square: Measure and cut enough fabric to create a triangle shape that fits into the breast pocket of your suit jacket. Once you have folded and sewn each side, you will have created a nice pocket square ready for use!
- Finishing Touches: Now it’s time to give your pocket square a final touch-up by trimming away any loose threads or seams. Finally, press down all sides using an iron so that everything looks neat and clean – this will help keep your pocket square looking sharp throughout its lifetime!
You’ve now successfully made a beautiful pocket square that you can proudly display! Your next step? Learning how to decorate your new creation with unique ideas.
How To Sew A Pocket Square By Hand?
Sewing a pocket square by hand can be an easy and rewarding process. Whether you’re making your own faux pocket squares or creating high-quality ones, the basics are the same. Here’s how to get started!
- First, choose your fabric and cut it into a desired size so that it will fit in the pattern of your pocket square. Make sure the unfinished edges are tucked away as much as possible before beginning to stitch.
- Next, hand stitch around the edge using small stitches to create a crisp line and ensure it won’t unravel over time. Take care not to make your stitches too tight or they may pucker up when pressed after completion.
- Finally, press lightly with an iron on low heat to give your pocket square a finished look and feel. If you’d like additional embellishment such as fringe trim, now is the time to add this detail for extra flair.
TIP: When stitching by hand, use quality thread that matches your fabric color for the best results. This will help keep your seam from being visible from both sides of the pocket square when worn!
Pocket Square Decoration Ideas
Creating the perfect pocket square is like a work of art – it takes skill and precision to get it just right. With a few simple steps, you can create your own finished garment with a sewing machine that will make heads turn! From excess fabric to popular styles, here are some decoration ideas for any style of pocket square.
When selecting fabric for your pocket square, choose something durable such as cotton or linen so that it will last longer once completed.
To begin creating your own masterpiece, measure out how much excess fabric you need before cutting it in order to ensure an even hemline when finished. Additionally, be sure to use pins throughout the process in order to keep everything neat and secure.
Once the stitching is complete on your pocket square, there are many ways that you can add unique touches such as embroidery or lace trimming.
Popular styles include polka dots, stripes, animal prints, and floral patterns – all of which can easily be achieved by adding decorative accents after finishing off the edges with bias tape or other trims.
No matter what type of design you decide to go with (or if no design at all!), these decoration ideas can help transform any ordinary piece into something special that will have people asking “where did you get that?”
The possibilities are truly endless when designing a custom pocket square. With a little creativity and patience, you’ll soon be showing off your creation with pride – now let’s move on to how to sew a pocket with a zipper!
How To Sew A Pocket With A Zipper.
Adding a zipper to your pocket square can be an easy and stylish way to spruce up any outfit. I love the look of zippers on clothing, and they are surprisingly simple to sew onto fabric with a sewing machine.
This tutorial will walk you through the steps for attaching a zipper to your pocket square so that it looks professional and stays securely in place.
To start, you’ll need some basic supplies:
- scissors
- pins
- thread
- fabric (your choice!)
- a zipper long enough for your desired size pocket square.
Begin by cutting out two pieces of fabric – one larger than the other – and then laying them out on the wrong sides together.
Place the zipper along the top edge of these layers, making sure the teeth line up exactly with the edges of both fabrics. Secure this piece in place using straight pins before starting to sew.
Next, set up your sewing machine for regular stitching and stitch along either side of the zipper until all four sides are secured down firmly; make sure not to catch or bunch up any extra fabric while doing this!
Be careful when getting close to corners because it’s important that every part is connected properly for maximum durability. Now we’re finished with our project and have added another beautiful detail to our wardrobe!
It’s time now to explore more ways to add embellishments like buttons or lace trimming to our pocket squares!
Sewing Embellishments For Your Pocket Square.
Adding embellishments to a pocket square can be like adding the final touches of icing on an extravagant cake. It’s the little details that take your project from ordinary to extraordinary! With a sewing machine, it couldn’t be easier to add these special flourishes and make your pocket square unique.
From ribbons and lace to buttons and embroidery designs, there are countless ways you can customize your pocket square. If you’ve got enough time or patience for creative projects, try some applique work with contrasting fabrics or spruce up plain squares with hand-stitched motifs.
You could even combine several techniques in one design – such as adding a rickrack around the edges and attaching a pretty button at each corner.
To show off your skills, create a monogrammed initial by stitching colorful threads onto the fabric or choose an intricate pattern from embroidery transfers to apply directly onto the pocket square.
TIP: Choose lightweight materials so they don’t weigh down the finished product too much when tucked into your chest pocket!
With all sorts of decorative possibilities available, you’re sure to find something just right for making your pocket square stand out in style.
The Classic Pocket Square Fold.
Folding a pocket square is like the finishing touch on an elegant suit. It’s one of those details that can make or break an outfit and give it extra flair when done right. As if you were dressing up your look with an accessory, this classic fold will bring sophistication to any ensemble:
- Start with a squared piece of fabric • Fold it in half diagonally
- Then fold into thirds again diagonally
- Tuck the edges together at the center point so all layers are even
- Finally, twist each end slightly for a neat finish.
The result? A distinguished style statement that won’t go unnoticed! With just a few simple steps, you’ll have crafted a timelessly stylish pocket square.
Moving on from here, let’s explore how to create another type of pocket square fold—the one-point.

One-Point Pocket Square Fold.
The classic pocket square fold is a timeless look, and this one-point pocket square fold is perfect for making an impression. It’s easy to make with just a few steps and a sewing machine.
But if you want to take your style up a notch, the one-point pocket square fold can add something extra special.
This elegant fold requires folding in two places instead of three – and it only takes minutes to create! First, start by laying out your fabric flat on the table or workspace. Then, pinch each corner together so that all four corners are aligned into one point at the center top of the material.
After that, sew along the edges of your fabric to secure the points in place. The result? A sharp-looking triangle shape with beautiful crisp lines for an added touch of sophistication to any outfit!
To complete this meticulous look, choose contrasting colors and fabrics for maximum impact – like linen with lace or chiffon combined with satin – then embellish with buttons or beads for an additional pop of personality.
With this simple step-by-step process, you’ll be able to show off your personal style no matter what occasion you’re dressing for!
The Scallop Pocket Square Fold.
To have your pocket square really stand out, consider the scallop fold. This elegant style is like a little wave that will easily turn heads! It’s the perfect way to add a touch of sophistication and fun to any outfit.
Creating this look involves making two pleats close together in the center and folding them back toward each other. Once you’ve made these pleats, you can then tuck one side into the other for a beautiful finished product.
To make sure it looks just right, take some time to adjust and measure as necessary before securing it with stitches or fabric glue.
With this simple technique, you can create an eye-catching accessory that pairs well with both formalwear and casual wear alike. With just a few supplies and steps, you’ll be able to have stunning pocket squares worthy of any sartorial connoisseur! So pull out those sewing materials and get creative – it’s time to make your own pocket square!
Making Your Own Pocket Square.
As they say, “a well-dressed man is never fully dressed without a pocket square.” So why not make one yourself? Crafting your own pocket square can be fun and easy with the right materials and tools. Let’s take a look at how to sew a pocket square with a sewing machine.
- Gather all of your supplies: fabric scissors, pins, iron, thread in matching colors, and the desired type of fabric for your pocket square (e.g., cotton or silk).
- Start by cutting out the size that you want using the fabric scissors and then lay it flat on an ironing board before pressing down firmly with an iron. This will help create crisp edges for when you start stitching later on.
- Grab some pins and begin pinning each edge together so that everything stays in place while you are sewing.
- Use your sewing machine to stitch around all four sides of the pocket square; this should only take about 5-10 minutes depending on your skill level with using a sewing machine. Remember to backstitch at the end so that there are no loose threads!
With these steps done correctly – voila! You now have your very own handmade pocket square that looks great and adds style to any outfit. Now let’s move on to tips for making sure your perfect pocket square lasts longer…
Tips For Making A Perfect Pocket Square.
Making your own pocket square is a great way to add a unique touch to any outfit. With the right tools and materials, crafting a perfect pocket square with a sewing machine can be easy! Here are some tips for making sure you get it just right:
- Make sure you’ve got the right fabric. If you want something that looks professional, opt for light fabrics like silk or cotton in solid colors or small prints.
- Decide on how big you want your square – 12 inches should do the trick.
- The last step before you start sewing is to iron out any wrinkles so everything looks nice and neat once finished.
Now you’re ready to begin stitching! Here are some key points to keep in mind when creating your pocket square:
- Cut out two squares from fabric, each measuring 12 inches by 12 inches
- Place one piece of fabric on top of the other and pin them together
- Sew around 3 sides using a straight stitch, leaving one side open
- Trim excess thread off at edges and turn inside out • Iron flat and fold into a desired shape
Crafting your own pocket square gives you an opportunity to express yourself through fashion without breaking the bank. Use these simple tips to create a beautiful accessory that will complete any look with ease!
Conclusion
Making your own pocket squares gives you full control over how they look – from fabric choice to size and shape – allowing you to customize them according to your style and preference.
So take out that sewing machine, pull up those sleeves, and create something truly unique that you can be proud of! Who knows? You might even find that this newfound skill inspires you to try other projects around the house too!
FAQs
Can I make my own pocket square?
Yes, you can make your own pocket square. You can make a pocket square out of almost any fabric and style you prefer. You can find many tutorials online that will teach you how to make a pocket square. You can also find many kits that include fabric and instructions on how to make a pocket square.
How do you make a simple pocket square?
1. Start with a square piece of fabric. You can use any type of fabric you like, such as cotton or silk.
2. Fold the fabric in half diagonally.
3. Fold the fabric in half again in the opposite direction.
4. Place the pocket square in your pocket and adjust it for a neat look.
5. If desired, you can add a decorative stitch around the edges of the pocket square.
What is the standard size of a pocket square?
The standard size of a pocket square is usually 10 inches by 10 inches.
What fabric is best for pocket square?
Silk is the most popular choice for pocket squares, as it is soft, smooth, and luxurious looking. Cotton is also a good choice, as it is lightweight, breathable, and easy to care for. Linen is another popular choice, as it is lightweight and breathable, but it can wrinkle easily. Wool is a good option for colder climates, as it is warm and durable.
Is it OK to not have a pocket square?
Yes, it is perfectly fine to not have a pocket square. It is ultimately a personal preference.
What is the purpose of a pocket square?
A pocket square is a small piece of fabric that is worn in a jacket pocket, usually for decorative purposes. It can be used to add a pop of color or texture to an outfit and can also be used to make a bold statement. Pocket squares can also be used to cover up stains or to hide a pocket that is not buttoned correctly.
